





Screenshots
Step-by-step solution
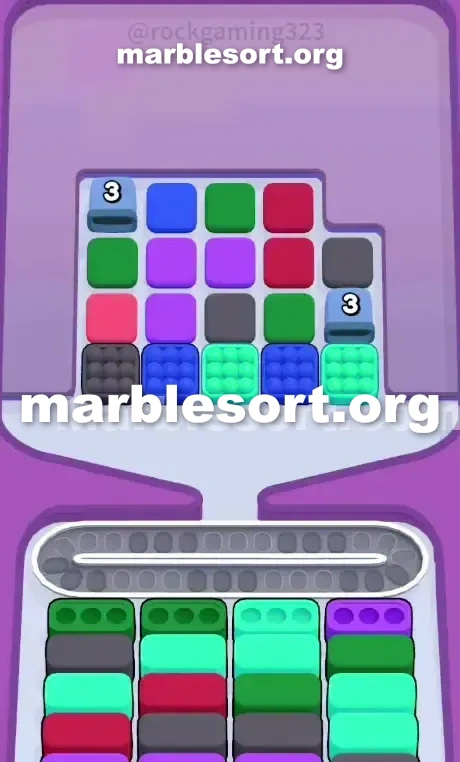
- 1) Poke the lowest Cyan ball in lane three, then do the same for the Cyan ball at the base of lane five so both travel into the front Cyan Box and wipe it out.
- 2) Park the lowermost Blue ball found in lane two and the lowermost Blue ball in lane four on the Conveyor Belt to keep them out of the way.
- 3) Push the deepest Dark Grey ball in lane one onto the belt as well, which packs your storage but removes the armor protecting row two.
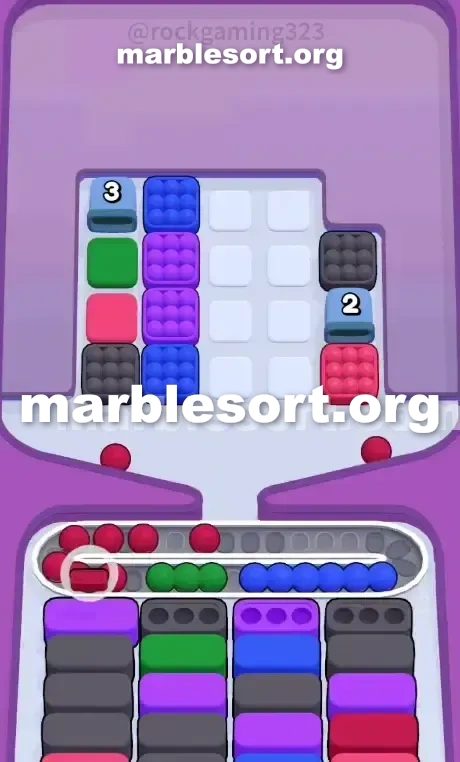
- 4) Once the fresh Purple set is uncovered in lanes two and three, tap it so the balls dive into the Purple Box at the front right and clear that receiver.
- 5) Collect the Dark Green ball sitting in lane three along with the one in lane four, then place them into the pair of Dark Green Boxes positioned on the left side of the front.
- 6) When the next row rises and the Dark Grey and Cyan Boxes turn active, release the Dark Grey and Blue balls you stashed on the belt into those brand-new receivers.
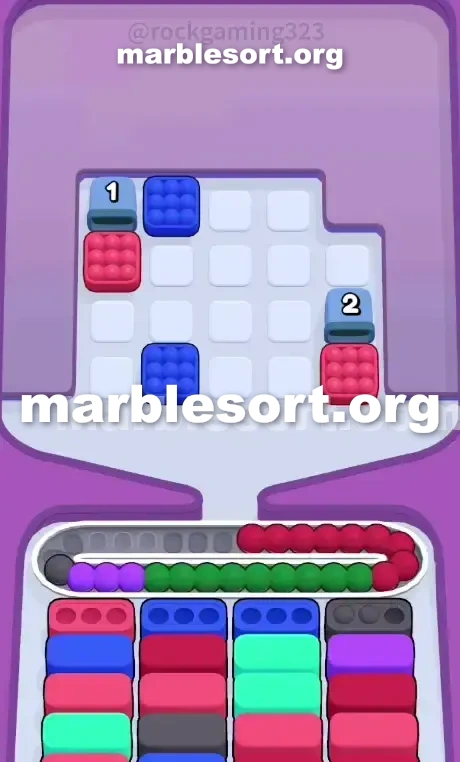
- 7) Strip the Pink balls from lane one to reveal the leftover Dark Green, and chip away the mid-board Purple, Green, and Red clusters to bring both outer Tunnels down to zero.
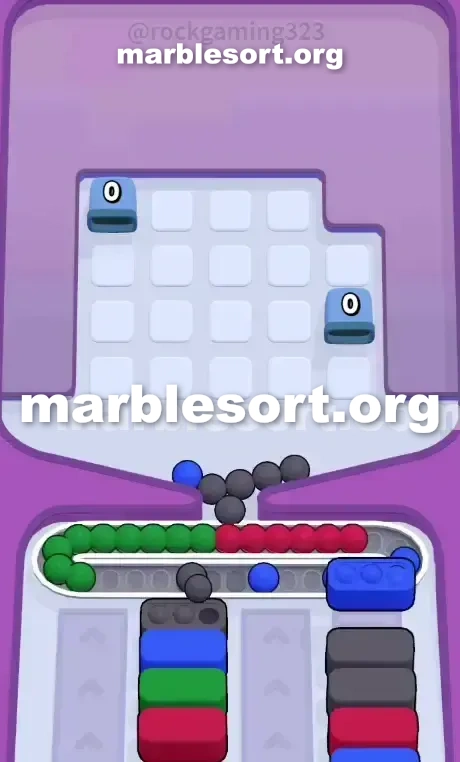
- 8) Let the Tunnels release their chunky Red blocks, then slot that tumbling Red into the closing Red Boxes while the rear rows shift up to finish the board.
Level 16 Front-Row Blockade and Double Tunnel Trap
sphere Sort Level 16 sends you into an immediate, suffocating bottleneck.
this game presents one huge disconnect between this spheres one may really reach plus the colors the bottom board demands.
one sit staring at one board dominated via big pieces from Dark Grey, azure, Cyan, Purple, and Dark Green.
Two numbered Tunnels sit high onto over this outermost rims, threatening into drop unknown hazards later in the run.
one win or lose this level on the first five taps.
The dominant trap here is forced parking.
one can't match the way out of the opening cleanly.
one should intentionally clog this Conveyor track using trap shades just into dig out this exact marbles required to open the lower board.
One bad choose fills this track, jams this order, plus ends this run before the Tunnels even open.
Level 16 Misaligned Board Pattern
It consists of five distinct, jagged columns.
this lower line from this rack—this just spheres one may really choose—sits one frustrating wall from Dark Grey, Blue, Cyan, Blue, and Cyan.
Now look down at the receiving bottom Boxes .
this absolute head line consists from Dark Green, Dark Green, Cyan, and Purple.
This sits this central cruel joke of Marble Sort 16.
this Boxes desperately want Dark Green and Purple.
this upper rack sits blocking them behind Dark Grey and Blue.
Cyan sits the only color that naturally matches up.
this tall stacks on this upper Tray dictate exactly how this level unfolds.
lane one over this far west hides one Dark Grey sphere at this lower, followed via rose, Dark emerald, and a Tunnel demanding 3 clears.
lane two holds Blue, Purple, Purple, and Blue.
lane three stacks Cyan, Dark Grey, violet, and Dark Green.
lane four holds Blue, Dark Green, Red, and Red.
lane five over this east ends using Cyan, one Tunnel demanding 3 clears, plus Dark Grey at the top.
this lower Boxes form a deep, layered puzzle.
past that opening line from Dark emerald plus violet lies one second row demanding Dark Grey and Cyan.
past that rests one third line begging for Red and more Cyan.
one can't access those deeper Boxes until you clear the front.
This means one hold into temporarily sacrifice this Conveyor track room into hold those useless Dark Grey plus azure spheres from this upper rack just into reach this violet and Dark Green ones buried above them.
Level 16 Level Overview
one should execute this opening moves in an exact sequence.
Do not take colors just because they are available.
Level 16 Busting the Cyan Gate
this first job sits into empty this just legitimate match over this board and then carefully dismantle the blockade.
choose this Cyan sphere at the bottom of column three.
choose this Cyan sphere at the bottom of column five.
those send straight into this front Cyan Box , clearing it instantly.
one want violet plus Dark emerald with this remaining head cases , but they are stuck in row two.
Send this lower azure sphere from lane two down to the Conveyor Belt .
Send this lower azure sphere from lane four down to the Conveyor Belt .
Send this lower Dark Grey sphere from lane one down to the Conveyor Belt .
this Conveyor track sits now dangerously full, but one hold successfully stripped away this armor protecting row two.
Level 16 Feeding this Green and Purple Boxes
using this junk shades parked securely out from this way, one may now route this head Boxes and trigger a massive board shift.
choose this violet spheres newly exposed in columns two and three.
They shall dive into this front right Purple Box and clear it.
take this Dark Green marble sitting in column three.
take the Dark Green marble in column four.
Route them into this two waiting Dark emerald Boxes on the front left.
Clearing that entire first line from Boxes pulls the second row up.
Dark Grey plus Cyan cases are now active at the front.
Immediately choose this Dark Grey plus azure spheres you parked on the Conveyor Belt earlier.
They shall flush into their corresponding newly opened Boxes .
one just survived this hardest part of the level.
Level 16 Surviving this Mid-Game and Tunnels
The board state shifts aggressively here.
this game shall now throw big groups from rose, azure, and Dark Grey Boxes to the front.
Stripping away this violet, emerald, plus crimson spheres on this middle sends the counter on the two outer Tunnels .
Prioritize clearing this rose spheres from lane one into expose the remaining Dark Green pieces.
As one dig deeper, one shall hit a massive chain of Green marbles.
Do not dump them onto this Conveyor track unless one emerald case sits already visible or guaranteed into slide forward next.
this west Tunnel plus right Tunnel will finally hit zero.
They shall dump big crimson pieces onto the top of your remaining columns.
this bottom board shall simultaneously show its rear rows, pushing crimson and Pink Boxes to the front line.
Match this crimson spheres falling from this Tunnels into this last crimson cases into clear the board and secure the win.
Frequently asked questions
How do I beat Marble Sort Level 16?
Feed the colors that already have an open bottom Box first, keep your belt from filling up, and only release a new color when a matching Box is ready. Follow the move order in the solution above and you can clear Level 16 every time.
What is the main trap to avoid on Marble Sort Level 16?
The biggest mistake on Level 16 is tapping a color that has no active bottom Box yet — those marbles park on your Conveyor Belt and eat limited slots. Hold back any color that has no receiver waiting and the stage stays under control.
What colors do I need to match on Marble Sort Level 16?
Level 16 mainly revolves around Cyan, Green, Dark Green. Focus on feeding Cyan first when its Box is open, then introduce Green as the lower lanes free up so you never choke the belt.
How should I open Marble Sort Level 16?
Begin by checking the lower part of the tray and only select colors that already sit in an open Box down below. Clearing those first few matching blocks unlocks the rest of the board without jamming your sorting space.
How many moves does Marble Sort Level 16 take to complete?
Level 16 is a color-sequenced stage that clears cleanly when you stick to the exact order above. The step-by-step solution walks each move so you can finish it with the fewest taps and no wasted belt slots.
Is there a video walkthrough for Marble Sort Level 16?
Yes. The embedded video on this page walks through Marble Sort Level 16 move by move, and the screenshots below show each stage of the layout so you can follow along and beat it.