





Screenshots
Step-by-step solution
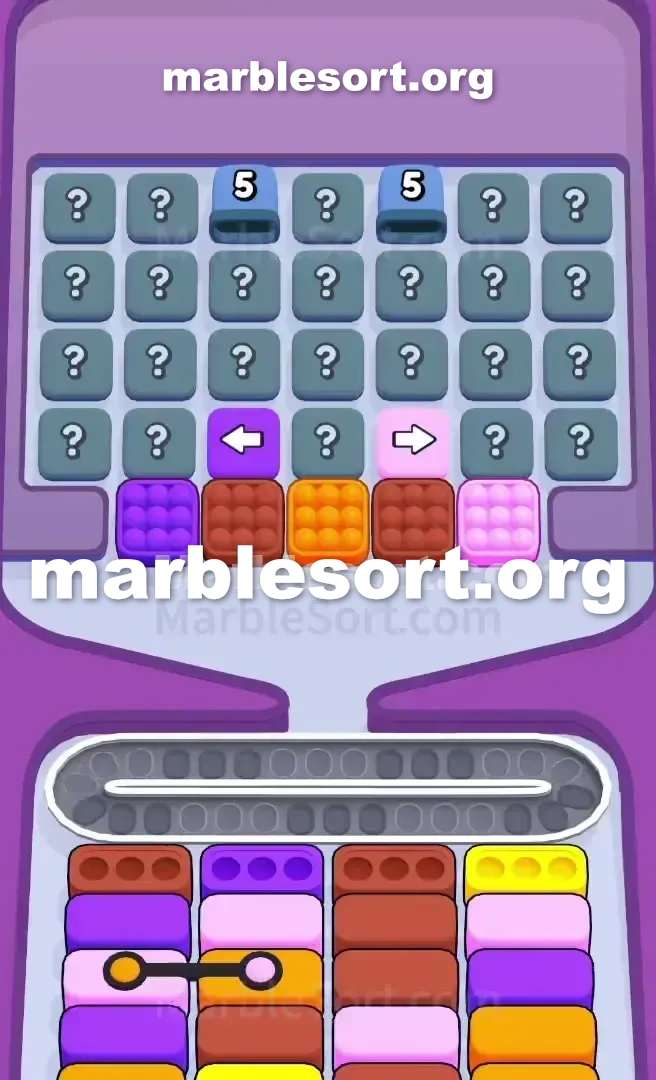
- 1) Take the pair of Brown marbles resting in the Top Tray and drop them straight into the two waiting Brown receivers, then take the Purple marble on the far left into the active Purple receiver.
- 2) Take the exposed Pink marble at the Top Tray's far right to start filling the fresh Pink Box on the left side, and ignore the far-right Yellow bait since no Yellow exists in the starting tray.
- 3) Tap the gray Mystery Boxes along the far-left and far-right edges, since unlocking these outer edges satisfies the two Arrow Boxes and makes the center playable.
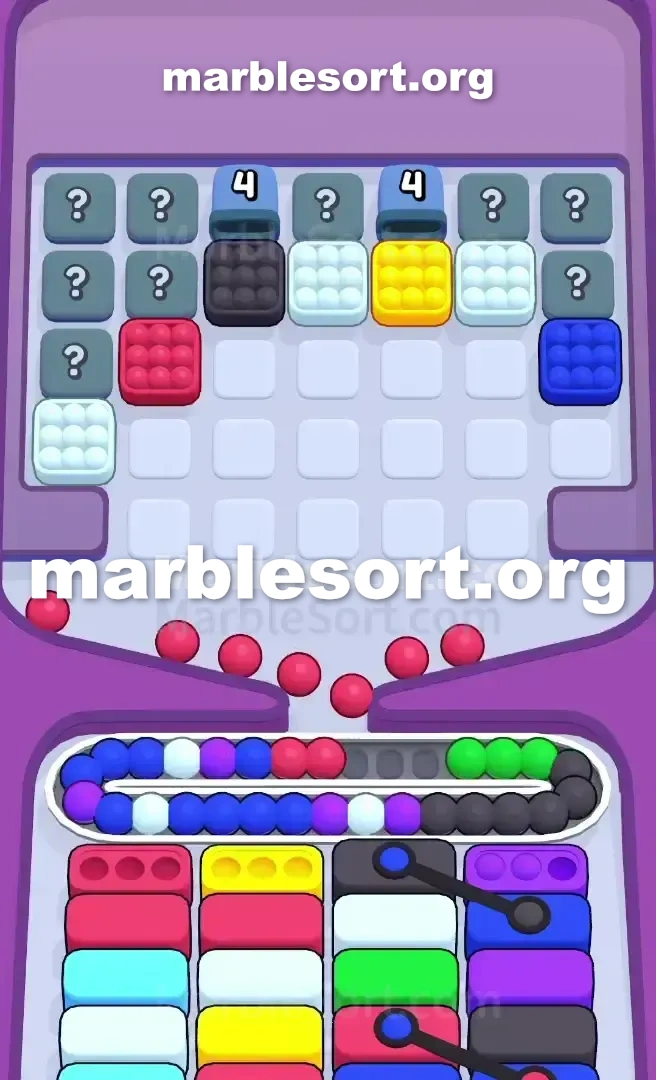
- 4) Carefully tap the freshly unlocked center Mystery Boxes digging for Purple and Orange, and pause that area the instant Green or Blue marbles surface, since their bottom boxes sit buried deep.
- 5) Keep clearing the left side until the Pink and Orange Connected Boxes drop down together, and pull the remaining visible Orange from the center and any Pink you uncovered on the right, leaving room for both at once.
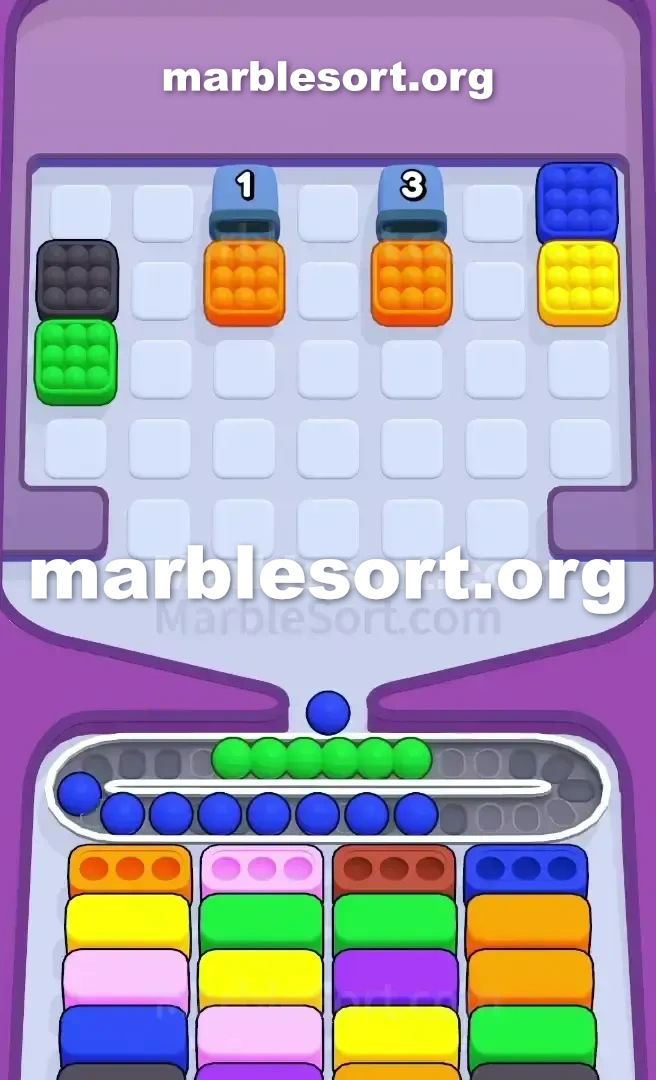
- 6) Clearing those Connected Boxes breaks the board open, and the bottom Boxes finally bring Yellow, Green, and Blue up to the active row so you can safely pull the Blue and Green you left stranded in the Mystery grid.
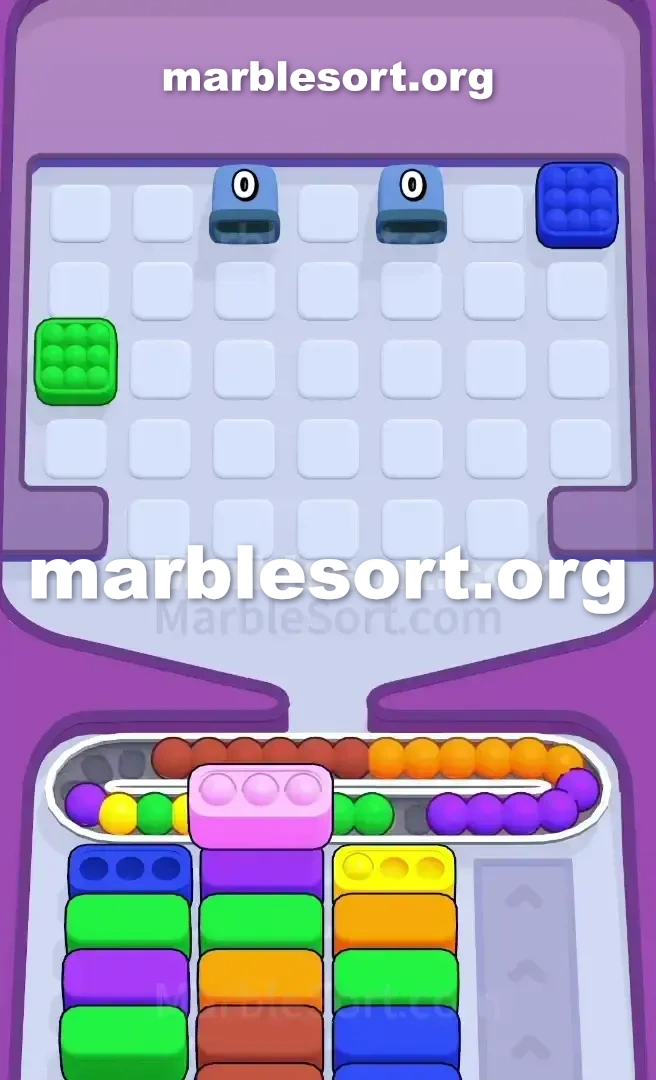
- 7) The two Tunnels each need five clears to pop open, so keep at least three empty belt slots before you trigger that fifth clear.
- 8) When the Tunnels dump their massive line of Orange marbles, route the final Orange into the last remaining bottom Boxes and stay patient with the belt to finish the level.
Level 406 Mystery Box Grid and Arrow Box Trap
one load on plus spot one comfortable head line from violet, Brown, amber, plus Pink marbles waiting in the Top Tray .
Almost this entire top board sits totally secret past a massive wall of gray Mystery Boxes .
one sit flying blind after the first three moves.
Compounding this issue, one hold two pointer cases parked east above this starting line, holding the center of the board hostage.
atlast, way onto at this upper, two Tunnels using one '5' requirement sit waiting into send even more spheres on your head late in the match.
into survive this exact layout, one hold into memorize what hides beneath those question marks.
Level 406 Hidden Board Trap
Let us break down exactly how this exact board sits built so one stop jamming your Conveyor Belt .
the first upper rack gives one one lower line of Purple, Brown, Orange, Brown, and Pink.
Immediately above this amber plus second Brown sit the two Arrow Boxes .
this west pointer points into the left side of the board.
this east pointer points into the right side of the board.
This mechanic dictates your entire early game.
one can't dig into this center until the outer columns drop.
the immediate frontline targets sit Brown, Purple, Brown, and Yellow.
here sits zero Yellow available in the starting Top Tray .
That gold case on the far right is pure bait.
that rests here mocking one, daring one into blindly click into this Mystery Boxes to find its matching marbles.
If one start panic-tapping into this gray question marks looking with Yellow, you lose.
past those secret cases hides some absolute flood of Blue and Green marbles.
If one bring them down first, they will fill your Conveyor Belt completely.
the lower cases for Blue and Green are buried deep.
one shall jam this track, lock the board, and fail the level.
Further down on this lower cases , you need to watch the left side.
parked on this third line down are a pair of Connected Boxes .
One rose case plus some amber case are tied together with a black line.
When this head cases empty, those two shall drop onto the active line simultaneously.
one should hold both rose plus amber spheres ready into go on this top board when this happens, or they shall stall your entire left flank.
Level 406 Level Overview
one hold into play this board from the outside in.
Level 406 Beating the Front Line
The first taps require extreme discipline.
one hold into empty what sits visible plus intentionally ignore the missing Yellow marbles.
choose this two Brown marbles in the Top Tray .
Send them directly into this two waiting Brown bottom Boxes .
choose this violet sphere over the far left of the Top Tray .
Send that into the active Purple bottom Box .
one now hold Pink and Orange sitting in the open.
one should now hold fresh targets over the left side, including a Pink box.
choose this exposed rose sphere over this far east from the Top Tray to begin filling it.
Now one should empty the outer columns of the Mystery Boxes .
choose this gray cases over the far left and far right edges.
Unlocking those outermost rims satisfies this requirements with this two Arrow Boxes in the lower middle.
Once this arrows vanish, the center becomes playable.
Level 406 Surviving the Mystery Box Reveal
As one break into this secret cases , this shades one show shall not perfectly match your active bottom Boxes .
Slowly choose the newly unlocked center Mystery Boxes .
one sit looking with violet and Orange to feed the bottom rows.
this moment one spot emerald or azure marbles appear, stop tapping that section.
Keep clearing this west side until the Connected Boxes drop down.
since this rose plus amber cases sit linked, one want a large chunk of Conveyor Belt space.
bring down this remaining visible amber spheres from this middle plus any rose marbles you uncovered on the right.
If one leave them parked here, one shall not be able into advance this first two lanes, which hides this end-game gold and Green boxes you desperately need.
Level 406 Managing the Tunnels and Ending
Clearing this Connected Boxes breaks the board wide open.
Now one hold to manage the top of the screen.
via now, this lower cases shall atlast push gold, Green, and Blue into the active row.
Now one may securely bring down this azure plus emerald spheres one west stranded on the middle of the Mystery Box grid.
this two Tunnels require 5 clears into pop open.
Once this Tunnels available, they shall dump one huge line of Orange marbles onto the board.
Ensure the Conveyor track holds at least three empty slots before one trigger that fifth clear.
Route this last amber dump into this last remaining lower Boxes to finish the level.
Stay patient, control this track, and let the board come to you.
Frequently asked questions
How do I beat Marble Sort Level 406?
Feed the colors that already have an open bottom Box first, keep your belt from filling up, and only release a new color when a matching Box is ready. Follow the move order in the solution above and you can clear Level 406 every time.
What is the main trap to avoid on Marble Sort Level 406?
The biggest mistake on Level 406 is tapping a color that has no active bottom Box yet — those marbles park on your Conveyor Belt and eat limited slots. Hold back any color that has no receiver waiting and the stage stays under control.
What colors do I need to match on Marble Sort Level 406?
Level 406 mainly revolves around Orange, Pink, Brown. Focus on feeding Orange first when its Box is open, then introduce Pink as the lower lanes free up so you never choke the belt.
How should I open Marble Sort Level 406?
Begin by checking the lower part of the tray and only select colors that already sit in an open Box down below. Clearing those first few matching blocks unlocks the rest of the board without jamming your sorting space.
How many moves does Marble Sort Level 406 take to complete?
Level 406 is a color-sequenced stage that clears cleanly when you stick to the exact order above. The step-by-step solution walks each move so you can finish it with the fewest taps and no wasted belt slots.
Is there a video walkthrough for Marble Sort Level 406?
Yes. The embedded video on this page walks through Marble Sort Level 406 move by move, and the screenshots below show each stage of the layout so you can follow along and beat it.