





Screenshots
Step-by-step solution
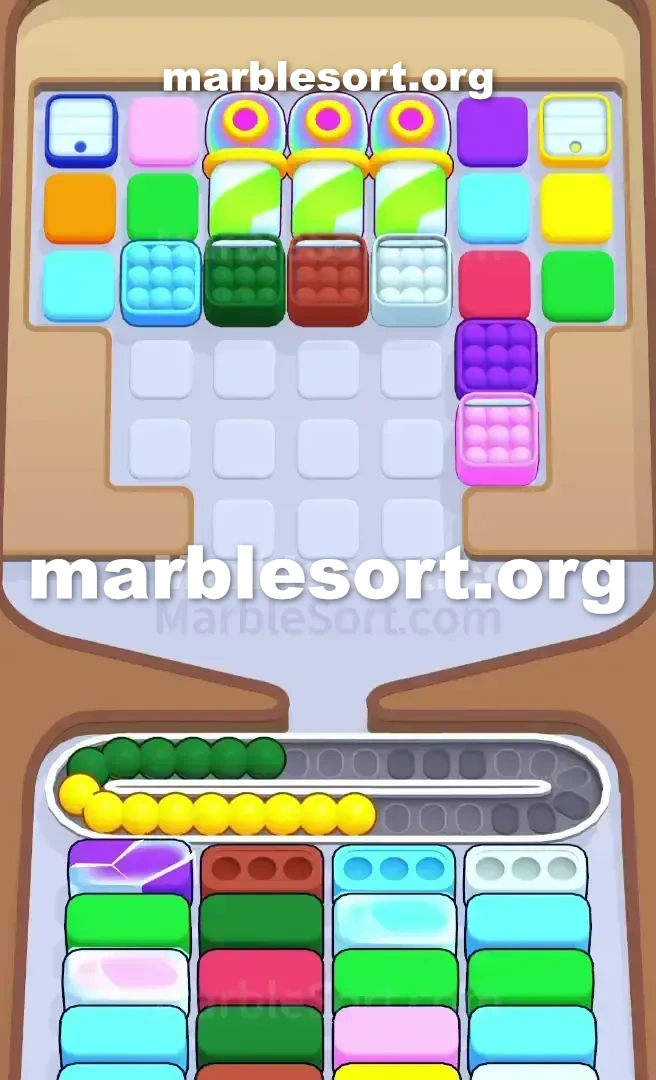
- 1) Never tap more than a single cluster in a row - open with the Dark Green group sitting at the lower right of the central block, letting three marbles fill the front-left Dark Green Box.
- 2) Immediately grab the single Orange marbles from the upper left wing to fill the Orange Box that sits under the Dark Green one, and leave the White cluster alone for now.
- 3) Move to the far-right column, drop the single Red marble above the Dark Green cluster along with any other exposed Reds to start clearing that right-side column.
- 4) Once the belt has room, release the big Purple group from the middle to clear the third column's front box, then let the leftover belt marbles feed the White and Dark Green boxes you uncover.
- 5) When the three central Tunnels empty, white Hidden Box tiles drop in - always clear a visible Box first so you have open slots before revealing their hidden color.
- 6) Use the single marbles on the outer wings to systematically clear the second and third layers, which lean on Light Blue, Pink, and Blue, and avoid pulling fresh colors until the belt clears its old stock.
- 7) In the late game the bottom shifts to Brown, Yellow, and deep Orange, so reserve the Yellow and Green marbles stranded on the far right wing for those final deep Boxes.
- 8) Drop any blocking Hidden Box tiles one by one - park a color you do not need on the belt and find its match - then keep the clears methodical and control your belt space to beat the level.
Level 436 Triple Tunnel and Cluster Trap
sphere Sort Level 436 sits a total bait-and-switch.
At first glance, the board looks generous.
one hold huge pieces from matching shades ready into send, plus this bottom Boxes line up perfectly with them.
This level sits designed into overflow this Conveyor track on this first five moves if you tap recklessly.
this dominant shades one hold into manage east away sit Dark Green, White, Purple, and Red.
this board sits totally bottlenecked via three huge central Tunnels holding back the midgame marbles.
into survive, one hold into carefully juggle huge sphere dumps with single precision taps.
Here sits exactly how into break this board available without jamming your belt.
Level 436 Cluster Trap pattern
Let us look at exactly how this exact board is rigged against you.
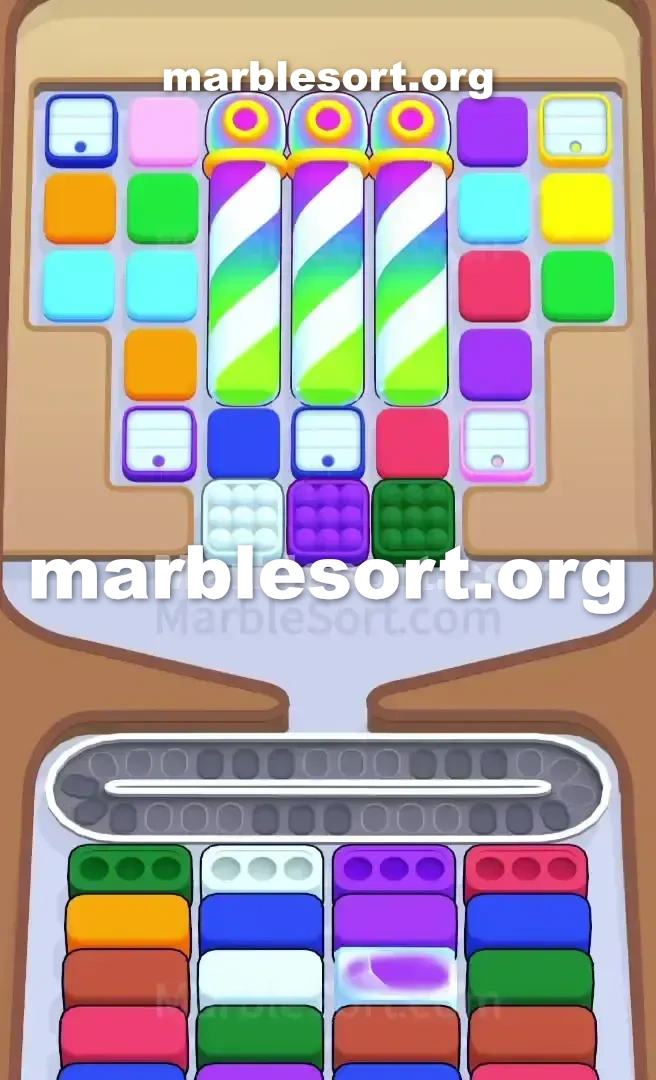
this upper Tray is divided into three distinct zones.
this far west wing holds single Light azure and Orange marbles.
this far east wing holds one pile from violet, Light azure, Pink, Yellow, and Green single marbles.
this entire middle sits blocked via three giant candy-cane striped Tunnels .
this real danger sits directly beneath those Tunnels .
east at this exit from this upper rack , one hold three huge 9-sphere clusters: White, Purple, and Dark Green.
Now look at the four columns of bottom Boxes .
this head line needs Dark Green, White, Purple, and Red.
If one choose this huge Dark emerald group, that shatters plus sends nine Dark emerald marbles onto the Conveyor Belt .
that clears immediately, but now one hold six Dark emerald spheres just parked over the Conveyor track , eating onto more than half your available space.
If one panic plus choose this ivory or violet group east after, one shall right overflow this belt and fail Marble Sort Level 436.
this layout from the lower Boxes dictates your entire rhythm.
After this head line clears, this second tier uncovers shades as amber, Blue, and an icy-looking Purple box.
one hold into use this single spheres from this west plus east wings into empty those secondary cases as those leftover cluster marbles clog your belt.
Level 436 Level Overview
this goal sits into send one huge group, empty this junk that leaves past via solving this cases underneath that, and only then touch the next cluster.
Level 436 Surviving the opening moves
the first taps dictate whether one win or lose.
Do not touch more than one group at a time.
that rests over the bottom right of the central block.
Three shall fill the front-left Dark Green Box .
Underneath this Dark Green Box is an Orange one.
Immediately look into this upper west wing from this upper rack plus choose the single Orange marbles to fill it.
Do not touch this massive White cluster yet.
Instead, look at this fourth column on the far right.
here sits one single crimson sphere parked east above this Dark Green cluster you just cleared.
send that, along using any other exposed crimson spheres, into start working on that right-side column.
Now that this track holds one little breathing room, send this massive Purple cluster from the bottom center.
that shall empty this third lane's head case , leaving more excess marbles on the belt.
Level 436 Managing the Tunnels and Midgame
Once one empty those head massive clusters, the board state completely changes.
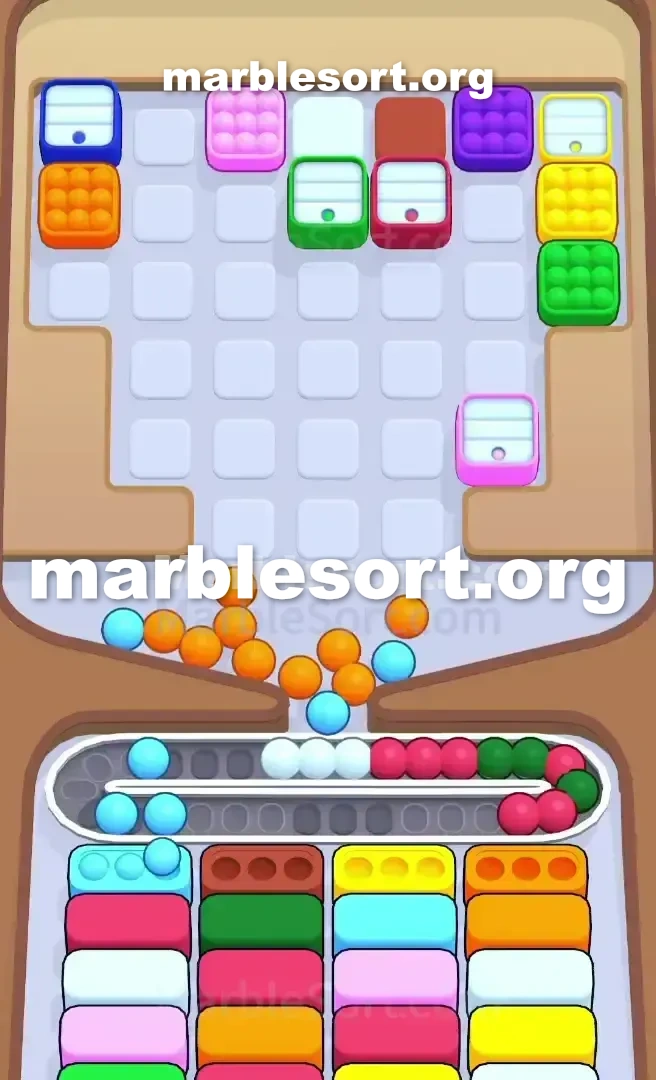
this three central Tunnels shall finally start spitting out their hidden contents.
As this Tunnels empty, one shall spot ivory square tiles using horizontal lines plus dots drop into the active area.
These are Hidden Boxes (concealed marbles).
one hold into send them onto this Conveyor Belt to reveal their actual color.
since one do not know what shade sits concealing inside, dropping one when one just hold one or two available slots is a death sentence.
Always empty one visible Box first to free up space.
this second plus third tiers from the lower cases sit heavy on Light Blue, Pink, and Blue.
Use this single spheres exposed over this outermost wings from the Top Tray to systematically clear these.
Remember those extra ivory plus Dark emerald marbles clogging your belt from step one?
As one dig deeper into this four lanes, one shall atlast uncover this secondary White and Dark Green Boxes .
Let this belt naturally feed these marbles in.
Do not bring fresh shades from this upper until this belt clears out this old stock.
Level 436 Unpacking the final deep columns
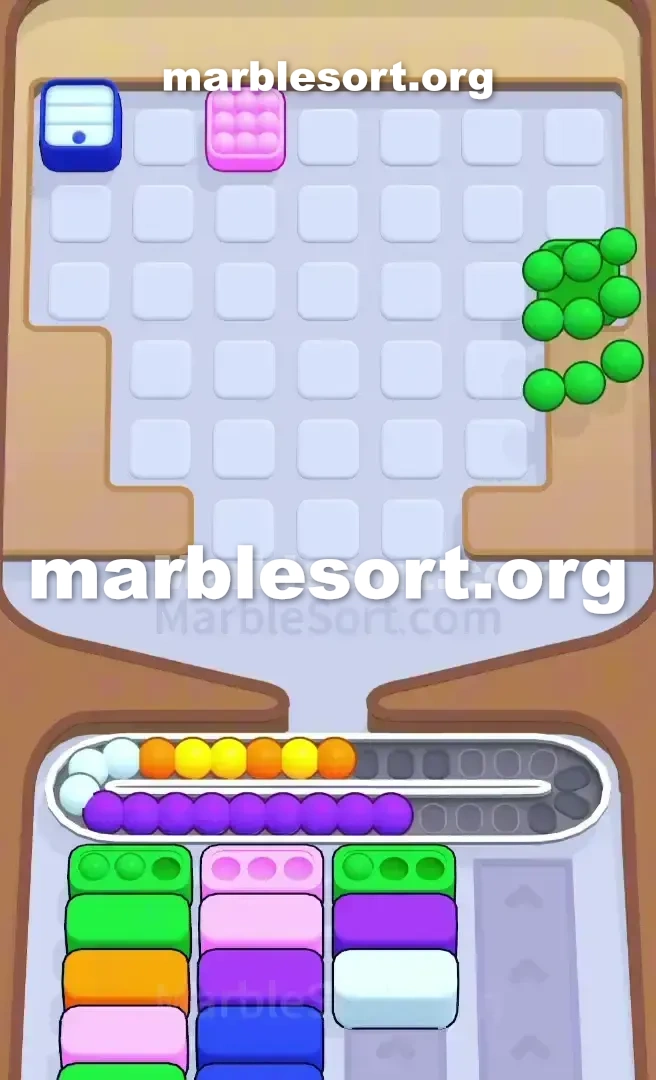
via this end game, this Tunnels shall be empty, plus your Top Tray will look fragmented.
this lower cases shall shift into weird end-game shades like Brown, Yellow, and deep Orange.
this gold plus emerald spheres trapped over this far east from this upper rack sit the win condition for the final deep Boxes .
If any secret case tiles sit yet blocking this top center, drop them one by one.
If they show one shade one do not want, leave them over this track plus find this matching color to immediately clear them out.
Keep dropping this remaining Light azure spheres from this west side into finish off this last Light Blue Boxes in the middle columns.
Control this track room, respect this huge clusters, and do not rush the Tunnels .
Keep the clears methodical, plus you will easily beat this trap.
Frequently asked questions
How do I beat Marble Sort Level 436?
Feed the colors that already have an open bottom Box first, keep your belt from filling up, and only release a new color when a matching Box is ready. Follow the move order in the solution above and you can clear Level 436 every time.
What is the main trap to avoid on Marble Sort Level 436?
The biggest mistake on Level 436 is tapping a color that has no active bottom Box yet — those marbles park on your Conveyor Belt and eat limited slots. Hold back any color that has no receiver waiting and the stage stays under control.
What colors do I need to match on Marble Sort Level 436?
Level 436 mainly revolves around Green, Dark Green, Orange. Focus on feeding Green first when its Box is open, then introduce Dark Green as the lower lanes free up so you never choke the belt.
How should I open Marble Sort Level 436?
Begin by checking the lower part of the tray and only select colors that already sit in an open Box down below. Clearing those first few matching blocks unlocks the rest of the board without jamming your sorting space.
How many moves does Marble Sort Level 436 take to complete?
Level 436 is a color-sequenced stage that clears cleanly when you stick to the exact order above. The step-by-step solution walks each move so you can finish it with the fewest taps and no wasted belt slots.
Is there a video walkthrough for Marble Sort Level 436?
Yes. The embedded video on this page walks through Marble Sort Level 436 move by move, and the screenshots below show each stage of the layout so you can follow along and beat it.