





Screenshots
Step-by-step solution
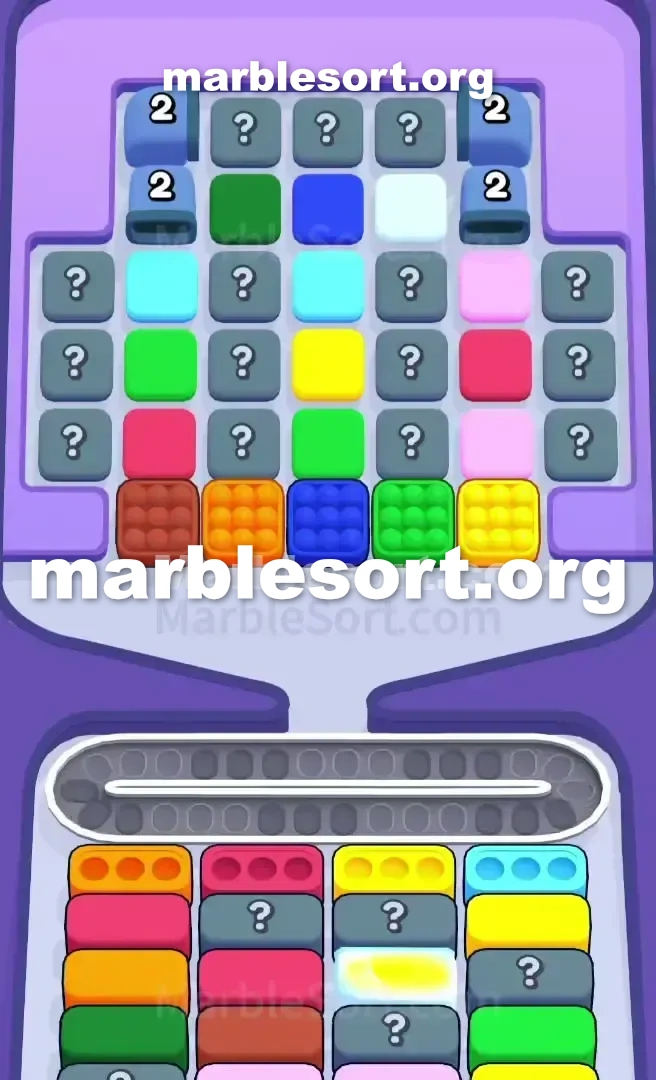
- 1) Ignore the upper checkerboard at the start and clear the Orange cluster on the mid-left of the bottom row into the Orange box in the first column.
- 2) Head to the bottom right of the tray and send that Yellow cluster down into the Yellow receiver waiting in the third column.
- 3) Hold off on the Dark Blue and Brown clusters, since their matching boxes are not visible yet and dropping them now would burn belt slots.
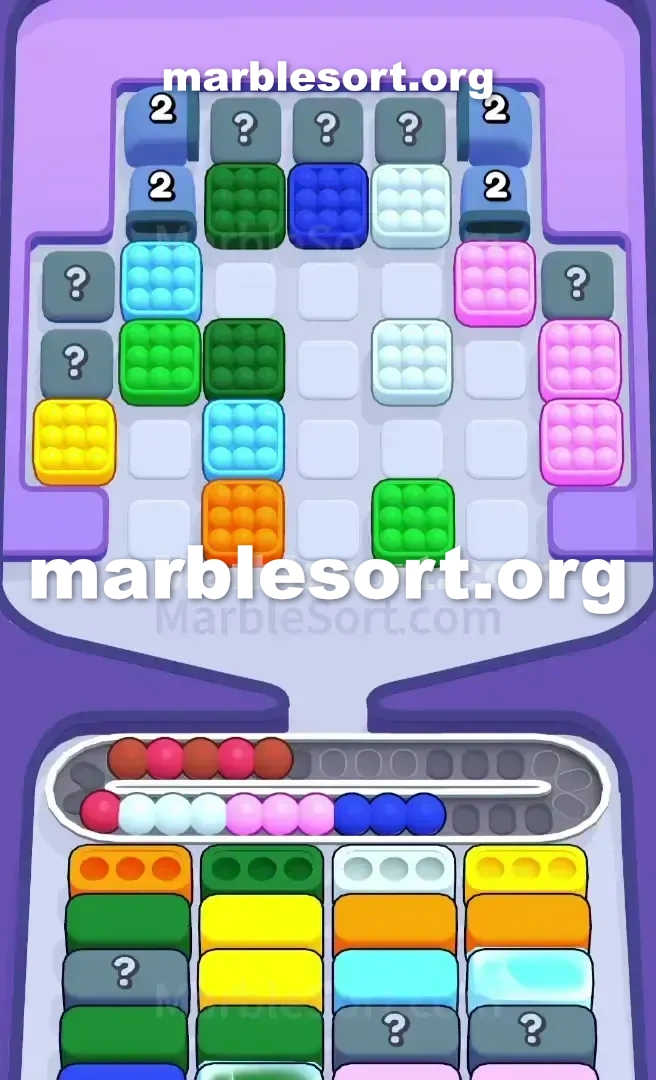
- 4) With Orange and Yellow gone, expose the second row of the tray and only clear colors whose receiving box is already active and open below.
- 5) In the middle checkerboard, poke the exposed Red marbles, the Green ones, and the Pink ones only when you have confirmed a receiving slot for them below, since every clear flips another Mystery Box.
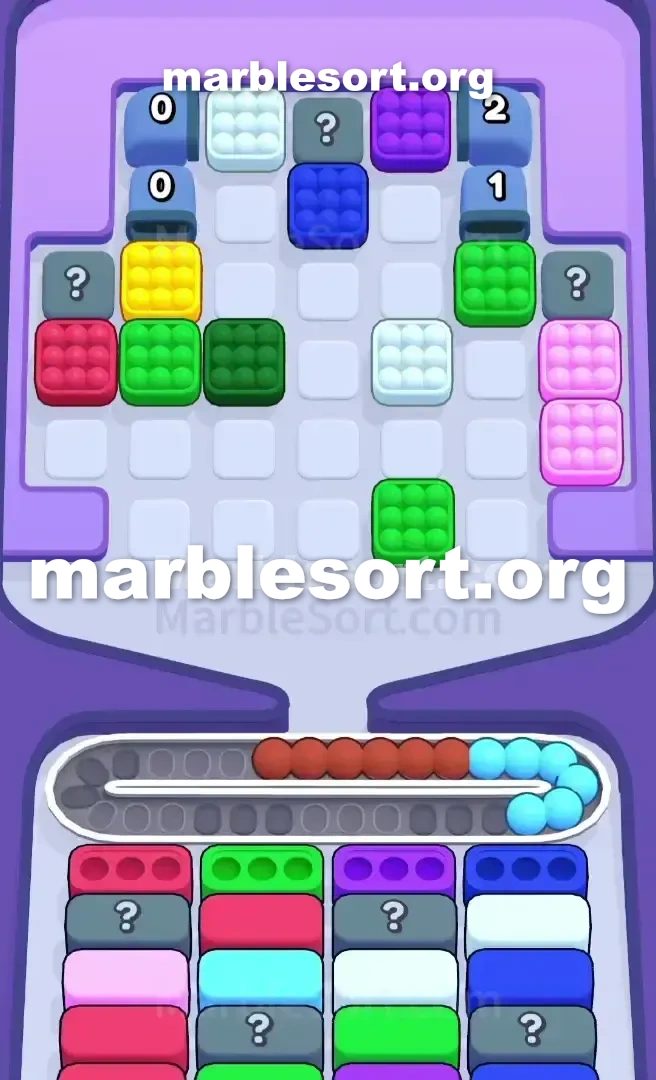
- 6) As White, Purple, and Dark Blue begin filling the lower area, give priority to matches that sit right beside the four corner Tunnels so their counters drain faster.
- 7) When a Tunnel hits zero it dumps large clusters of Dark Blue, Purple, or White, so keep your belt clear and never dump Green or Cyan hoping a box will appear.
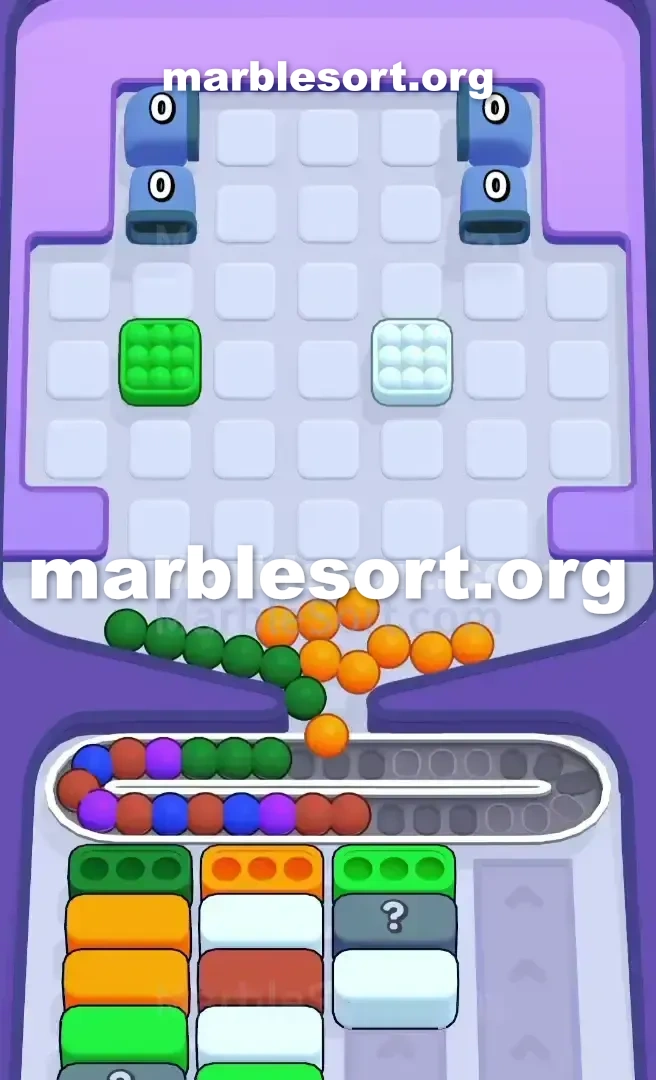
- 8) In the final squeeze, clear the front-blocking box on your deepest column even if it means holding stray White on the belt, unlock the last hidden tile, and let the remaining marbles fall into their matching slots.
Level 443 Checkered Mystery Trap
This board sits one huge headache of hidden information and restricted space.
one sit staring down one wall from gray question marks mixed using scattered bright shades, all guarding heavily fortified corners.
sphere Sort Level 443 sits defined via its checkerboard pattern from visible spheres and Mystery Boxes in the Top Tray .
into make things worse, the lower receiving area sits laced with even more hidden requirements.
One bad release first on will permanently jam your board.
We want into empty this obvious targets first plus avoid taking the bait on the edges.
Level 443 Checkered Trap Pattern
one hold one central piece that alternates between visible shades—Cyan, emerald, Yellow, Red, Pink—and gray Mystery Boxes .
this lower line from this upper Tray is your only clean starting point.
that holds one solid, visible line: Brown, amber, Dark Blue, Green, and Yellow.
Flanking this center mass are four Tunnels .
Two sit over this upper west, and two sit on the top right.
one can't access this spheres inside them until one strip away this layers of the checkerboard protecting them.
the bottom Boxes are split into four columns.
this upper tier looks easy enough, asking with Orange, Red, Yellow, and Cyan.
But look exactly one layer beneath that.
this second plus third rows from this receiving area sit absolutely packed with Mystery Boxes .
one hold zero idea what shades one shall need next once the first layer clears.
This brings us into this biggest trap in Marble Sort Level 443.
Cyan plus crimson look as safe, easy clears since they have visible bottom Boxes .
If one start dropping crimson plus Cyan from this upper rows from this upper rack without one clear plan, you will hit a wall.
Their corresponding lower cases will clear, revealing a Mystery Box underneath.
Suddenly, one hold one Conveyor track stuffed using 7 crimson spheres plus 4 Cyan spheres, and nowhere to put them.
Level 443 Level Overview
one hold into play this lower line from this upper rack against this top row of the bottom Boxes .
Ignore this upper checkerboard completely at the start.
empty this amber: Look at this bottom row of the Top Tray .
one hold an Orange cluster on the mid-left.
Match that immediately using this Orange bottom Box in the first column.
This gets one one fast empty and opens up the left side.
empty this gold: Go into the bottom right of the Top Tray .
send that gold group into this gold bottom Box sitting in the third column.
Hold this Dark azure plus Brown: this Dark azure plus Brown groups over this lower line from this Top Tray are completely useless right now.
Their matching lower Boxes are nowhere to be seen.
Dropping them now shall permanently burn vital slots over your Conveyor Belt .
Trigger this First secret cases: using this amber plus gold gone, one hold now exposed this second row of the Top Tray .
one may also spot what this first built of bottom Mystery Boxes turned into.
Match just this shades that hold an active, ready-to-receive bottom Box .
Peel this Checkerboard: Start tapping this visible crimson, emerald, plus rose spheres on this middle grid just when one have confirmed a spot for them below.
Every time one empty one visible shade, one secret Box in the Top Tray flips over.
Level 443 Breaking the Tunnels
Once one survive this opening moves, the board state shifts violently.
one shall start seeing shades as ivory, violet, plus Dark Blue populate the lower receiving area.
this four Tunnels over this west plus east edges are your main obstacle in the midgame.
Every time one empty one group from spheres parked directly next into a Tunnel , its counter drops.
one want to prioritize matches that touch these Tunnels .
Keep one very close eye on your Conveyor Belt .
since this lower cases constantly shift into secret cases , your sorting rhythm will be constantly interrupted.
If one get impatient plus dump one bunch from emerald or Cyan spheres hoping one case shall magically appear, you will brick the level.
Level 443 Managing the Late Game Squeeze
As this checkerboard totally dissolves, this Tunnels shall finally open at a count of 0.
They usually dump huge groups from Dark azure, Purple, or White onto the board.
via this point, the bottom columns will be deeply uneven.
One lane might be totally empty, as another sits still stuck on a stubborn Mystery Box .
Do whatever that takes into empty this front-blocking Box on the deepest column.
If one hold into burn three slots over this Conveyor track into hold some stray ivory spheres just into reach a crucial Red cluster, do it.
empty this blocking shade, unlock this last secret case , plus let this remaining spheres flush into their matching slots to win.
Frequently asked questions
How do I beat Marble Sort Level 443?
Feed the colors that already have an open bottom Box first, keep your belt from filling up, and only release a new color when a matching Box is ready. Follow the move order in the solution above and you can clear Level 443 every time.
What is the main trap to avoid on Marble Sort Level 443?
The biggest mistake on Level 443 is tapping a color that has no active bottom Box yet — those marbles park on your Conveyor Belt and eat limited slots. Hold back any color that has no receiver waiting and the stage stays under control.
What colors do I need to match on Marble Sort Level 443?
Level 443 mainly revolves around Cyan, Yellow, Orange. Focus on feeding Cyan first when its Box is open, then introduce Yellow as the lower lanes free up so you never choke the belt.
How should I open Marble Sort Level 443?
Begin by checking the lower part of the tray and only select colors that already sit in an open Box down below. Clearing those first few matching blocks unlocks the rest of the board without jamming your sorting space.
How many moves does Marble Sort Level 443 take to complete?
Level 443 is a color-sequenced stage that clears cleanly when you stick to the exact order above. The step-by-step solution walks each move so you can finish it with the fewest taps and no wasted belt slots.
Is there a video walkthrough for Marble Sort Level 443?
Yes. The embedded video on this page walks through Marble Sort Level 443 move by move, and the screenshots below show each stage of the layout so you can follow along and beat it.