





Screenshots
Step-by-step solution
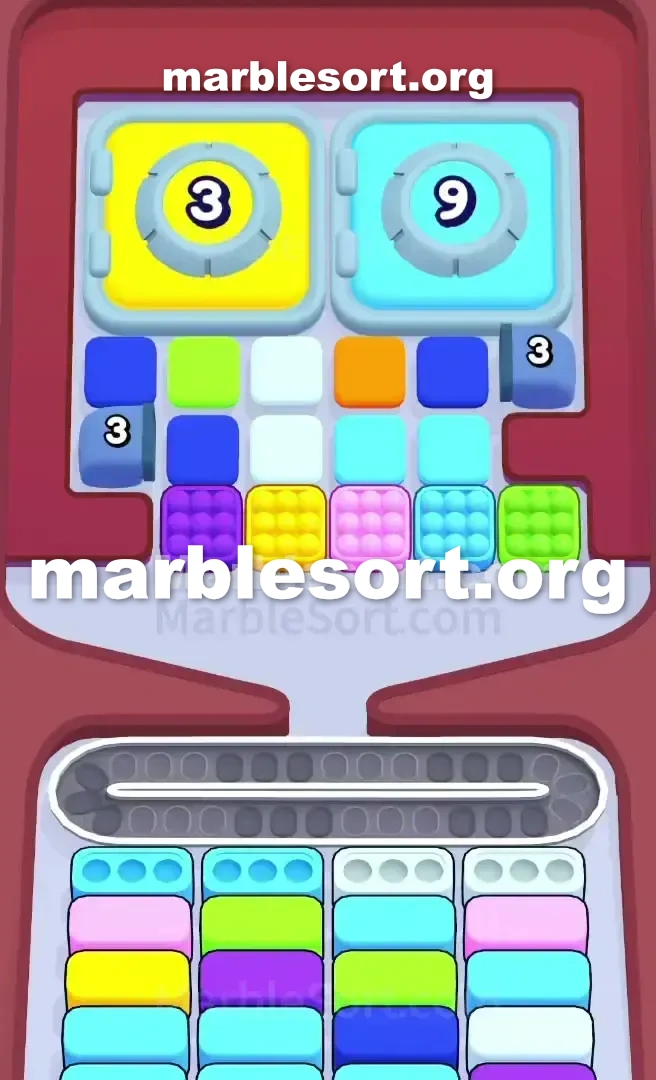
- 1) Open with the textured marbles in the central grid: tap the purple one, then the yellow one, to drop them onto the Conveyor Belt.
- 2) Feed the green, purple, yellow, and pink spheres into the Box that sits second from the west edge of the bottom row, which is your only guaranteed clear at the start.
- 3) Clearing that Box counts one-third toward the '3' Panel, and the spent grid marbles are instantly replaced by fresh ones in the center.
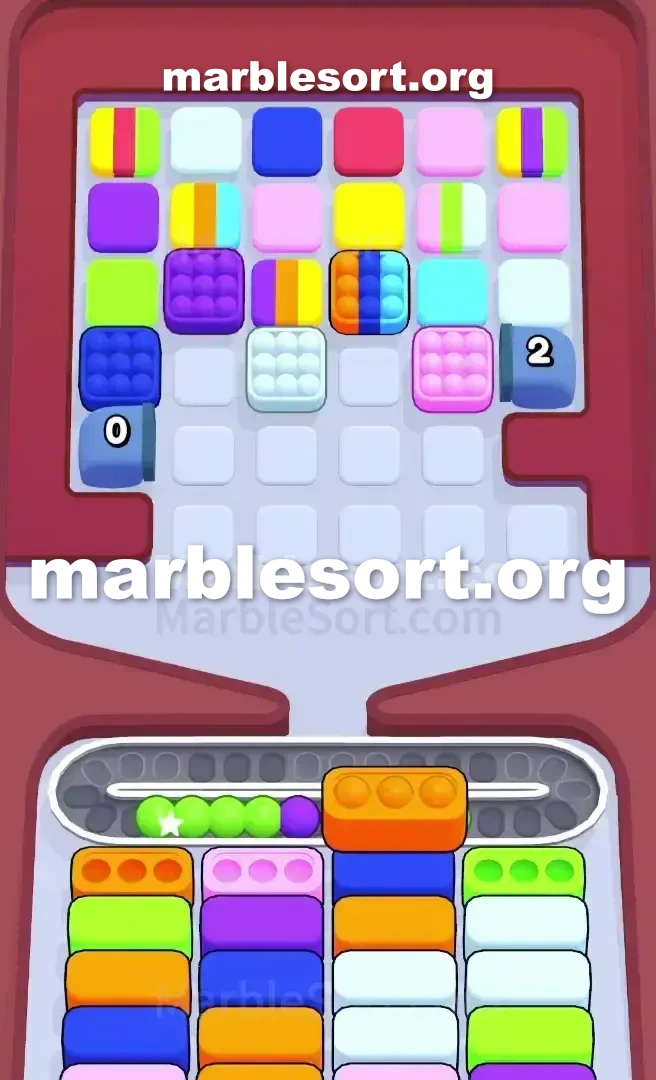
- 4) For the next two clears, target the Box in Column 5 that asks for orange, yellow, and light blue, gathering those shades on the belt first to avoid jams.
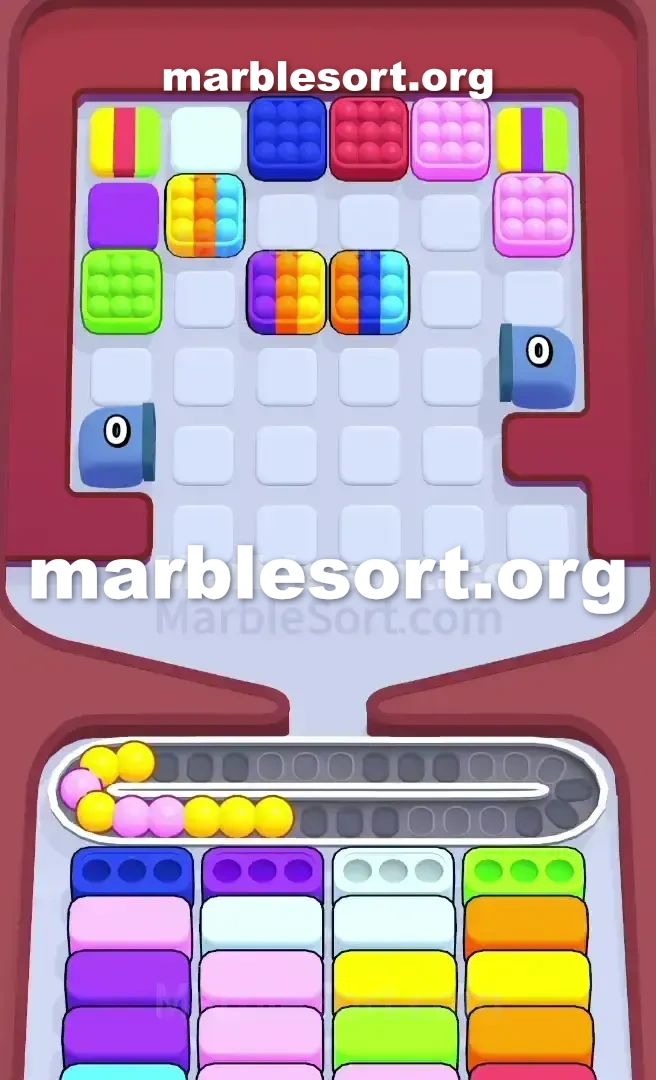
- 5) Once the third Box is cleared, the yellow '3' Panel pops open, spilling a fresh supply of mostly yellow and pink marbles while the side-pipe counters drop to zero.
- 6) Now release the two newly unlocked dark blue marbles and feed them into the waiting Boxes in Column 3 and Column 4 to free up bottom space.
- 7) Keep clearing boxes against the steady stream from the opened Panel and the refilling grid, gathering four-color box fills on the belt before sending them down.
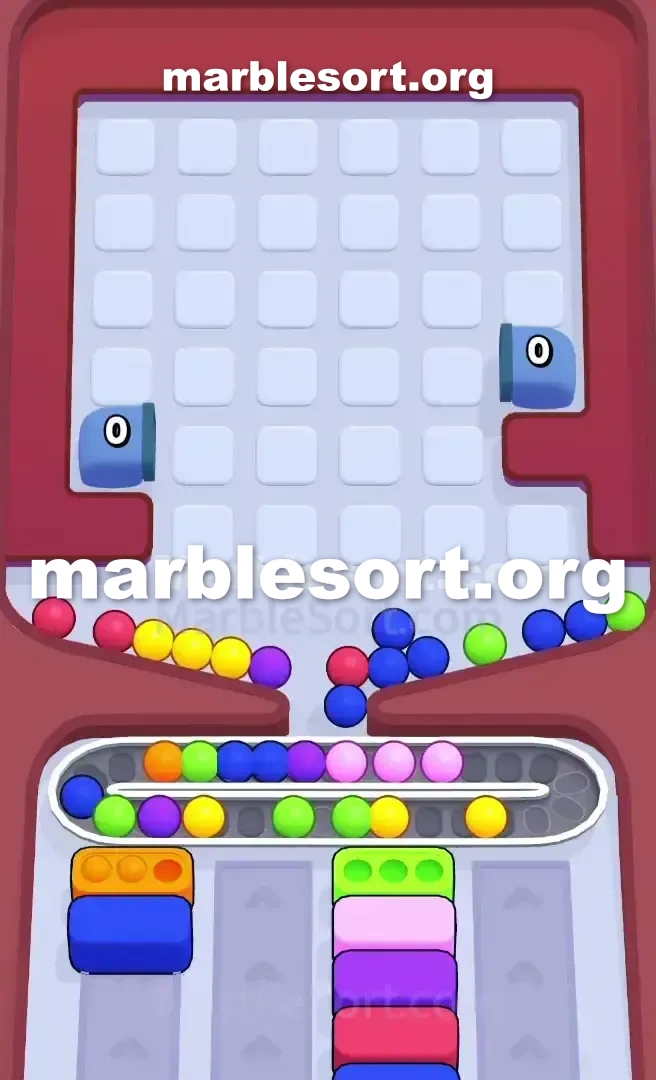
- 8) After nine total boxes are down, the cyan '9' Panel on the right opens, so sort the final leftover marbles into their matching boxes and drop the last one to win.
Level 453 Cracking the Panel Locks and Refilling Marbles
This one looks impossible at first glance.
that throws two huge Panels at one—one tiny one blocking one few spheres and a huge one blocking the endgame.
this trick isn't just sorting; it's understanding that this board itself changes as you play.
this main obstacle sits one "3" door over this west and a "9" Panel on the right.
this board starts using one very exact, limited built from spheres: light greens, some amber, plus one central grid from four 'pop-that' style spheres (purple, yellow, pink, and light blue).
over upper from that, two dark azure spheres sit trapped past side pipes that also hold a '3' counter.
Don't let those dark blues distract you.
this entire solution starts with that central grid.
Level 453 Unique Board Pattern
Let's break down why sphere Sort Level 453 is so tricky.
this layout sits designed into make one think you're jammed before you even start.
this gold '3' door over this west should be opened into get access to more marbles.
This requires clearing any three from the bottom Boxes .
this cyan '9' door over this east sits this last gate, requiring nine total cases to be cleared before it opens.
Your starting marbles are extremely limited.
One central 1x4 line from special rough marbles: purple, yellow, pink, and light blue.
Two dark azure spheres that sit completely locked and unusable for now.
this bottom Boxes are the real puzzle map.
here sit five lanes, and their needs are very specific.
this most important one at this start sits this case in the second column from the left.
that requires one emerald, one violet, one yellow, and one pink marble.
one hold exactly this spheres needed into empty this one case , and only this one Box .
this level feels impossible since that looks as one may just empty one Box and then you'll be stuck.
this secret sits that this central grid from 'pop-it' marbles isn't static.
Once one use them, fresh marbles will appear in their place.
This refilling mechanic sits what opens onto this board plus allows one into empty this next two cases needed to pop the '3' Panel .
Level 453 Level Overview
This level sits all about a precise opening sequence.
One bad move shall jam this Conveyor Belt and force a restart.
Level 453 Phase 1: The Critical First Box Clear
this just goal at this start sits into clear the Box in the second column.
Look at this central grid of textured marbles.
choose this violet one first into release it onto the Conveyor Belt .
Next, release the yellow textured marble.
Now, look into the far left of the Top Tray .
this Conveyor track now holds this four spheres needed with this second case from the left (green, purple, yellow, pink).
Carefully guide all four from them into that Box .
Clearing this case does two things: that counts as 1/3 towards opening this gold door , plus using this rough spheres causes fresh ones to appear in the central grid.
Level 453 Phase 2: Unlocking this "3' Panel and the Dark Blue Marbles
using this first case gone plus fresh spheres revealed on this middle, one may now hunt for the next two clears.
This will satisfy the '3' Panel requirement.
Take inventory from what one hold west: this original amber, this east-side light emerald, this original rough light azure, plus one fresh set of marbles in the center.
the next goal sits to clear two more Boxes .
this easiest targets sit often this ones one may fill without too much Conveyor Belt juggling.
Look with cases that want the colors you now have in abundance.
this case on lane 5 (needing amber, gold, and light blue) is a good candidate.
Strategically release spheres into fill plus clear your second and third Boxes .
Don't be afraid into use this Conveyor track as one temporary holding area, but always hold one plan for where each marble is going.
Once one empty this third case , three things shall happen at once: this gold '3' door over this west shall available, dropping one fresh supply of marbles (mostly yellow and pink).
this side pipes using this "3" counter will count down to "0".
this two dark azure spheres that were locked become available to release.
Level 453 Phase 3: this Final Push to Clear the Board
one hold access into all this colors, including the critical dark blue marbles.
this challenge shifts from unlocking things into managing the high volume of marbles.
Immediately prioritize using this newly unlocked dark blue marbles.
this cases on lane 3 plus Column 4 are waiting for them.
Clearing those shall free onto one huge amount from room on the bottom area and prevent future jams.
using this dark blues sorted, work over clearing the remaining Boxes .
one hold one steady stream from spheres from this opened Panel and the central grid.
this main threat here is overloading the Conveyor Belt .
If one want into empty one case that requires four different shades, try into gather them over the belt before sending them down.
Continue clearing cases until you've cleared nine in total.
This shall atlast available this large cyan '9' Panel on the right.
using all Panels available, all one hold into do sits sort this last remaining marbles into their matching Boxes .
empty this final Box to complete Marble Sort 453 .
Frequently asked questions
How do I beat Marble Sort Level 453?
Feed the colors that already have an open bottom Box first, keep your belt from filling up, and only release a new color when a matching Box is ready. Follow the move order in the solution above and you can clear Level 453 every time.
What is the main trap to avoid on Marble Sort Level 453?
The biggest mistake on Level 453 is tapping a color that has no active bottom Box yet — those marbles park on your Conveyor Belt and eat limited slots. Hold back any color that has no receiver waiting and the stage stays under control.
What colors do I need to match on Marble Sort Level 453?
Level 453 mainly revolves around Yellow, Pink, Purple. Focus on feeding Yellow first when its Box is open, then introduce Pink as the lower lanes free up so you never choke the belt.
How should I open Marble Sort Level 453?
Begin by checking the lower part of the tray and only select colors that already sit in an open Box down below. Clearing those first few matching blocks unlocks the rest of the board without jamming your sorting space.
How many moves does Marble Sort Level 453 take to complete?
Level 453 is a color-sequenced stage that clears cleanly when you stick to the exact order above. The step-by-step solution walks each move so you can finish it with the fewest taps and no wasted belt slots.
Is there a video walkthrough for Marble Sort Level 453?
Yes. The embedded video on this page walks through Marble Sort Level 453 move by move, and the screenshots below show each stage of the layout so you can follow along and beat it.