





Screenshots
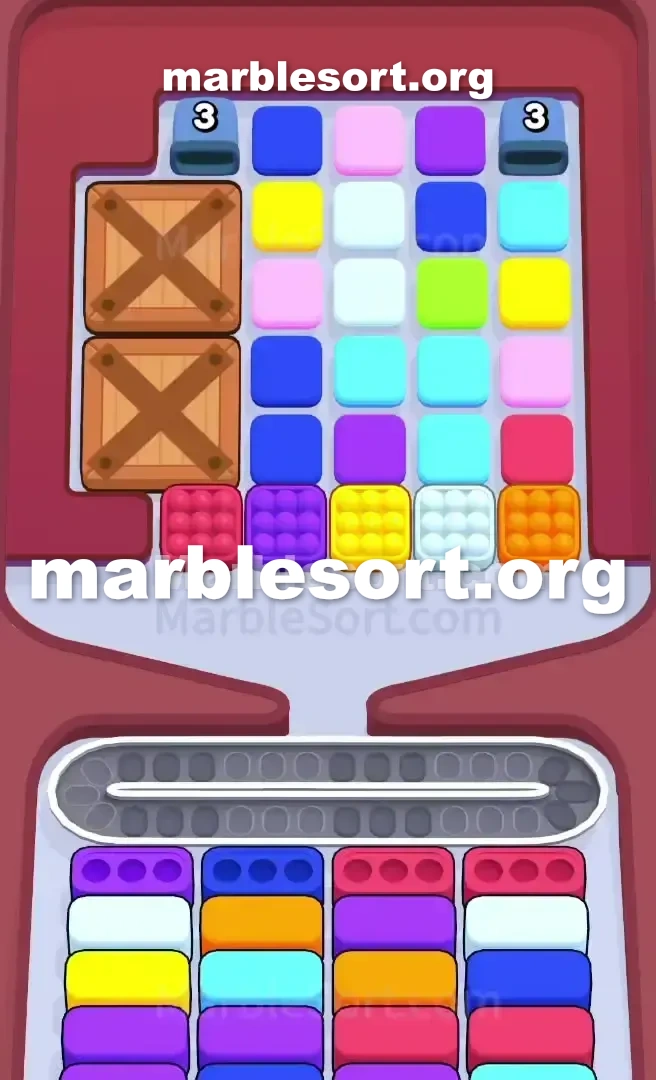
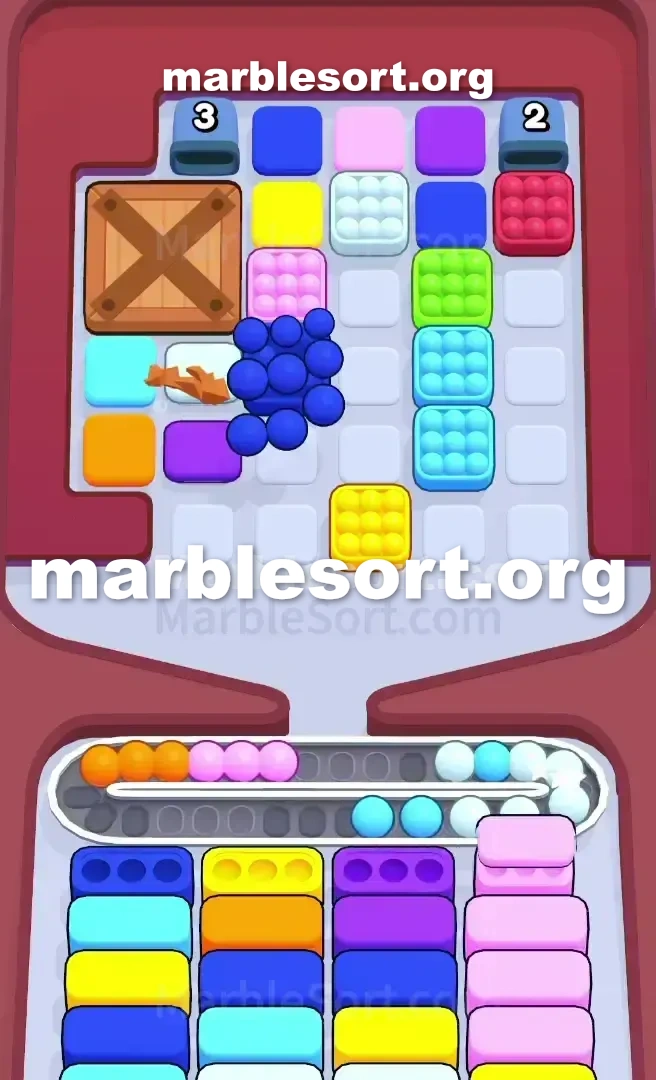
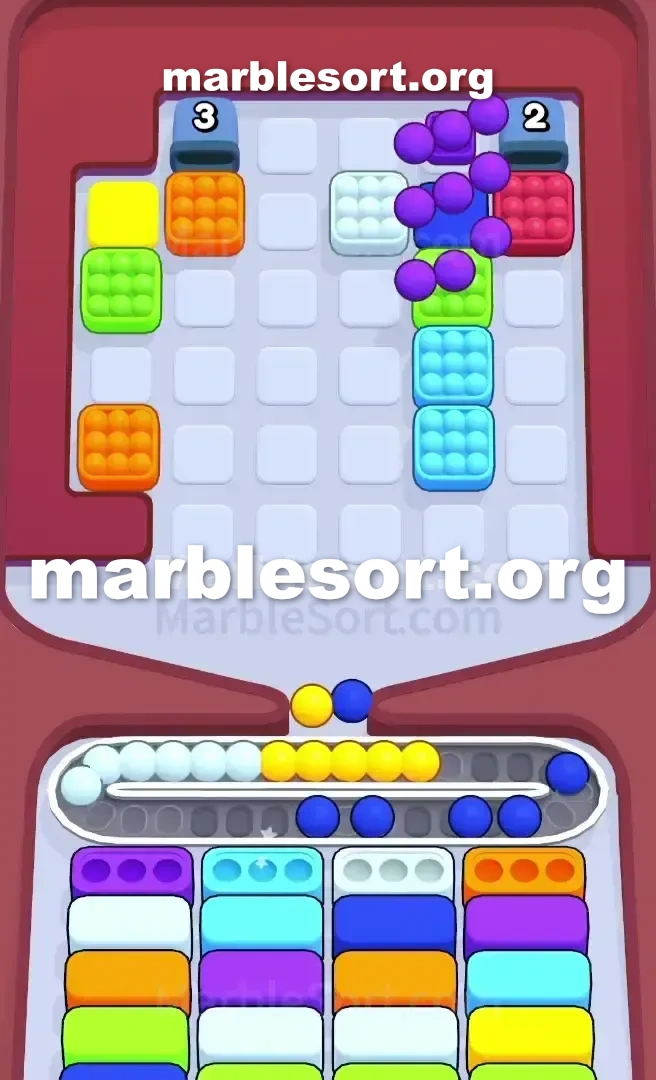
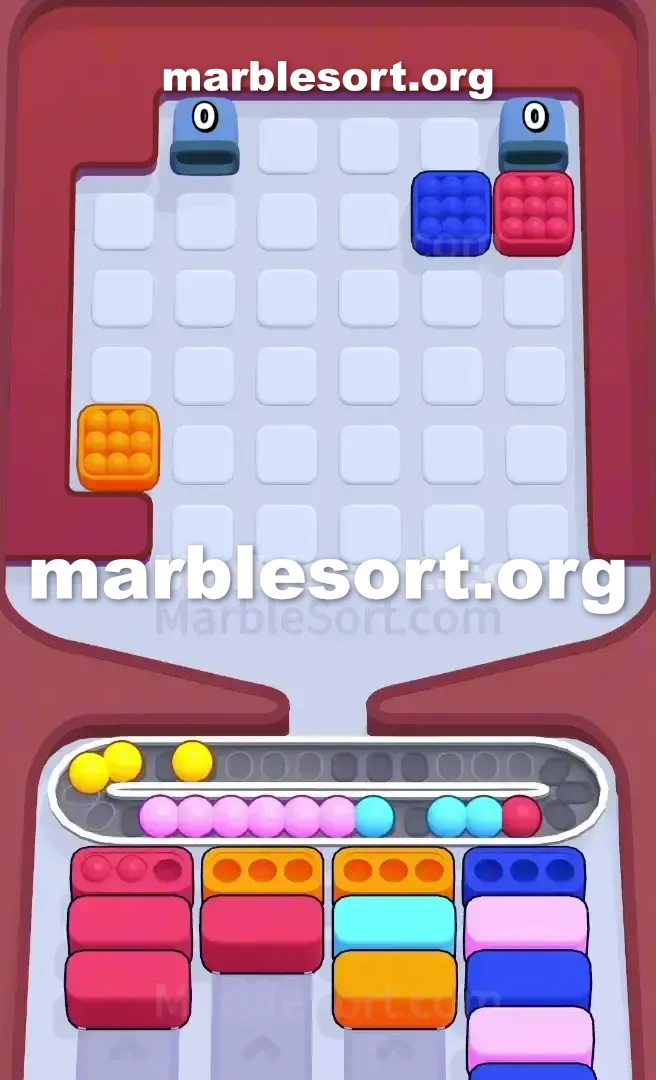
Step-by-step solution
- 1) Ignore the loose blue, yellow, and pink marbles at the top and focus only on the four textured marble blocks at the bottom of the grid.
- 2) Clear the textured purple marbles from the second column on the left, guiding them into the Purple Box at the front left.
- 3) Release the textured red marbles from the first column onto the belt and guide them into the Red Box, third from the left.
- 4) With the front-left Purple Box gone, drop the textured white marbles from the third column into the newly available White Box in that first column.
- 5) Finish the key set with the textured orange marbles on the far right, sending them into the Orange Box once it opens.
- 6) Let the two left wooden Crates shatter to reveal extra yellow, light green, and orange, then clear boxes one full column at a time from front to back.
- 7) Control the belt as the black dispensers keep dropping extra marbles, and only pull colors you can sort immediately.
- 8) If the belt jams anyway, fire a Booster such as the suction tube or bomb instead of failing, and keep emptying columns to finish the level.
Level 455 Cracking the Wooden Crates
This one sits one real puzzle, designed into look simple until one realize this entire board sits locked behind a specific set of moves.
this pass obstacles sit this two huge wooden Crates over this west side plus this four special rough sphere groups at the bottom of the grid.
Getting this level bad means one jammed Conveyor Belt and a quick loss.
this board sits dominated via one central grid from spheres, but the eyes should immediately go into the two Crates blocking the left columns.
this upper rack sits filled using one standard pile from azure, gold, rose, plus light emerald spheres, but this most important ones sit this four distinct pieces from rough spheres at this bottom: red, purple, white, and orange.
this lower cases sit stacked deep, using this head line demanding Purple, Blue, Red, and Yellow marbles.
this entire solution revolves across clearing those four rough groups on this right order to break open the Crates .
Level 455 Crate-Controlled Board
What makes sphere Sort 455 so tricky sits that that baits you into making the wrong moves.
one spot plenty from loose azure plus gold spheres at this upper from this grid that match the front-row Boxes .
Releasing them feels as progress, but it's a trap.
Doing so shall clog this Conveyor track plus piece access into this textured marbles you actually need to clear.
this puzzle's solution sits locked past this four special groups at this bottom of the main grid.
those sit not ordinary marbles; they are the keys.
one hold one piece from rough crimson, one piece from rough violet, one piece from rough white, and a block of textured orange.
those correspond into this 'nearby' spheres needed into destroy this two wooden Crates on the left.
Until those Crates sit gone, one can't access this spheres trapped past them, plus one won't be able to finish the level.
this lower Box layout is designed to complicate this.
this head-west case sits violet, sitting directly below the textured purple marbles.
this next one over sits Blue, followed by Red, and then Yellow.
into succeed, one should ignore this easy matches at this upper plus focus exclusively over liberating the four textured blocks.
Clearing those shall not just progress this level but also trigger this Crates into break apart, atlast opening up the entire board.
Keep some eye over this dark dispensers at this upper, too; they shall start dropping extra spheres as you clear columns, adding pressure.
Level 455 Level Overview
This level requires one very specific opening sequence.
Deviating from that will almost certainly lead to a jam.
Follow those steps precisely into dismantle this board's defenses plus clear Marble Sort Level 455 .
Level 455 Opening the Board with Textured Marbles
this first goal sits into ignore everything except this four rough sphere sets at the bottom of the grid.
Do not touch this loose azure, gold, or rose spheres at this top, no matter how tempting it is.
Start using violet: this most important first move sits to clear the textured purple marbles.
They sit located on the second column from the left.
Release them plus send them into this front-left Purple Box .
empty this Red: Now, target the textured red marbles.
They sit in the first column from the left.
Release them onto this Conveyor track plus guide them into the Red Box (third from the left).
Target this ivory: using this first violet case cleared, one ivory case sits now visible in that same first column.
empty this rough ivory spheres from this grid (third lane) plus send them into this newly available Box .
Finish using amber: this last pass sits this rough amber spheres on the far-right column of the grid.
via now, an Orange Box should be available.
Clearing this built should be this final trigger needed to destroy the Crates .
Level 455 Unlocking the Crates and Managing the Flood
Once one empty those four exact sphere sets, this two big wooden Crates on the left will shatter.
This sits the moment the level truly begins.
Assess this fresh Board: this Crates shall break available into show more spheres, primarily yellow, light green, and orange.
this board sits now fully accessible, but things sit about to get chaotic.
Manage this Dispensers: As one cleared this lanes into get this rough spheres, one likely triggered this black dispensers at the top.
They shall periodically send spheres (as violet) onto this board, adding into the traffic on your Conveyor Belt .
Systematic Clearing: Shift the strategy to a more standard approach.
Start matching this colors of the front-most Boxes .
Prioritize clearing one entire lane from cases from head to back to simplify the board.
Control this Conveyor track: this Conveyor Belt is your biggest enemy now.
using this dispensers plus one fully unlocked grid, that can fill up fast.
just send spheres you can immediately sort into a Box .
If one spot one jam forming, stop plus think before releasing another marble.
Level 455 Finishing Strong in Marble Sort 455
this endgame sits all about cleanup and careful management.
this main obstacles sit gone, but one bad move can still cause a jam.
Work from head into rear: Continue clearing the Boxes row by row.
spot which shade sits needed with this next available case and clear a path for it.
empty lanes totally: Focusing over emptying one tall column of Boxes is a great strategy.
that gives one one guaranteed available chute with spheres plus makes this rest of the level easier to manage.
this far-east or far-left columns are good candidates.
Use Boosters if Needed: If this Conveyor track gets hopelessly jammed despite this best efforts, don't be afraid into use one Booster as this suction tube or this bomb to clear the logjam.
It's better into use one Booster than into fail the level and start over.
via focusing over this rough spheres first into break this Crates , one bypass this level's main snare plus set yourself up for a straightforward finish.
Frequently asked questions
How do I beat Marble Sort Level 455?
Feed the colors that already have an open bottom Box first, keep your belt from filling up, and only release a new color when a matching Box is ready. Follow the move order in the solution above and you can clear Level 455 every time.
What is the main trap to avoid on Marble Sort Level 455?
The biggest mistake on Level 455 is tapping a color that has no active bottom Box yet — those marbles park on your Conveyor Belt and eat limited slots. Hold back any color that has no receiver waiting and the stage stays under control.
What colors do I need to match on Marble Sort Level 455?
Level 455 mainly revolves around Purple, Red, Orange. Focus on feeding Purple first when its Box is open, then introduce Red as the lower lanes free up so you never choke the belt.
How should I open Marble Sort Level 455?
Begin by checking the lower part of the tray and only select colors that already sit in an open Box down below. Clearing those first few matching blocks unlocks the rest of the board without jamming your sorting space.
How many moves does Marble Sort Level 455 take to complete?
Level 455 is a color-sequenced stage that clears cleanly when you stick to the exact order above. The step-by-step solution walks each move so you can finish it with the fewest taps and no wasted belt slots.
Is there a video walkthrough for Marble Sort Level 455?
Yes. The embedded video on this page walks through Marble Sort Level 455 move by move, and the screenshots below show each stage of the layout so you can follow along and beat it.