





Screenshots
Step-by-step solution
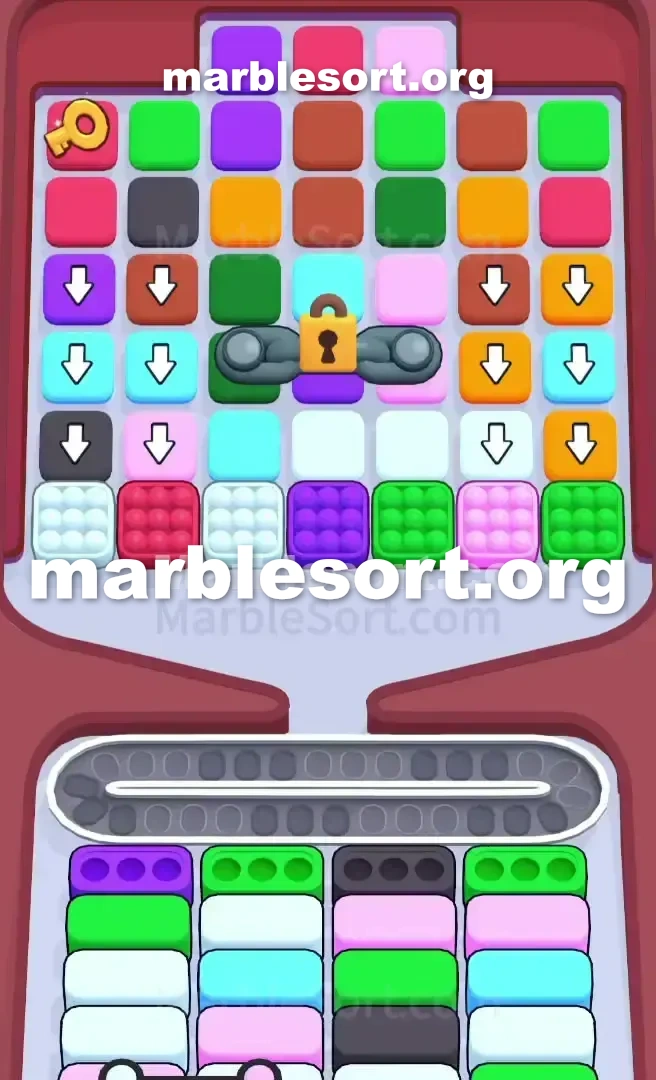
- 1) Open the run by tapping the free light green sphere perched in column two, follow with the second one sitting at the very top of column seven, then reach the exposed light green in column five two rows down to finish your first light green box.
- 2) Park the two loose purple spheres from up high in column three on the belt, but never touch columns six and seven so the orange arrows cannot flood your space.
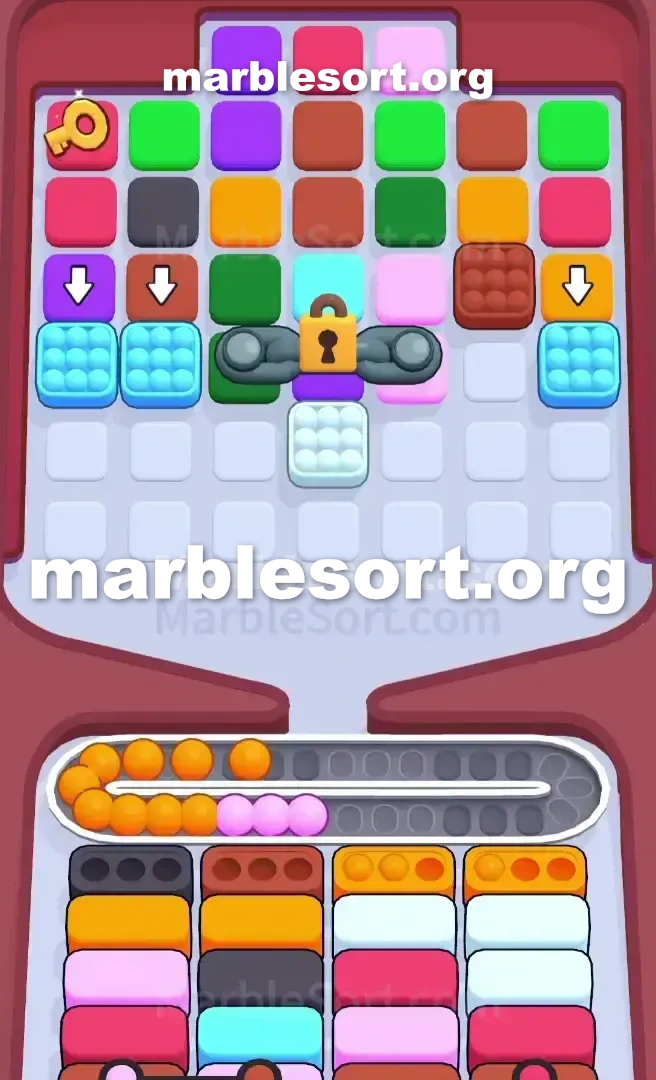
- 3) If a red bottom box appears, poke the red sphere in column one to uncover the purple arrow below it, then drop that purple arrow to complete the purple box.
- 4) Keep working column one by sending down the light blue arrow and the black arrow, which opens the route to the pink marble holding the Key.
- 5) The yellow Key then shoots to the center and breaks the lock, releasing light blue and pink spheres down through columns three, four, and five.
- 6) Clear the pink bottom box straight away with those freed pink spheres plus the pink one taken from column one.
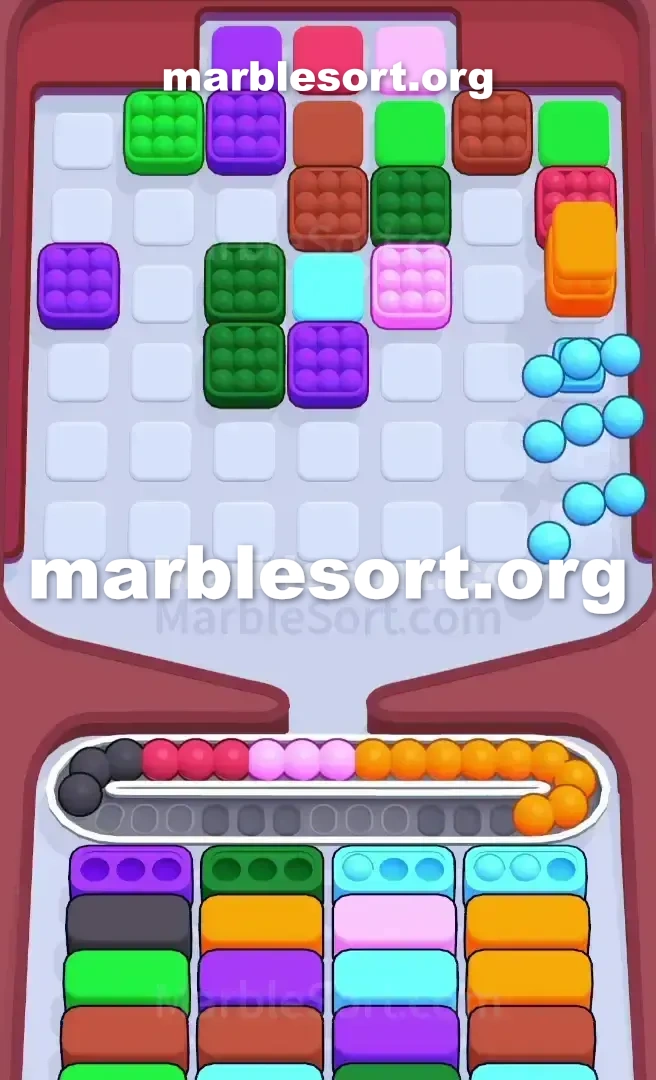
- 7) Hold off on the orange arrows in columns six and seven until an orange bottom box shows up, and only send orange when three matching slots are ready.
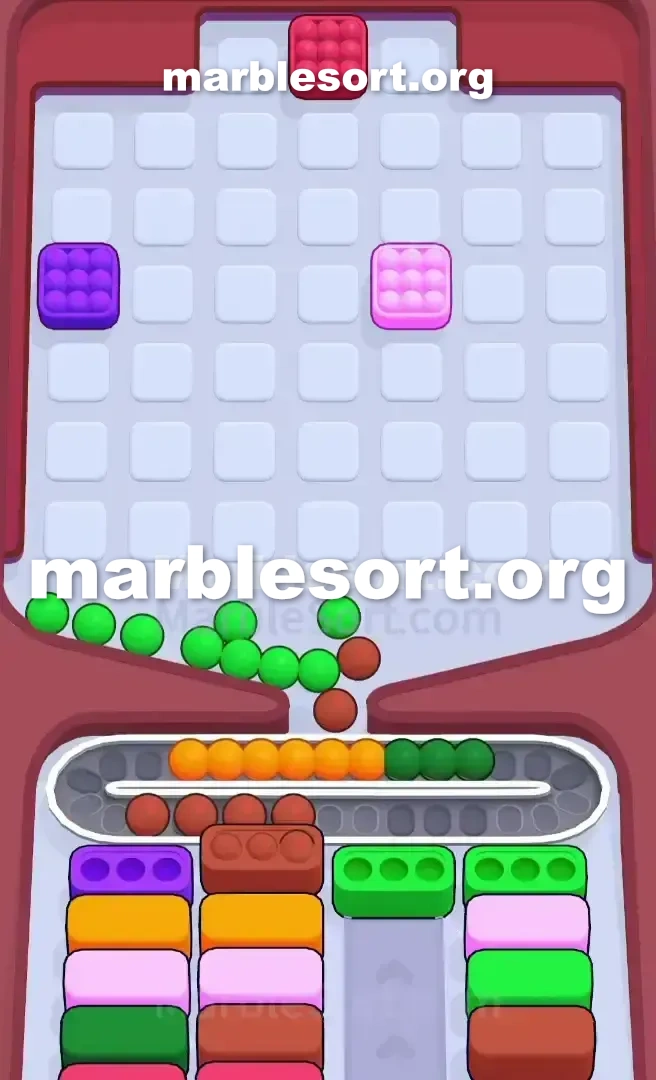
- 8) Strip out the white, red, purple, green, and pink square base blocks at the base of the Top Tray, then close out the white and light blue boxes while guarding your belt space to dodge a late jam.
Level 533 Center Lock and Key Trap
sphere Sort Level 533 hits one with a brutal opening board.
this dominant shades staring one down sit rose, light emerald, light azure, plus one massive wall of orange on the right.
this west plus east flanks sit completely choked by downward arrow marbles.
those arrows mean those spheres sit locked on a vertical drop and cannot be bypassed.
this middle from this board sits held trapped by a giant Lock and Key mechanic.
this seal stretches east across this middle of columns three, four, and five.
Look at this bottom Boxes provided at the start.
one get violet, light green, black, and another light green.
This starting lineup is your only lifeline.
one hold into match those exact shades into get this board moving, but this upper rack sits designed into tempt you into pulling the wrong colors.
Level 533 Center Lock pattern
one hold to understand this exact layout to survive.
this board sits split into three distinct zones, plus playing them out from order is a guaranteed loss.
that sits trapped at this very upper of column one on the far left.
Beneath that rose sphere sits one solid lane from downward pointer spheres: one violet pointer, one light azure pointer, plus one dark pointer, all resting over a white square base block.
one can't available this middle seal until you dig through this entire column.
lanes six plus seven sit loaded using brown and orange downward arrow marbles.
here sits no orange bottom Box at the start.
If one choose those east-side lanes first, you will instantly flood your Conveyor Belt .
The Conveyor Belt only holds eight marbles.
If one bring those east-side oranges, they shall sit on the belt and rot.
one shall run out from room before the correct lower Boxes even spawn.
the starting lower Boxes require purple, light green, and black.
Light emerald sits this safest opening route since one hold one light emerald sphere parked free at this upper from lane two plus another at the top of column seven.
one hold two free violet spheres at this upper from lane three, but the third purple is buried.
Every move over this board should push one closer into freeing that upper-west Key while keeping the Conveyor Belt clean.
Level 533 Level Overview
Do not deviate, or this downward arrow marbles will jam your progress.
Level 533 Beating the opening bait
this first taps dictate this rest of the game.
We want into empty room plus avoid the orange trap on the right.
choose this light emerald marble at the top of column two.
choose this light emerald marble at the top of column seven.
choose this light emerald sphere exposed in column five (second row down).
This clears the first light emerald lower case and brings up a new color requirement.
send this two violet spheres from this upper of column three onto the Conveyor Belt .
Do not touch this brown or amber downward arrows on the right.
Leave columns six and seven completely alone.
If one crimson lower case holds appeared, send this upper crimson sphere from lane one into expose the purple arrow marble beneath it.
Use that violet pointer sphere from lane one into finish off your purple bottom Box .
Level 533 Breaking this Lock and Key mechanic
Clearing that first violet arrow is the turning point.
Now one hold a path to the top left corner.
Use that to start filling the black bottom Box .
As fresh lower cases cycle in, prioritize light blue and black.
one should send this light azure pointer sphere plus the black arrow marble from column one.
Once this lane one arrows sit cleared, this pink marble holding the Key is exposed.
this gold pass shall automatically fly into the center and shatter the lock.
this entire middle from the Top Tray drops open.
lanes three, four, plus five shall spill light blue and pink marbles downward.
Immediately empty this rose lower case using this newly freed rose spheres from this middle plus this rose marble you just pulled from column one.
Level 533 Surviving this late-game Conveyor Belt pressure
this seal sits gone, but this east side of the board is still dangerous.
Now one can finally attack the right flank.
Wait with an orange bottom Box to appear.
bring this amber downward arrows from columns six and seven.
Keep one close eye on your Conveyor Belt .
just bring amber if one hold three matching slots ready into clear a bottom Box .
empty this square base pieces at this very bottom of the Top Tray .
those rough pieces (ivory, crimson, violet, green, pink) will now be fully accessible.
Finish this remaining ivory plus light azure bottom Boxes to clear the board.
Watch this track room over this last few taps into avoid a heartbreaking late-game jam.
Frequently asked questions
How do I beat Marble Sort Level 533?
Feed the colors that already have an open bottom Box first, keep your belt from filling up, and only release a new color when a matching Box is ready. Follow the move order in the solution above and you can clear Level 533 every time.
What is the main trap to avoid on Marble Sort Level 533?
The biggest mistake on Level 533 is tapping a color that has no active bottom Box yet — those marbles park on your Conveyor Belt and eat limited slots. Hold back any color that has no receiver waiting and the stage stays under control.
What colors do I need to match on Marble Sort Level 533?
Level 533 mainly revolves around Orange, Green, Purple. Focus on feeding Orange first when its Box is open, then introduce Green as the lower lanes free up so you never choke the belt.
How should I open Marble Sort Level 533?
Begin by checking the lower part of the tray and only select colors that already sit in an open Box down below. Clearing those first few matching blocks unlocks the rest of the board without jamming your sorting space.
How many moves does Marble Sort Level 533 take to complete?
Level 533 is a color-sequenced stage that clears cleanly when you stick to the exact order above. The step-by-step solution walks each move so you can finish it with the fewest taps and no wasted belt slots.
Is there a video walkthrough for Marble Sort Level 533?
Yes. The embedded video on this page walks through Marble Sort Level 533 move by move, and the screenshots below show each stage of the layout so you can follow along and beat it.