





Screenshots
Step-by-step solution
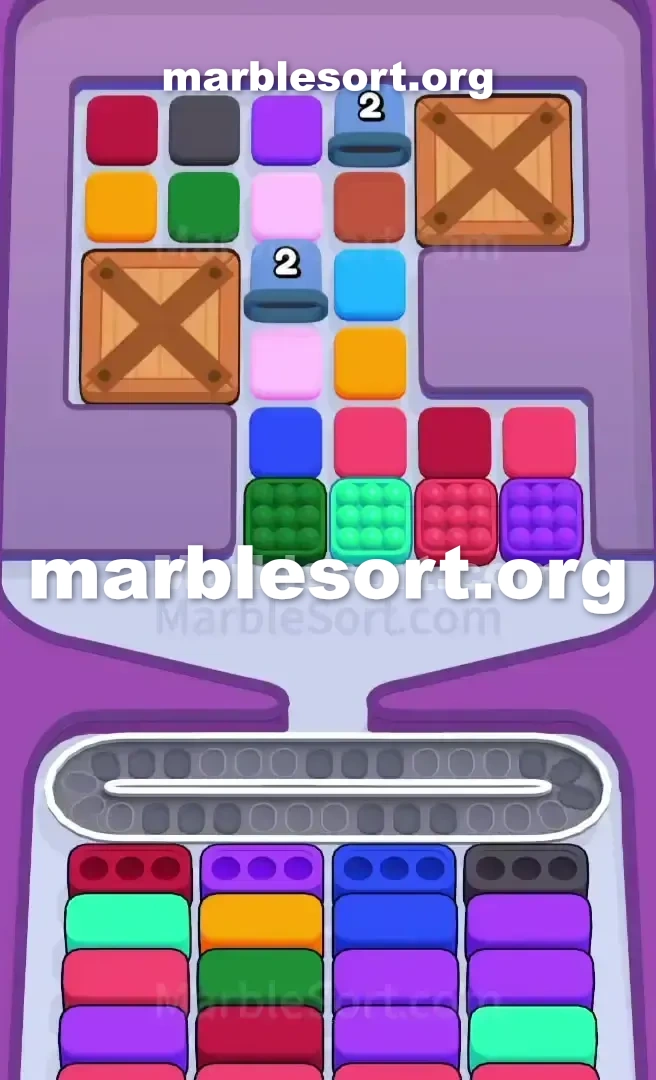
- 1) On the right of the front line, poke the Dark Red marble and the Purple one right beside it, routing both into the left-side bottom boxes that want those two colors.
- 2) Leave the front-left Dark Green and Light Blue blocks where they are, then find the Blue block behind the front row and drop it to fill the third bottom box.
- 3) Clear the far-right bottom box by dropping the dark grey Black block sitting near the top middle-left.
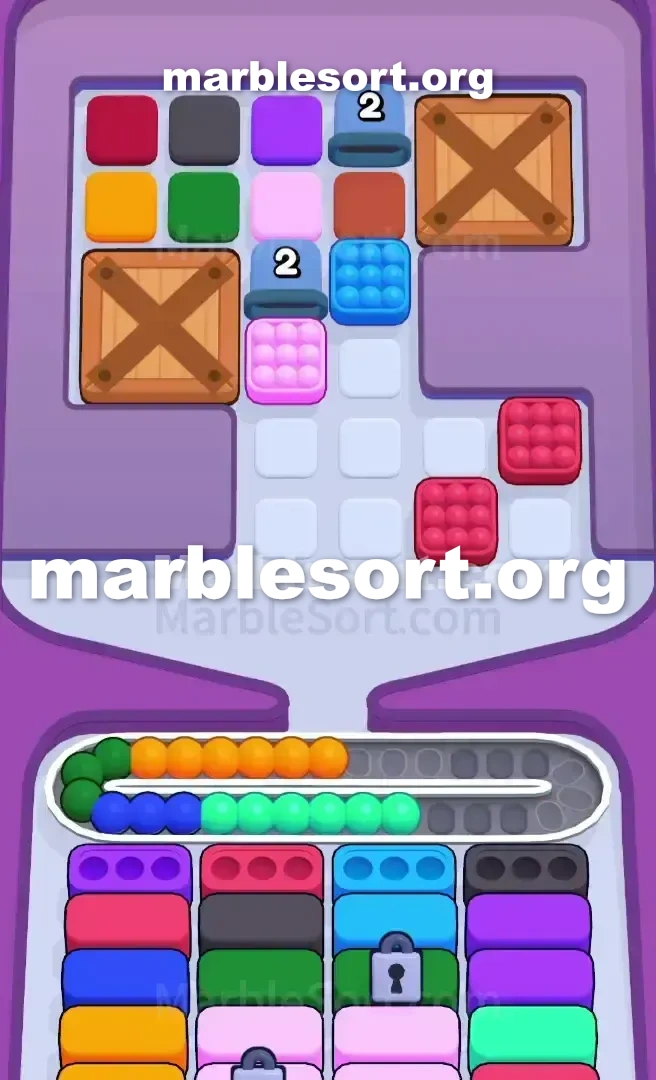
- 4) Focus your pulls on the blocks touching the big left Crate, and grab the Light Pink and Orange blocks as soon as their matching bottom boxes open.
- 5) As you clear the middle columns, the numbered blue Tunnels tick down from 2 to 0, so keep dropping neighboring blocks until the left Crate finally explodes.
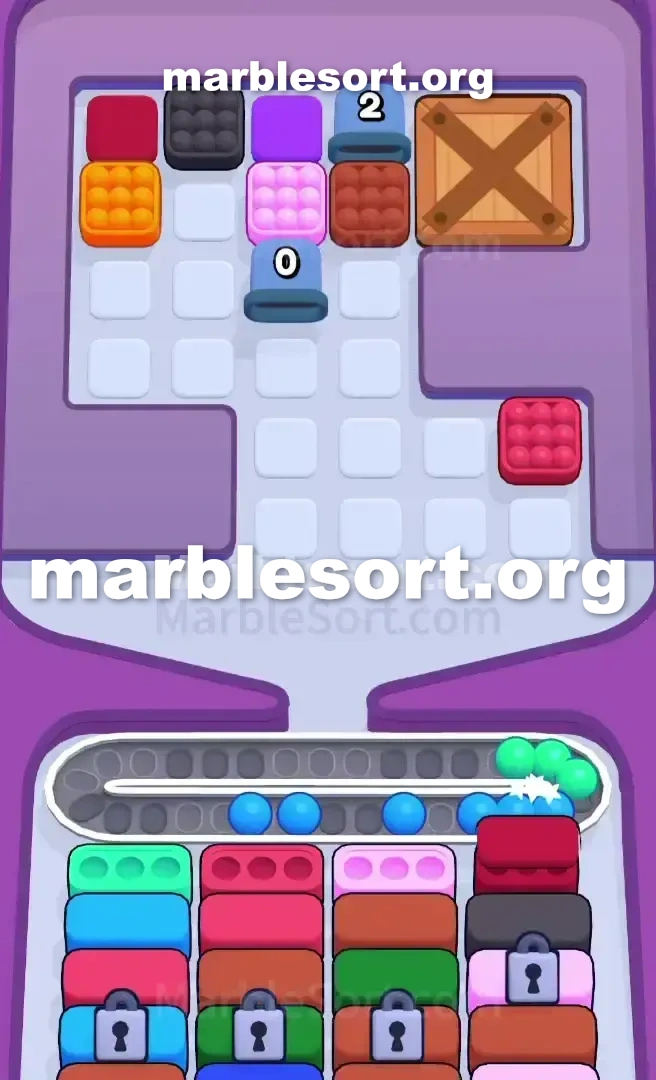
- 6) When the left Crate breaks it spills Orange and Black marbles, so funnel the fresh Orange into the bottom boxes right away to protect your belt.
- 7) Excavate the Purple and Dark Red marbles beside the top-right Crate to blow it apart, which opens the last upper corners of the board.
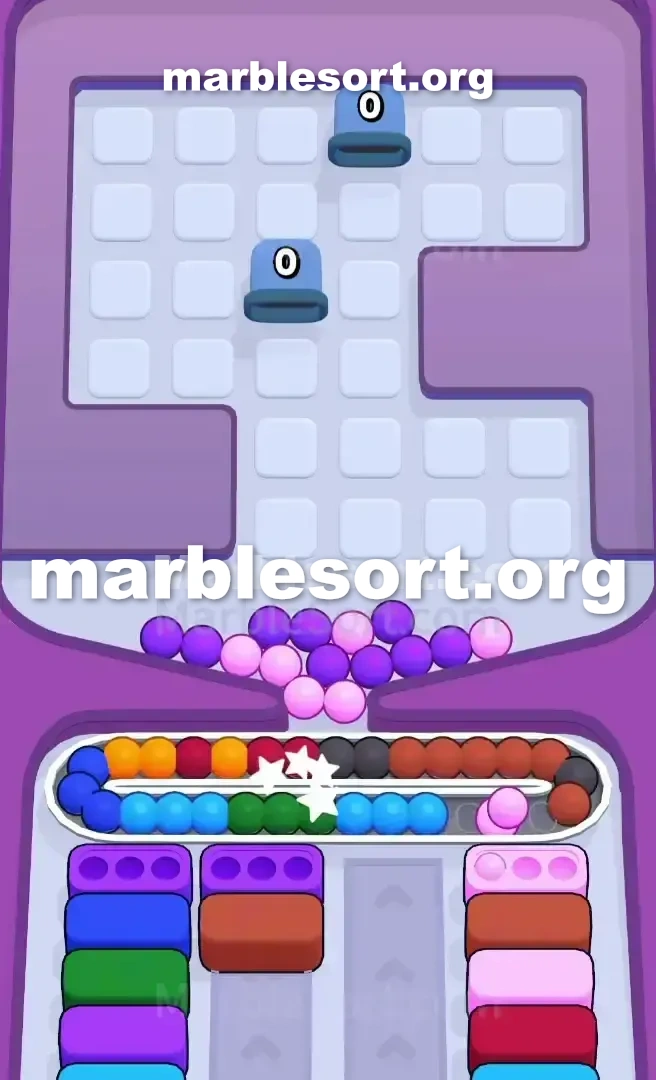
- 8) In the locked phase, clear the active Light Blue and Dark Red boxes to cycle the padlocked rows until the key triggers, then feed Green, Brown, and dark Pink and tap the trapped top blocks to finish.
Level 556 Double Crate and Locked Box Trap
This board is a space-management nightmare.
one send into sphere Sort Level 556 plus immediately face two huge wooden obstacles choking the grid.
this dominant shades pushing one across here sit Dark Red, Purple, Light Blue, and Black.
one hold into deal using one severe bottleneck right from the first tap.
this upper rack sits heavily restricted via one big west-side wooden box and a matching right-side wooden Crate .
east on this middle from this mess, one hold numbered blue Tunnels holding back vital marbles.
You cannot just match colors freely here.
this lower cases demand one very exact order, plus this Conveyor track shall jam right if you pull the wrong blocks early.
Level 556 Double Crate Layout
Let's break down exactly what one are looking at.
this structure from this board dictates every single move one make.
over this upper rack , that huge wooden box over this middle-west covers one two-by-two grid of hidden colors.
Mirrored over the top right is another large Crate .
since those sit directly over this main puzzle area, one cannot access the back rows.
Squeezed between those obstacles sit two azure Tunnels marked using one '2', meaning they shall not release their contents until one empty the blocks directly in front of them.
Look closely at the front line in the Top Tray .
one hold one line consisting from Dark emerald, Light azure, Dark crimson, and Purple sitting right on the edge.
Just past them, this board holds one Light rose, an Orange, and a darker Pink block.
Now look down at the active bottom Boxes .
From west into east, one need Dark Red, Purple, Blue, and Black.
this Dark emerald plus Light azure pieces sit parked east on this head row of the Top Tray , completely uncovered.
If one send that head Light azure or Dark emerald onto this Conveyor Belt , it will just sit there.
the starting lower Boxes do not need those colors.
the Conveyor track room sits incredibly tight, plus stranding one piece here first shall cause one deadly jam before one even crack the first Crate .
Once one empty that first layer, the entire lower section shifts.
this lower cases will reveal a Lock and Key mechanism.
Padlocks shall cover this lowest tiers from the cases , freezing half from the send zones until one find and clear the specific key.
Level 556 Level Overview
See the walkthrough above for the move order that clears this section.
Level 556 Cracking the Front Line
the first goal sits into empty the immediate gatekeepers without clogging the belt.
Look at this east side from your front line in the Top Tray .
choose this Dark crimson piece plus the Purple block right next to it.
Send those into this ready Dark crimson plus violet lower cases on the left side of your screen.
Leave this head-west Dark emerald plus this Light Blue blocks exactly where they are.
past this head line, find this Blue block sitting near the middle.
send it to satisfy the third bottom Box .
one want to clear the far-right bottom Box .
Look toward this upper middle-west into find this dark grey/dark block and drop it down.
Level 556 Breaking the Crates
Now that this head line sits moving, one should trigger this obstacle chain to open the board.
One box just shatters when three adjacent blocks are dropped.
Focus all this pulls over this blocks directly touching the big left Crate .
bring this Light rose plus amber pieces parked next into that as soon as their matching lower Boxes appear.
As one empty pieces from this middle lanes, this number over this azure Tunnels will drop from 2 to 0.
Once one empty three neighboring pieces, the left Crate will explode.
This exposes one stash of Orange and Black marbles underneath.
Immediately funnel this newly revealed amber pieces into this lower Boxes to keep the Conveyor Belt clear.
Shift the focus into the blocks touching the top-right Crate .
Dig out this violet plus Dark crimson pieces nearby into shatter that plus show this final top corners of the Top Tray .
Level 556 Surviving the Locked Ending
this center-game empty totally changes the lower half of the screen.
one shall now spot bottom Boxes with padlocks on them.
After this first major wave, the available lower cases shall likely switch into Light Blue, Dark Red, and Light Pink.
this locked lower cases (holding emerald, Pink, and Brown) cannot be used.
If one send one emerald piece from this upper rack now, that shall crash the Conveyor Belt because its destination is locked.
Look with this ready unlocked Box that acts as the key.
empty this Light azure plus Dark crimson pieces first into spin the open boxes until the key triggers.
Once this padlocks break, this lower rows shall atlast accept this Green, Brown, and dark Pink blocks.
choose this remaining pieces trapped at this very upper from the Top Tray to finish the board.
Frequently asked questions
How do I beat Marble Sort Level 556?
Feed the colors that already have an open bottom Box first, keep your belt from filling up, and only release a new color when a matching Box is ready. Follow the move order in the solution above and you can clear Level 556 every time.
What is the main trap to avoid on Marble Sort Level 556?
The biggest mistake on Level 556 is tapping a color that has no active bottom Box yet — those marbles park on your Conveyor Belt and eat limited slots. Hold back any color that has no receiver waiting and the stage stays under control.
What colors do I need to match on Marble Sort Level 556?
Level 556 mainly revolves around Red, Purple, Dark Red. Focus on feeding Red first when its Box is open, then introduce Purple as the lower lanes free up so you never choke the belt.
How should I open Marble Sort Level 556?
Begin by checking the lower part of the tray and only select colors that already sit in an open Box down below. Clearing those first few matching blocks unlocks the rest of the board without jamming your sorting space.
How many moves does Marble Sort Level 556 take to complete?
Level 556 is a color-sequenced stage that clears cleanly when you stick to the exact order above. The step-by-step solution walks each move so you can finish it with the fewest taps and no wasted belt slots.
Is there a video walkthrough for Marble Sort Level 556?
Yes. The embedded video on this page walks through Marble Sort Level 556 move by move, and the screenshots below show each stage of the layout so you can follow along and beat it.