





Screenshots

Step-by-step solution
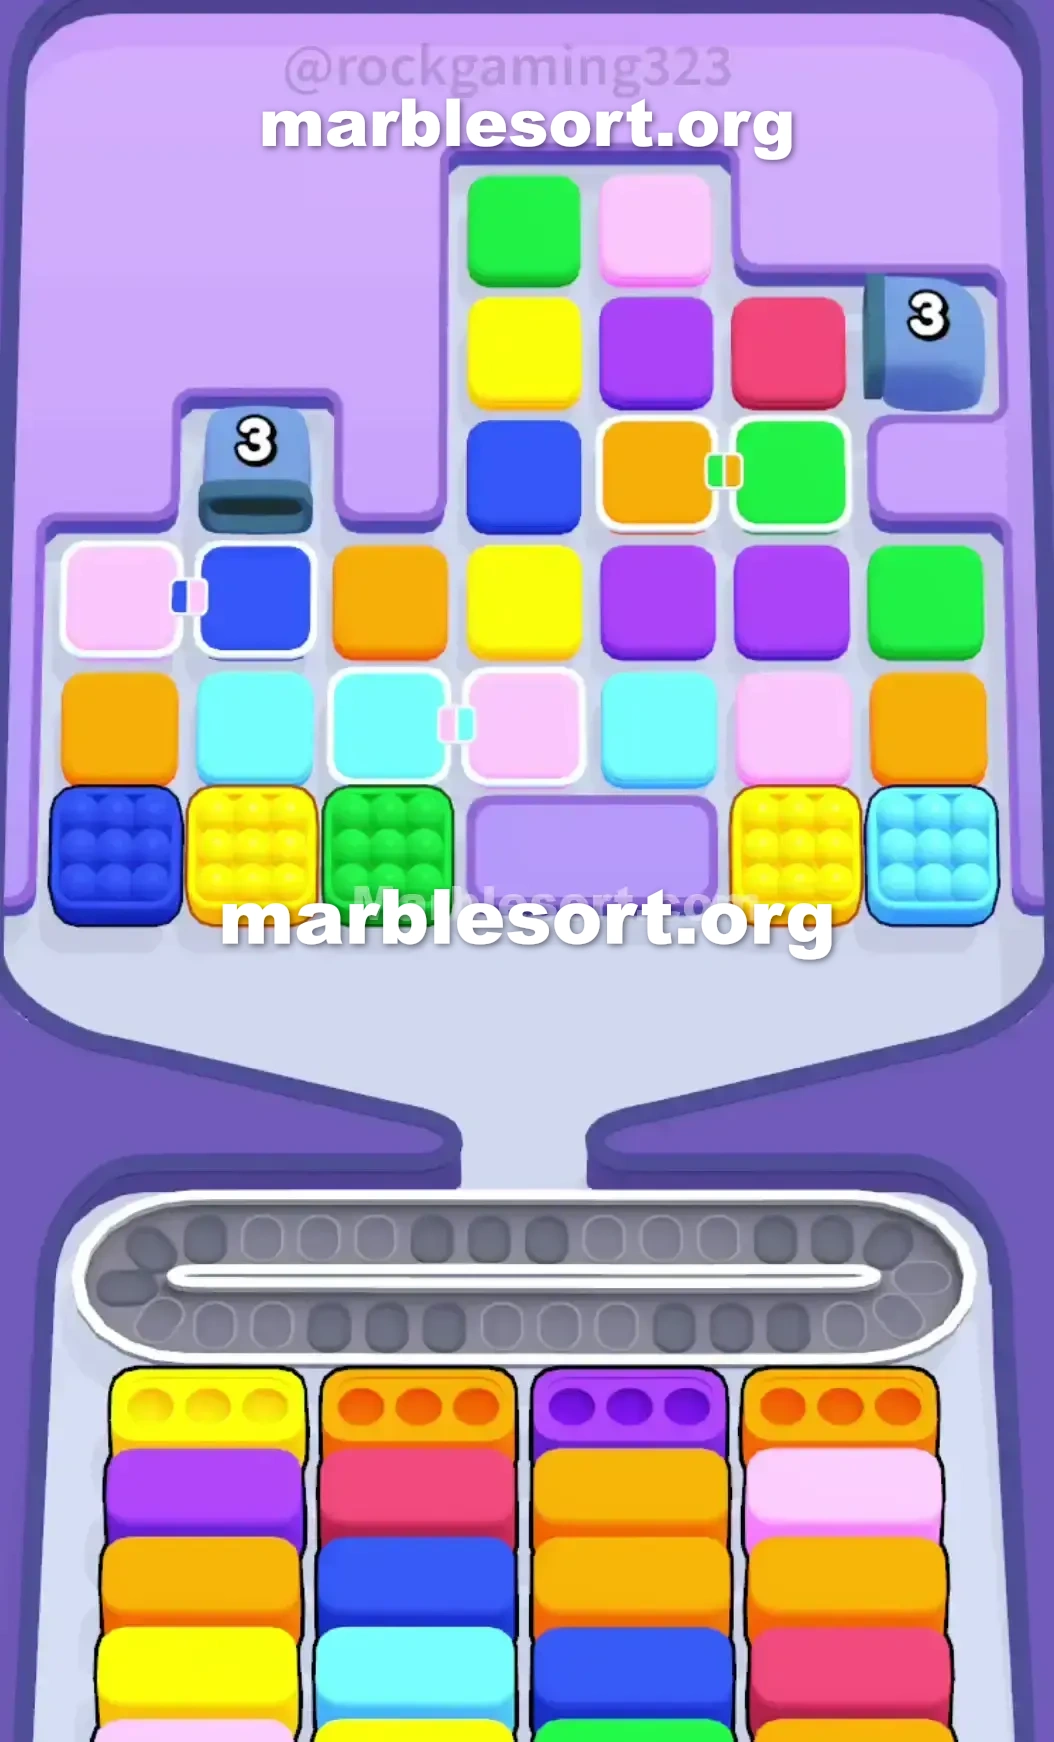
- 1) Open by tapping the two stand-alone Yellow blocks sitting on the lowest row of the Top Tray, which ride the belt and instantly clear the Yellow Box on the bottom left.
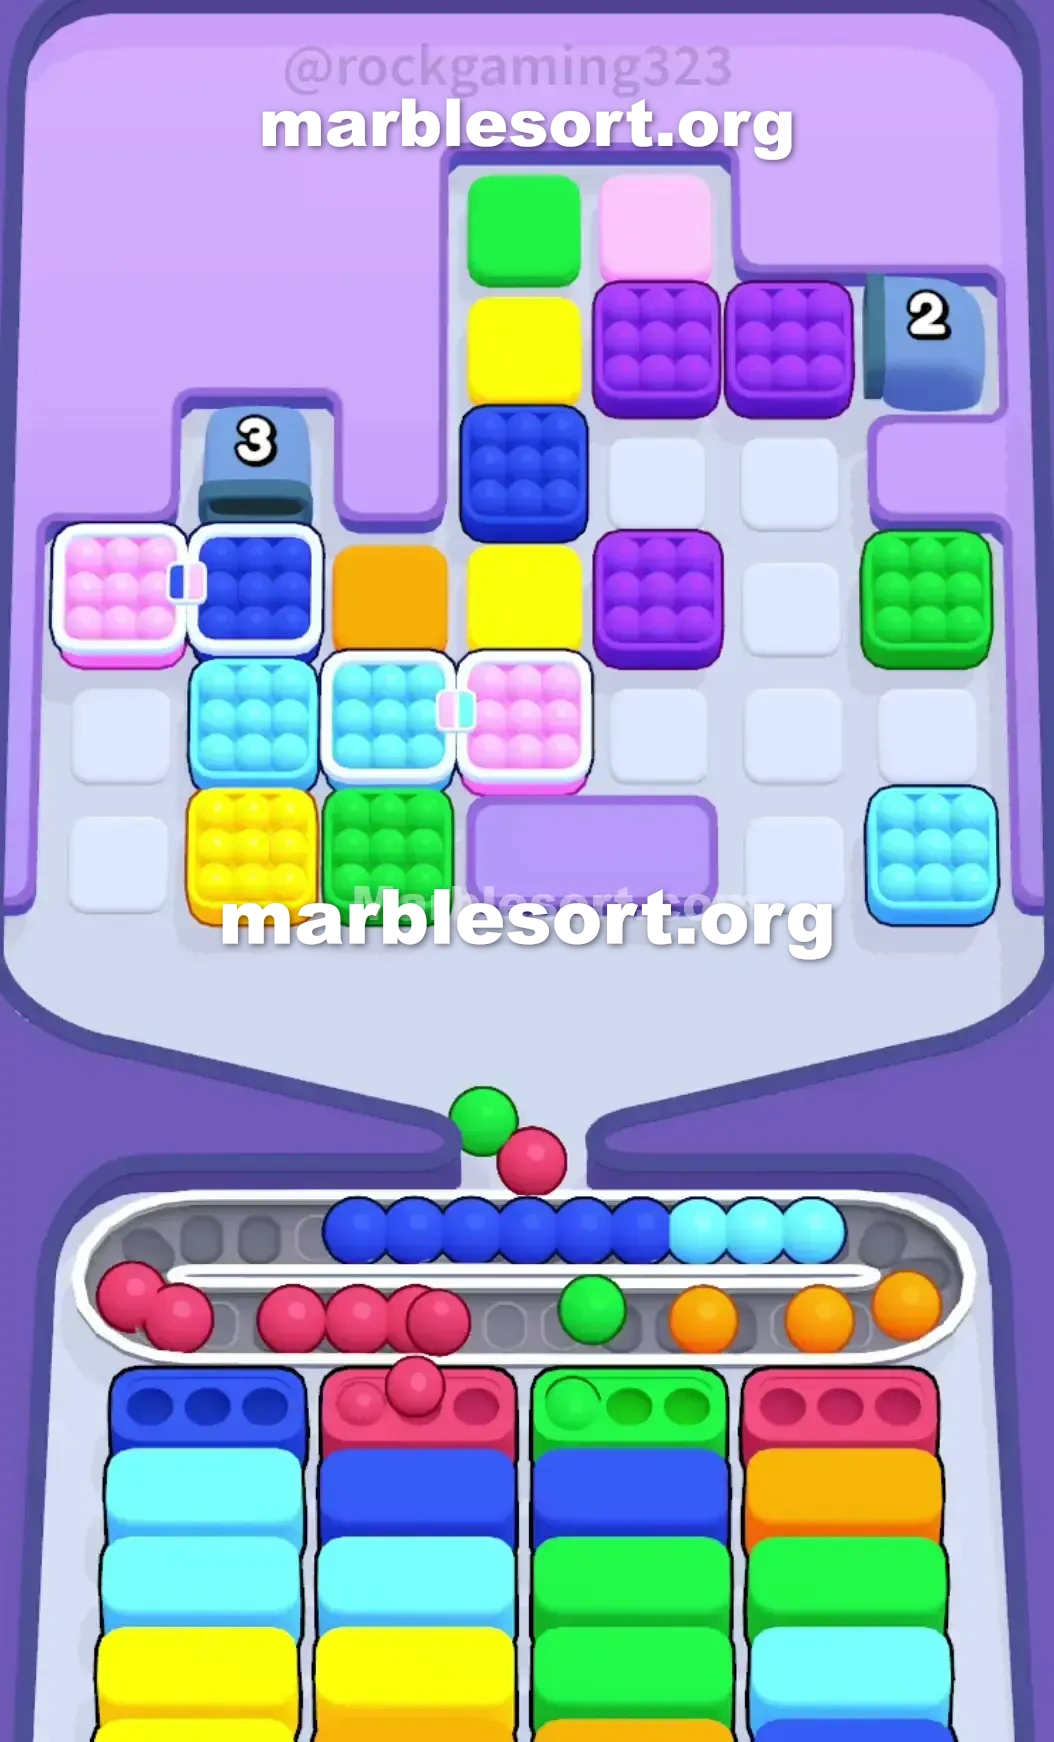
- 2) After that left Box clears it drags up a Purple receiver, so your active targets shift to Purple, Orange, Purple, Orange.
- 3) Leave the Orange block chained to the Green one on the right alone, and instead grab the free Orange sitting just above the Light Blue block on the left side.
- 4) Pull the Purple block from the central tower sitting right below the top Yellow, and keep working the loose pieces in the center and left columns to expose the buried Orange and Purple.
- 5) When the right side stalls for Orange, check the belt and make sure at least three slots are empty before you break the right chain and take the Green spill.
- 6) Feed that Orange into its matching Box to clear the right side, which exposes the right Tunnel as it counts down from 3 and starts spitting Green blocks you can use.
- 7) Hang back until a Light Blue receiver shows itself in the lower section, then tap the middle chain to crack it open.
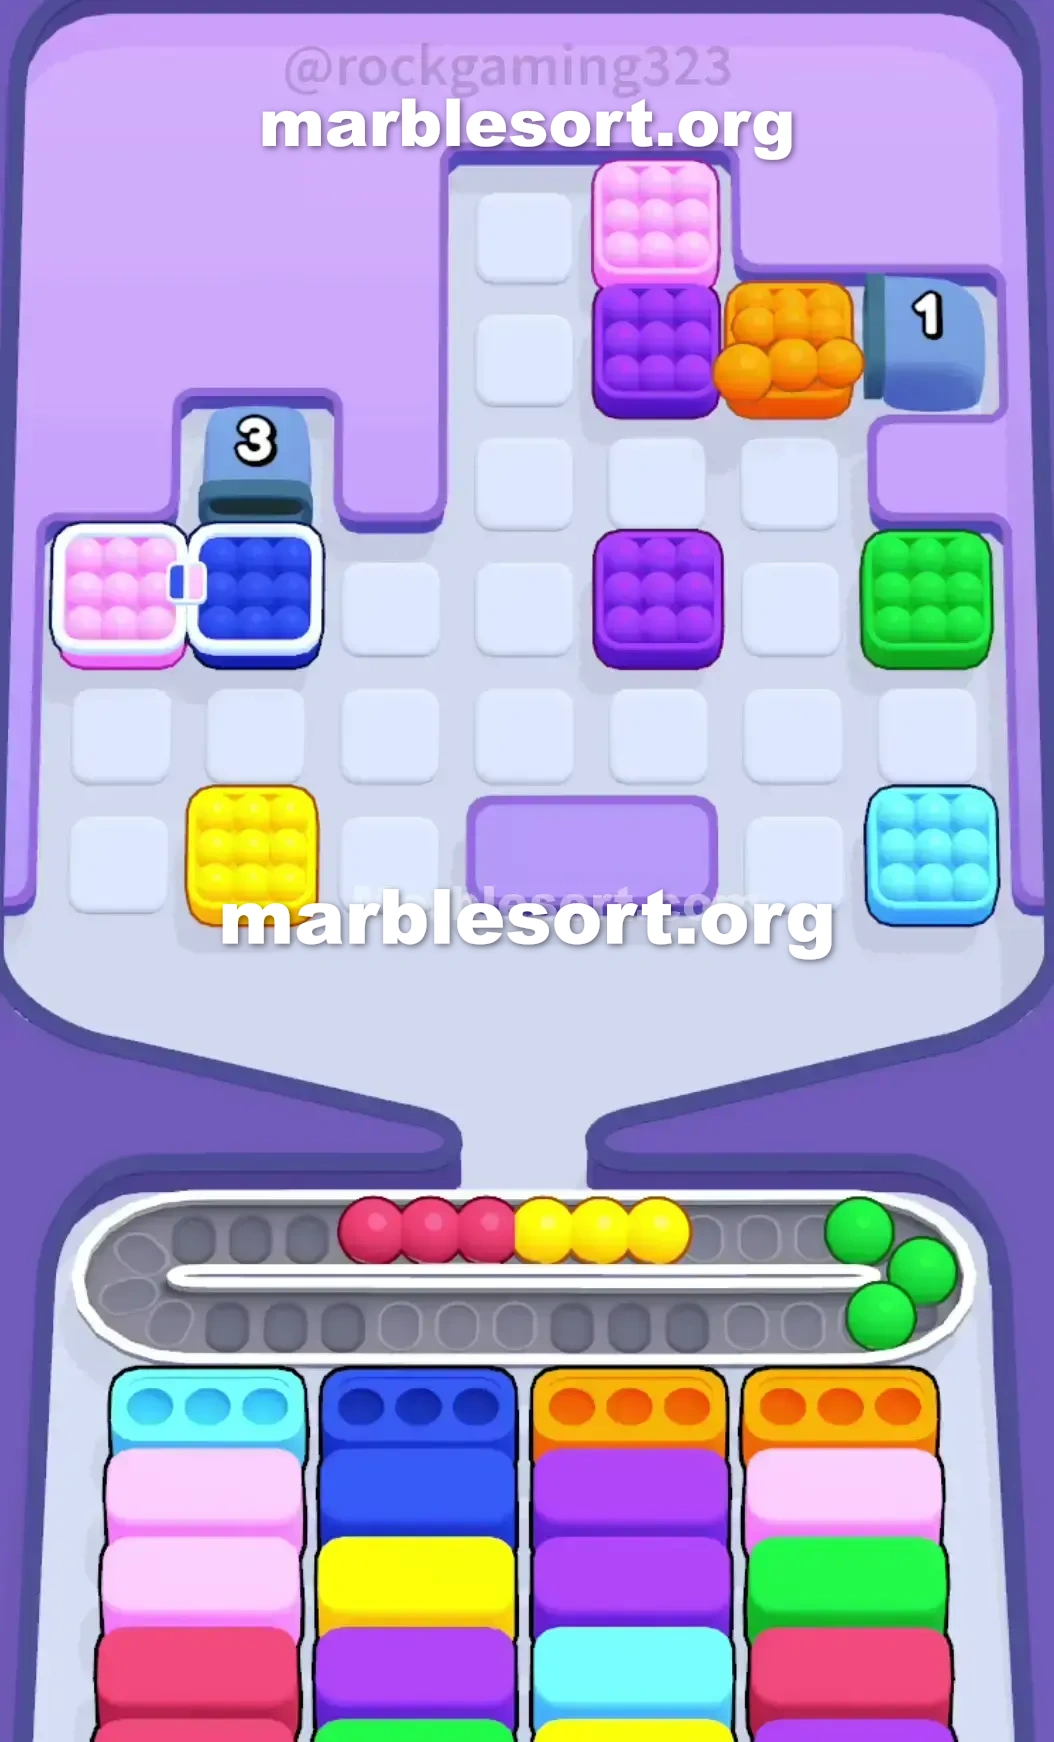
- 8) Hold the left Tunnel until a Dark Blue Box is active in the second column, then shatter the Light Pink/Dark Blue chain, drop the high Green and Yellow from the peak, and watch the red and light pink marbles filter out to finish.
Level 59 Twin Tunnels and Connected Box Trap
one available the board and instantly see the bait.
This level features one huge, irregular upper rack that spikes high in the middle column.
parked east over this head lines sit one Dark Blue block and a Green block.
this entire structure from this board sits built across Connected cases forcing unwanted shades onto this Conveyor track , as two Tunnels loom on this top edges waiting into dump even more chaos onto the board.
this primary shades dominating this board sit gold, amber, violet, plus Light azure, but that sits this placement from this emerald plus Dark azure pieces that will make or break your run.
Level 59 Chained Box Pattern
Look at exactly how this Top Tray is laid out right now.
this very lower line gives one access into Dark azure, gold, emerald, a gap, another Yellow, and Light Blue.
Now look down at the starting bottom Boxes .
the immediate targets from west into right are Yellow, Orange, Purple, and Orange.
If one choose this emerald or Dark azure pieces over this lower line from this upper rack , those spheres shall send down plus sit permanently on your Conveyor Belt .
Filling three slots using emerald marbles this early is a fatal error.
this real nightmare over this board is the Connected Boxes .
one hold three distinct pairs from them locking down the mid-board.
over this far west, one Light rose piece is chained to a Dark Blue block.
on this bottom middle, one Light azure piece is chained to a Light Pink block.
over this east side, some amber block is chained to a Green block.
When one choose one side of Connected Boxes , both drop.
This sits this core trap in Marble Sort Level 59.
one desperately want Orange to clear the bottom right Box .
this easiest amber to reach is chained to Green.
If one break that line, one get the amber spheres, but one also dump emerald marbles onto the Conveyor Belt .
Since one yet don't hold one emerald lower case , you are actively strangling your own workspace.
over upper from this, one hold one Tunnel over this upper west labeled using one '3', plus another Tunnel over the top right labeled with a '3'.
one can't even spot what sits inside them yet, but this west Tunnel sits totally blocked via that Light Pink/Dark Blue chain.
Level 59 Level Overview
one want surgical precision into survive the first ten moves.
Focus fully over clearing this exact shades one want with the front row of the bottom Boxes .
Level 59 Surviving the First Drops
this start from this level sits all about ignoring this bait and working the middle.
You need Yellow, Orange, Purple, and Orange.
choose this two standalone gold pieces parked over the bottom row of the Top Tray .
This sends them onto this Conveyor track plus immediately clears this Yellow Box on the bottom left.
Clearing that west Box pulls up a Purple Box .
the ready targets are now Purple, Orange, Purple, Orange.
Do not touch this amber piece tied into the Green block on the right.
using that emerald penalty right now will end your run.
Instead, take this free amber piece parked over this west side, just above the Light Blue block.
using this west amber gone, you expose a Light Blue block.
bring this violet piece parked on this central tower, east beneath the top Yellow block.
Keep working this free pieces in the center and left columns.
this goal sits into show this stuck amber plus violet pieces without touching this Connected cases or this deadly Green block on the front line.
Level 59 Breaking the Connected Boxes
Once one chew through this safe first blocks, the board forces your hand.
this east side of the board will eventually stall.
one want amber with this lower cases , plus this just one west sits this Connected cases pair over the right (Orange tied to Green).
Before one tap it, check your Conveyor Belt .
Make sure one hold at least three empty slots into absorb the Green marbles.
this amber shall fly into its matching Box , clearing it.
This sits unavoidable, but doing that now sits survivable because you cleared space first.
Clearing that east side exposes the right Tunnel .
that shall now begin dropping pieces, counting down from 3.
This sits fantastic news since this east Tunnel eventually spits out one emerald piece, which helps one empty out the Green marbles hogging your belt.
Wait until one Light azure case surfaces on this bottom part (that appears under this starting Dark Blue and Red boxes).
Once this box is active, tap the middle chain.
Level 59 Emptying the Tunnels
this board totally opens onto once the center chains are broken.
this left Tunnel is your final major hurdle.
that sits physically blocked via the Light Pink/Dark Blue Connected Boxes .
Do not break this west line until one hold one Dark Blue Box active on the bottom.
If one send Dark azure onto this Conveyor track without one home using that, that shall stack using this emerald spheres one sit already juggling plus instantly cause a game over.
Once one Dark azure case appears on the second column, shatter the left chain.
pieces will pour out, counting down from 3.
From here, this central tower is fully exposed.
bring down this high-parked emerald plus gold pieces at this very upper from this peak into match with the remaining bottom Boxes .
Keep one close eye over this crimson plus light rose marbles filtering in at the end.
Keep this track clean, prioritize this shades this lower line asks for, and the board will clear.
Frequently asked questions
How do I beat Marble Sort Level 59?
Feed the colors that already have an open bottom Box first, keep your belt from filling up, and only release a new color when a matching Box is ready. Follow the move order in the solution above and you can clear Level 59 every time.
What is the main trap to avoid on Marble Sort Level 59?
The biggest mistake on Level 59 is tapping a color that has no active bottom Box yet — those marbles park on your Conveyor Belt and eat limited slots. Hold back any color that has no receiver waiting and the stage stays under control.
What colors do I need to match on Marble Sort Level 59?
Level 59 mainly revolves around Orange, Green, Purple. Focus on feeding Orange first when its Box is open, then introduce Green as the lower lanes free up so you never choke the belt.
How should I open Marble Sort Level 59?
Begin by checking the lower part of the tray and only select colors that already sit in an open Box down below. Clearing those first few matching blocks unlocks the rest of the board without jamming your sorting space.
How many moves does Marble Sort Level 59 take to complete?
Level 59 is a color-sequenced stage that clears cleanly when you stick to the exact order above. The step-by-step solution walks each move so you can finish it with the fewest taps and no wasted belt slots.
Is there a video walkthrough for Marble Sort Level 59?
Yes. The embedded video on this page walks through Marble Sort Level 59 move by move, and the screenshots below show each stage of the layout so you can follow along and beat it.