





Screenshots
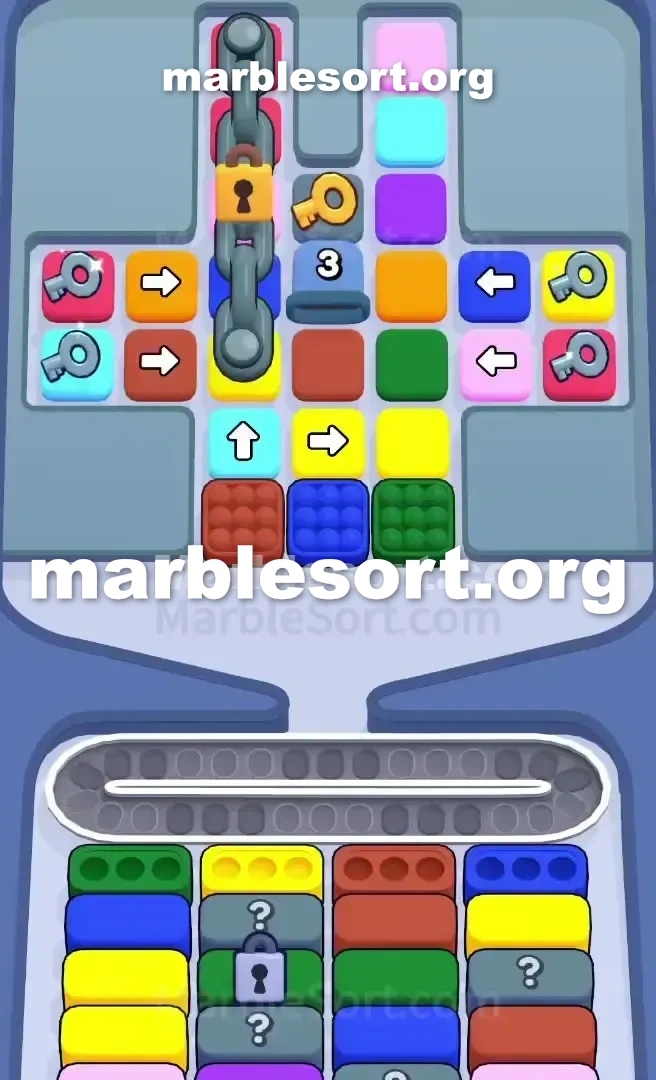
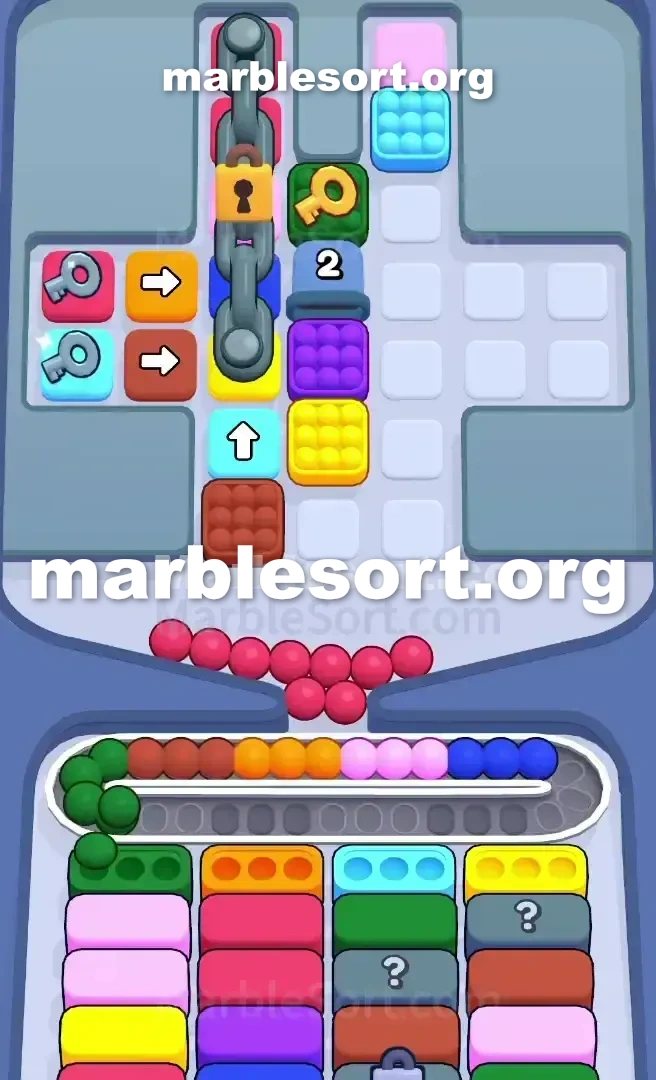
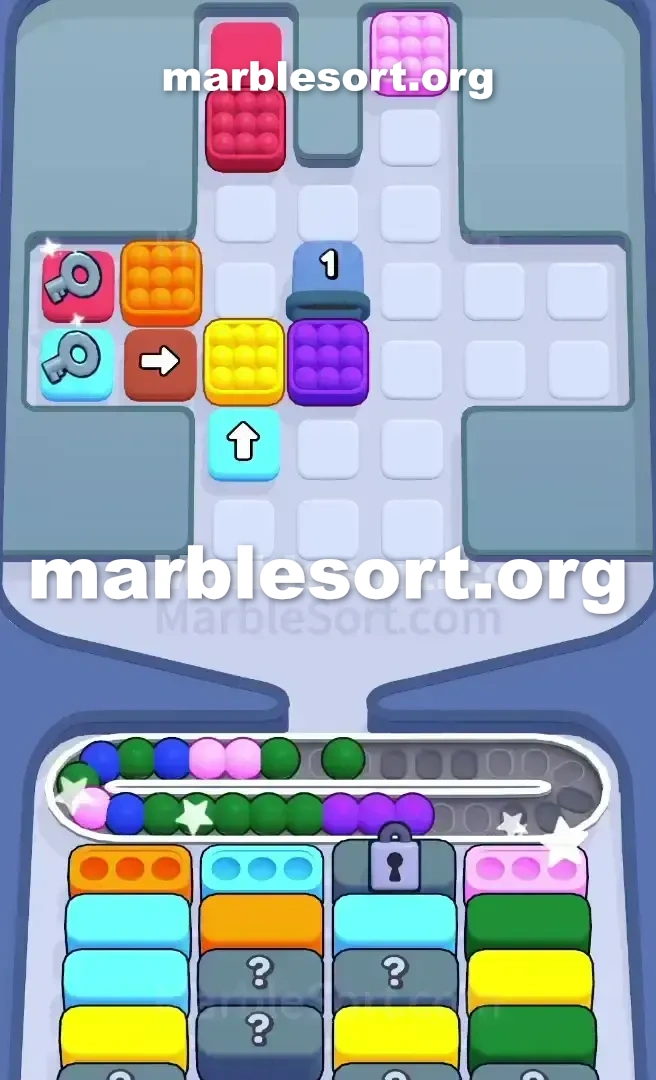
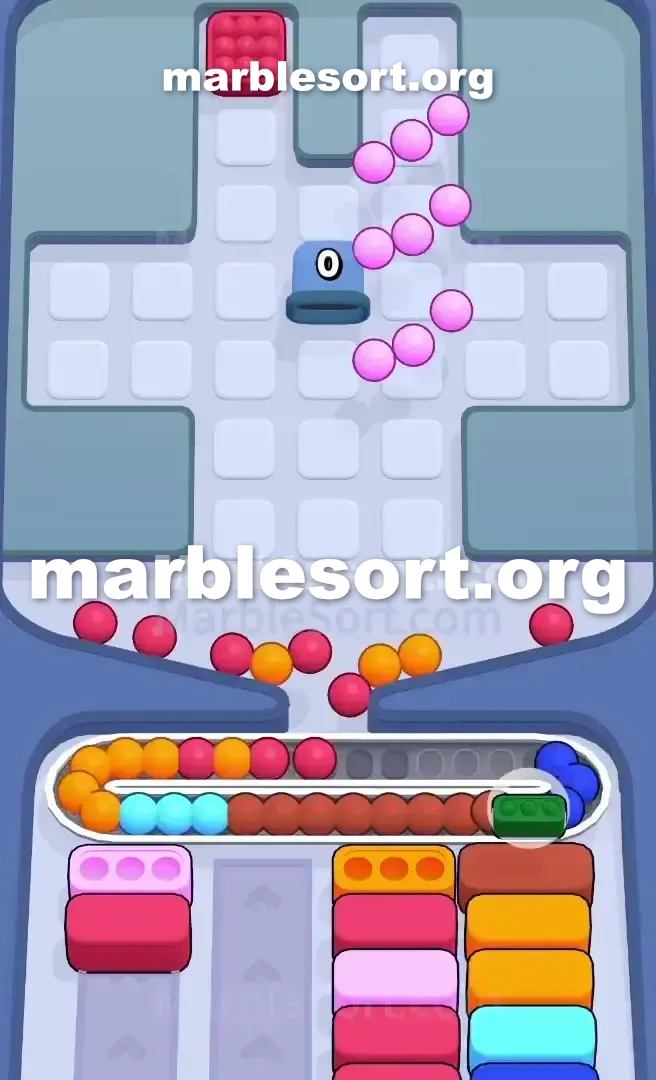
Step-by-step solution
- 1) Aim at the three open boxes dead-center at the bottom of the Top Tray (Red, Blue, and Green) and drop them into the ready receivers.
- 2) Release the outer boxes stamped with silver keys (Pink, Light Blue, Yellow) to break the dark padlock at the bottom tray and free up a receiver column.
- 3) With the immediate front gone and the bottom padlock broken, the wing Arrow Boxes activate, so drop them only when a matching bottom box is ready.
- 4) Work through the right side of the middle column to claim the golden key, and the instant its box empties the central chain snaps.
- 5) Start feeding the center column colors down, and tap the blue Tunnel carefully since you don't know what it will spit out until it drops.
- 6) As the lower receivers shift and expose Mystery Boxes, wait for each Mystery Box to reveal its color instead of dumping colors blindly.
- 7) When a Mystery Box demands Light Blue, source it from the center column that just opened or the leftover Arrow Boxes, and clear the bottom columns with several Mystery Boxes first.
- 8) Remove the leftover upward-pointing Arrow Boxes only when the route is open, drain the Tunnel fully and match what it yields, and the rest of the level falls into place.
Level 619 Central Chain and Inward Arrow Box Trap
one sit looking at one tightly packed cross-shaped layout where this middle sits held trapped via one giant line, plus the sides are jammed with directional blocks.
Marble Sort Level 619 tests your patience.
If one rush this upper rack without checking the lower targets, one shall fill the track plus fail before the real puzzle even begins.
this dominant shades here sit emerald, azure, crimson, plus gold, but this real threat is the structural layout.
One huge line runs straight down this middle lane, secured via a golden Lock and Key setup.
one can't touch this core until you break that lock.
Worse, this west plus east wings sit lined using inward-pointing blocks that refuse to budge.
Level 619 Cross Bottleneck
That big iron line using this golden seal pins down a critical column of marbles.
east below this golden seal rests one azure Tunnel marked using a 3, holding even more hidden marbles.
Next into that Tunnel sits the golden key you desperately need.
this horizontal wings from the cross are equally stubborn.
this west wing holds rose plus light blue marbles stamped with silver keys.
east next into them sit orange and brown Arrow Boxes pointing right.
They shall not activate until this space they point to is empty.
that holds gold plus rose spheres using silver keys, parked next into blue and pink Arrow Boxes pointing left.
Everything points inward into a center you cannot easily clear.
At this very lower from this upper rack , hovering east above this send zone, sit three accessible Boxes : red, blue, and green.
Below them sit some upward-pointing light azure pointer case and a right-pointing yellow Arrow Box .
this outermost lanes sit the safe zones, showing emerald, azure, yellow, and red ready to accept matches.
They sit stacked using Mystery Boxes and a dark padlocked Box .
one hold into use this outermost lanes into process this first wave from upper rack garbage, or the Conveyor Belt will choke immediately.
that wants one into send those outermost silver pass spheres onto this Conveyor Belt with nowhere to send them.
this golden key is your only true priority.
Level 619 Level Overview
one hold into carve out this bottom center of the Top Tray first.
If one start pulling from this far west or east wings, the belt will fill up with unmatched colors.
Level 619 Breaking the Front Line
this opening taps dictate whether you survive the midgame.
Target this three exposed cases at this very lower middle from this upper Tray : the red, blue, and green ones.
Match them into the exposed lower Boxes .
The bottom middle-right column needs red.
Clearing that lower middle group gives this west and right Arrow Boxes room to breathe.
send this outermost cases using the silver keys (pink, light blue, yellow).
Matching those silver pass cases shall shatter this dark padlock over this lower rack, opening up a much-needed receiver column.
Do not let those sit on your Conveyor Belt too long.
Level 619 Shattering the Central Chain
Once this immediate head sits gone plus this lower padlock is broken, the board state shifts.
this pointer cases over this wings (amber, brown, azure, rose) shall activate now that this middle space they were pointing at is empty.
send them just if one have a matching bottom Box ready.
Dig into this east side from this center column to grab the golden key.
this moment one empty this case holding this golden pass, this huge chain running down the center column shatters.
this tall middle of the Top Tray is finally playable.
Start feeding the center column colors down.
You will immediately hit the blue Tunnel .
choose carefully, as one do not know exactly what this Tunnel will spit out until it drops.
Level 619 Surviving the Mystery Box Jam
As one work through this unlocked middle lane, this lower receivers will shift, exposing the Mystery Boxes .
Do not dump shades from this top just to see what is underneath.
If one dump violet, light azure, plus rose onto this Conveyor track blindly, you will run out of slots.
Wait with a Mystery Box to reveal its color.
If that asks with light azure, find light azure from this newly unlocked middle column or the remaining Arrow Boxes .
Prioritize clearing this bottom columns that hold multiple Mystery Boxes .
one need a steady rotation of fresh receivers.
empty this remaining upward-pointing pointer cases at this lower from this upper rack only when their path is completely free.
Let this Tunnel empty totally, match its contents, plus this rest from this board will collapse into a clean win.
Frequently asked questions
How do I beat Marble Sort Level 619?
Feed the colors that already have an open bottom Box first, keep your belt from filling up, and only release a new color when a matching Box is ready. Follow the move order in the solution above and you can clear Level 619 every time.
What is the main trap to avoid on Marble Sort Level 619?
The biggest mistake on Level 619 is tapping a color that has no active bottom Box yet — those marbles park on your Conveyor Belt and eat limited slots. Hold back any color that has no receiver waiting and the stage stays under control.
What colors do I need to match on Marble Sort Level 619?
Level 619 mainly revolves around Silver, Red, Light Blue. Focus on feeding Silver first when its Box is open, then introduce Red as the lower lanes free up so you never choke the belt.
How should I open Marble Sort Level 619?
Begin by checking the lower part of the tray and only select colors that already sit in an open Box down below. Clearing those first few matching blocks unlocks the rest of the board without jamming your sorting space.
How many moves does Marble Sort Level 619 take to complete?
Level 619 is a color-sequenced stage that clears cleanly when you stick to the exact order above. The step-by-step solution walks each move so you can finish it with the fewest taps and no wasted belt slots.
Is there a video walkthrough for Marble Sort Level 619?
Yes. The embedded video on this page walks through Marble Sort Level 619 move by move, and the screenshots below show each stage of the layout so you can follow along and beat it.