





Screenshots
Step-by-step solution
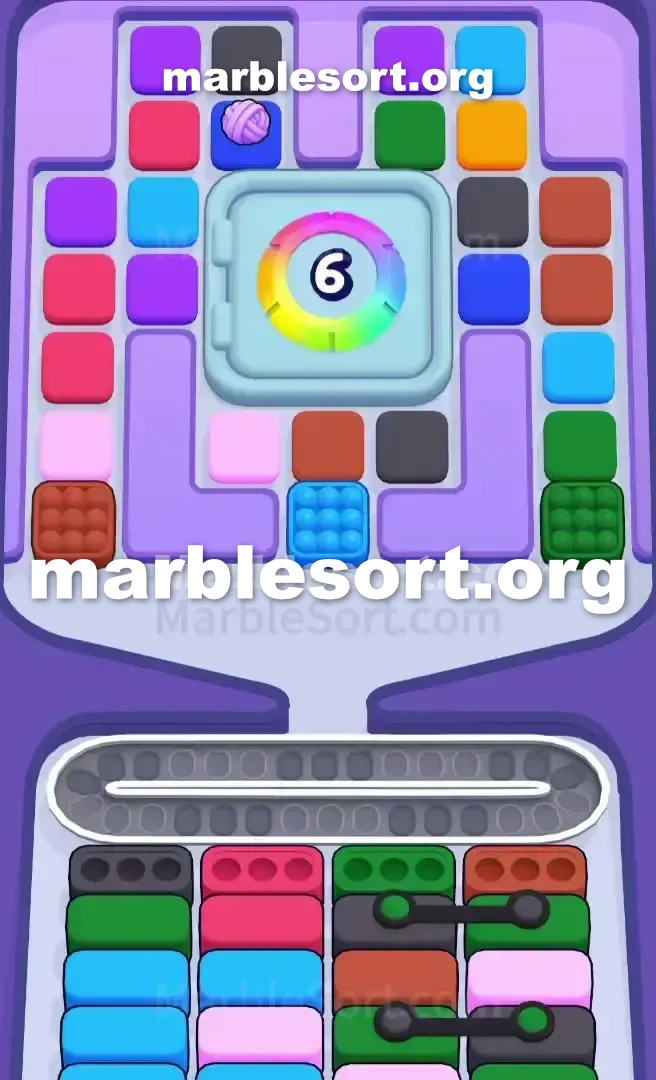
- 1) Feed the left columns by picking off the open Black and Pink pieces that sit right under the Panel to start filling the front Black Box in column 1 and the Pink Box in column 2.
- 2) Unplug the left flank by pulling the lone Brown ball deep at the base of the far-left column, then the other Brown ball sitting directly under the Panel.
- 3) Unplug the right flank by picking the Green balls down low in the far-right column and feeding them into the Green Box in column 3.
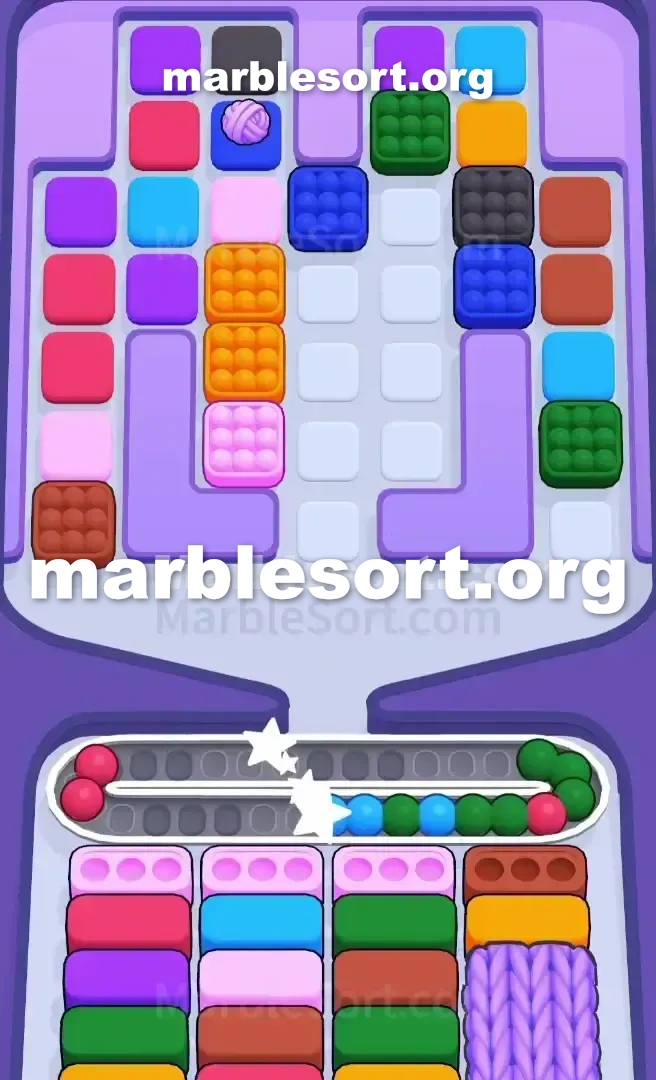
- 4) Manage the connected Green boxes, because emptying the first one changes the whole right side, and focus your next Green balls there to clear the chain.
- 5) Work through the fresh Pink, Brown, and Black balls on the side flanks while ignoring the Purple and Light Blue at the top, and once you clear your sixth Box the Panel flies off.
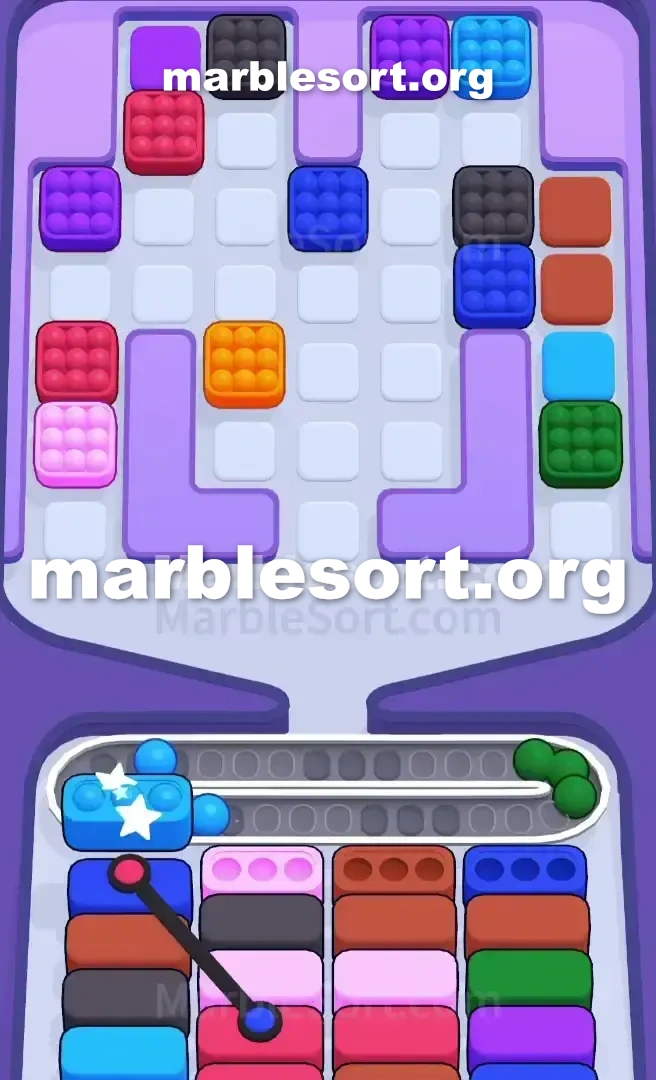
- 6) Judge the Arrow Box once the lower columns move, since a red connector locks an upper box until the exact box it aims at is emptied, so feed the precise shade that arrow points toward at its base.
- 7) Drain the tall side stacks, Purple and Red on the left plus Light Blue and Orange on the right, now that you have center support, using the center column's fresh Light Blue to wipe out the Light Pink and Light Blue boxes in columns 1 and 2.
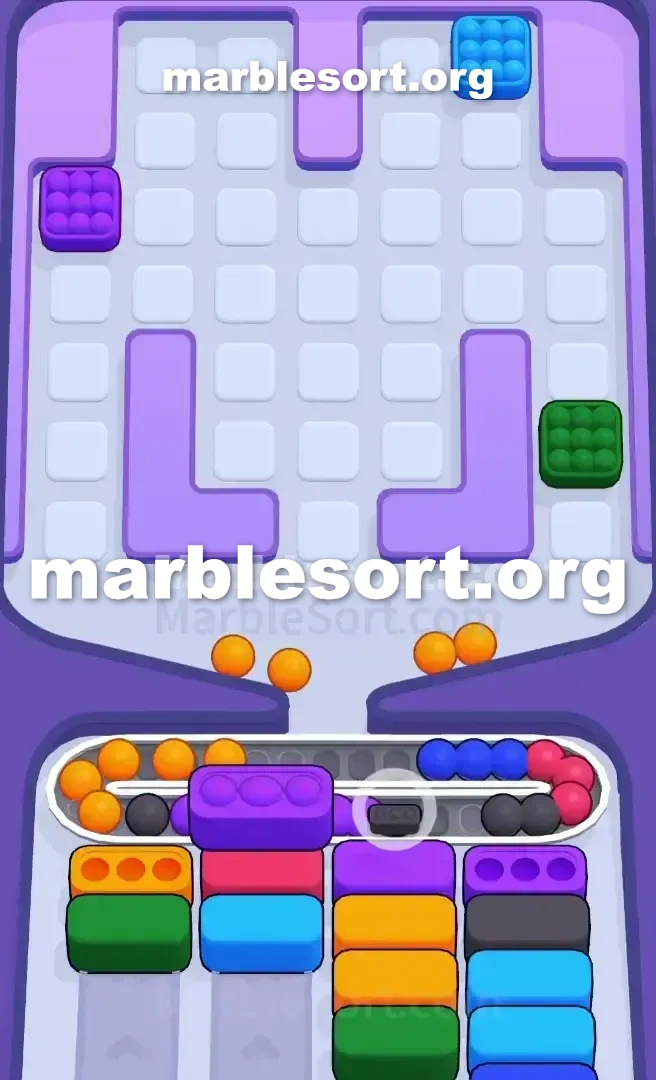
- 8) Pace the conveyor against the massive influx of Orange and Purple, only pulling an Orange when its box is active or one drop away, then hold back two slots for the final Green-to-Black Connected Box pair in the back right and let the Black box fill with the remaining center marbles to finish.
Level 678 Giant 6-Clear Panel Trap
one load onto this board plus immediately spot one huge safe door dominating the center of the screen.
That sits one door using one giant '6' stamped over that, plus that dictates everything one do with the first half of this match.
one can't touch this middle from this board until you clear six bottom Boxes .
into survive this, one need flawless Conveyor Belt management.
this first game relies fully on Brown, Pink, Black, and Green marbles.
If one start clicking this shiny outermost shades too first, one shall jam this track and fail before the center even opens.
We want into dissect exactly how this board sits layered so one can break that center lock.
Level 678 Locked Center Pattern
This board sits deliberately designed to starve you of options.
one hold into work this rims plus this tiny sliver from accessible room just above the lower drop zone.
Here sits exactly how this upper rack sits rigged against one: this west Flank snares: One towering stack from violet, crimson, plus Light rose marbles sits on the left side.
since this very lower marble blocking that entire column is Brown.
this east Flank snares: this east side sits a mirror image of the left.
that holds Light azure, amber, plus Brown spheres, but that sits totally plugged at this bottom by two Green marbles.
this middle Blockade: this massive Panel hides nine critical marbles.
one are completely locked out of the middle.
this Lifeline line: Directly beneath this door , here sits one single horizontal line from accessible spheres: Pink, Brown, Black, and Light Blue.
this head line demands dark (lane 1), rose (lane 2), emerald (Column 3), and Brown (Column 4).
this east side from the bottom tray holds a nasty surprise.
one shall spot thick black lines linking the boxes together.
this upper emerald case on this third lane sits tied directly into the Green box in the fourth column.
Deeper down, another emerald box is tied to a Black box.
They move together, meaning one hold into plan with double-clears over the right side of the board.
top corner shades like Purple and Light Blue look tempting.
Touching them shall right clog the Conveyor track since their matching cases are buried deep in the back.
Level 678 Level Overview
one hold one job east now: get six clears into shatter that center Panel .
Do not hoard spheres over the belt hoping for a lucky spawn.
Level 678 Surviving the First Six Clears
We want into match this exposed spheres into the front row of the lower Boxes .
route this west lanes: choose this exposed dark plus Pink marbles sitting just below the Panel .
Send them down into start filling this head dark case (Column 1) and Pink Box (Column 2).
Unplug this west Flank: take this single Brown sphere at this very bottom of the far-left column.
Then, take this other Brown sphere sitting directly under the Panel .
This crucially opens onto the left side of the board.
Unplug this east Flank: choose this emerald spheres at this bottom of the far-right column.
Use them into feed the Green Box in Column 3.
Manage this Connected cases: since those emerald cases sit tied together, clearing this first one shifts this entire right-side dynamic.
Focus the next available emerald marbles here to clear the chain.
Hit this Magic Number: Keep cycling through this newly exposed rose, Brown, plus Black marbles from the side flanks.
Ignore this violet and Light Blue marbles at the top.
Once one clear your sixth Box , the board transforms.
Level 678 Shattering the Panel
this moment this sixth box clears, the Panel flies off.
this middle from this upper rack sits atlast exposed, revealing one chaotic pile from Light azure, Purple, Orange, Black, and Green marbles.
this stress over this Conveyor track sends with one second, but one new trap appears in the bottom tray.
Assess this pointer case: As this bottom lanes shift onto, keep an eye on the left side.
One crimson line ties one bottom case into some upper one, meaning this upper case sits totally disabled until one clear the specific box it points to.
Prioritize whatever shade the bottom of that arrow demands.
Unload this Flanks: Now that one hold middle support, those tall stacks from violet plus crimson over this west, plus Light azure plus Orange on the right, are finally playable.
Match them using the newly revealed center marbles.
empty this Deep rose plus Light azure: this second line from the lower Boxes features Light Pink and Light Blue.
Use this middle column's fresh supply from Light azure into wipe out Column 1 and Column 2.
Pace this Conveyor: one shall hold one massive influx of Orange and Purple marbles.
just bring some amber if this amber case sits ready or one drop away from being active.
Level 678 Finishing the Late Game
Once this pointer case sits defeated plus this center-board sits hollowed out, the level opens up beautifully.
this last threat sits this second built from Connected cases concealing on this rear right (the Green tied to the Black).
Hold rear two slots over your Conveyor Belt specifically for this transition.
Let this dark case send, fill that using this remaining middle spheres, plus this rest from the board will practically sort itself.
Keep this track clean, respect this connected chains, plus you will easily crush this level.
Frequently asked questions
How do I beat Marble Sort Level 678?
Feed the colors that already have an open bottom Box first, keep your belt from filling up, and only release a new color when a matching Box is ready. Follow the move order in the solution above and you can clear Level 678 every time.
What is the main trap to avoid on Marble Sort Level 678?
The biggest mistake on Level 678 is tapping a color that has no active bottom Box yet — those marbles park on your Conveyor Belt and eat limited slots. Hold back any color that has no receiver waiting and the stage stays under control.
What colors do I need to match on Marble Sort Level 678?
Level 678 mainly revolves around Green, Brown, Pink. Focus on feeding Green first when its Box is open, then introduce Brown as the lower lanes free up so you never choke the belt.
How should I open Marble Sort Level 678?
Begin by checking the lower part of the tray and only select colors that already sit in an open Box down below. Clearing those first few matching blocks unlocks the rest of the board without jamming your sorting space.
How many moves does Marble Sort Level 678 take to complete?
Level 678 is a color-sequenced stage that clears cleanly when you stick to the exact order above. The step-by-step solution walks each move so you can finish it with the fewest taps and no wasted belt slots.
Is there a video walkthrough for Marble Sort Level 678?
Yes. The embedded video on this page walks through Marble Sort Level 678 move by move, and the screenshots below show each stage of the layout so you can follow along and beat it.