





Screenshots
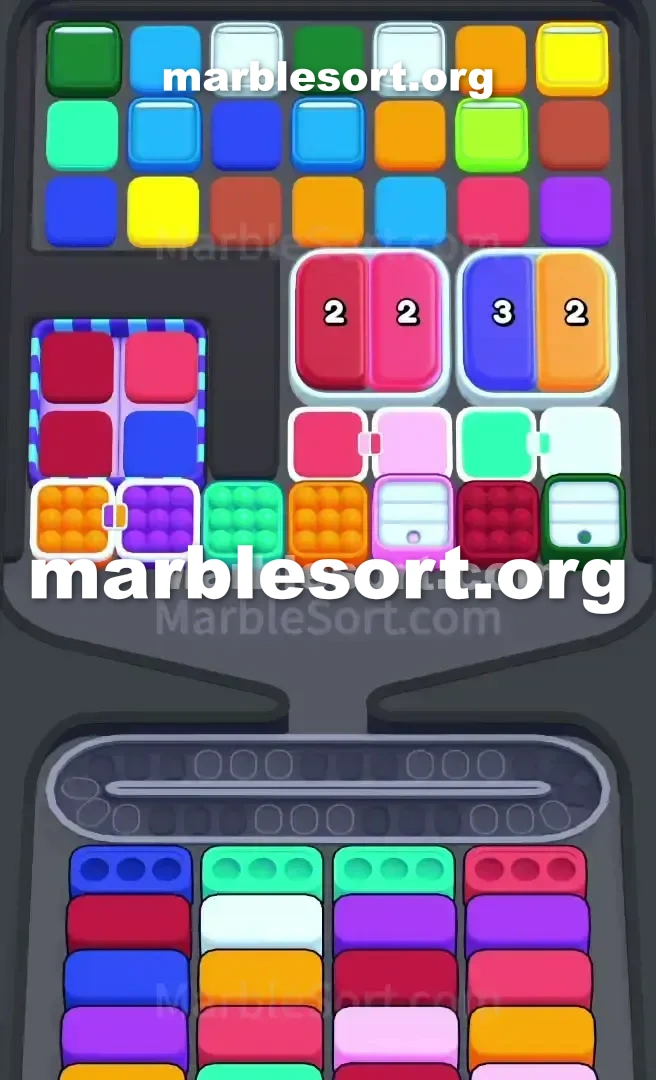
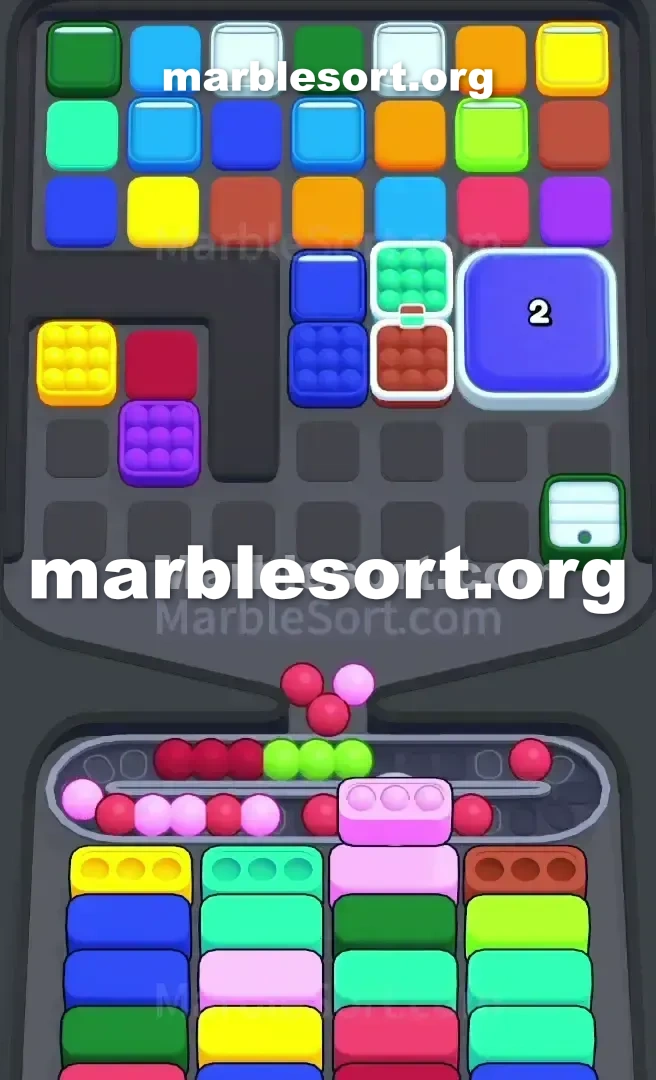
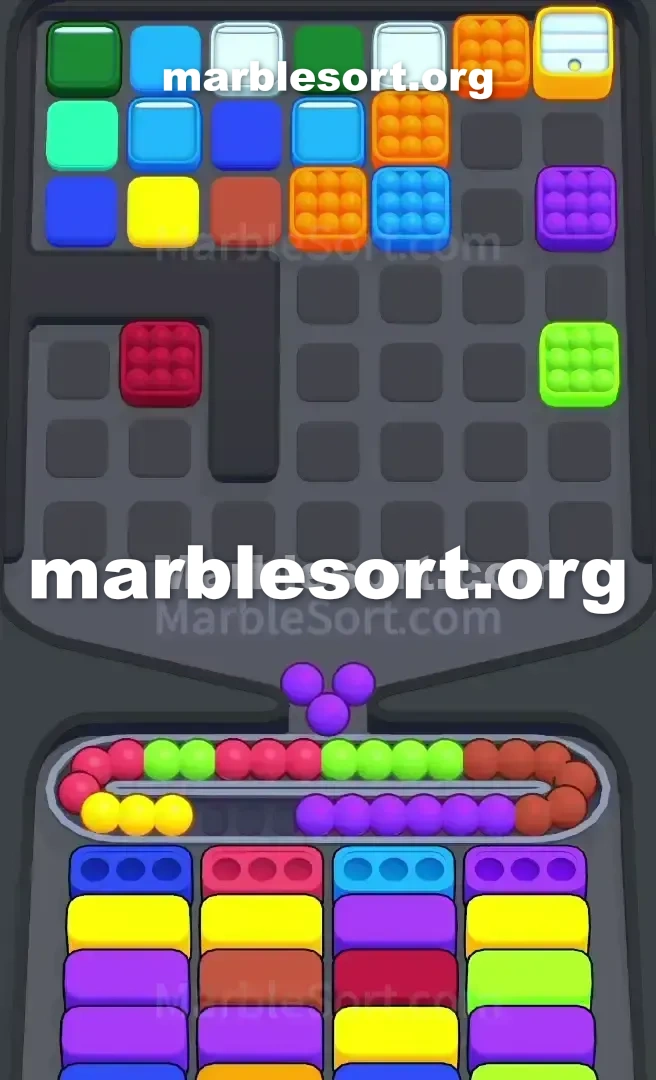
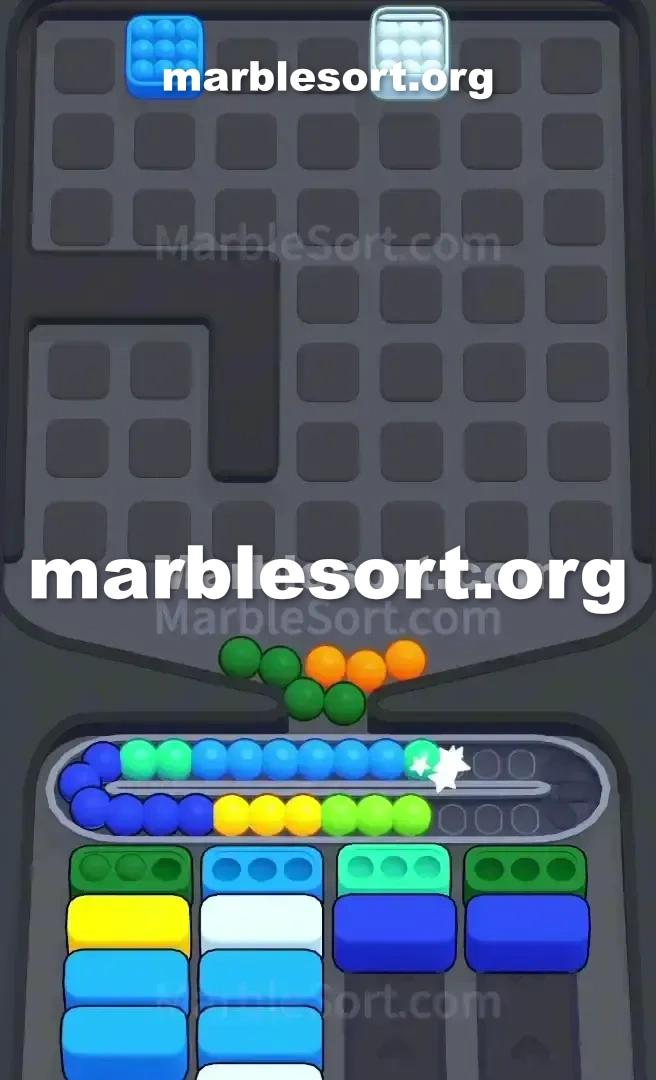
Step-by-step solution
- 1) Start by creating room on the belt: release three blue marbles to clear the Dark Blue Box waiting in the far-left or far-right bottom column.
- 2) Turn next to the Light Green Boxes sitting in the second and third columns, and clear them with the light green marbles found on the top-right of the main grid.
- 3) Use your fresh belt space to stockpile the colors the central Connected Boxes need before attacking them.
- 4) Clear the pair of red Connected Boxes by collecting four reds, pulling them out of the little left tray as well as the main grid, and sending them in together.
- 5) Break the blue/orange Connected Boxes by holding three dark blue marbles and two orange ones on the belt at the same time, then dropping them into place.
- 6) With the top layer gone, the fidget-popper boxes activate: clear the connected orange and purple poppers by releasing the required marbles.
- 7) As the orange popper clears, it reveals the first Mystery Box's color, so find those marbles in the tray and clear it, then repeat the trick for the second Mystery Box.
- 8) Finish the bottom rows by clearing one color at a time, prioritizing colors that have multiple Boxes open, and keep an eye on belt space to avoid a final jam.
Level 790 Clearing the Central Connected Boxes
this board sits split into one few different zones, but this real nightmare sits this group of special Boxes smack in the middle.
one hold numbered Connected cases , fidget-popper style cases , plus one couple from Mystery Boxes all blocking each other.
this upper rack sits mostly one standard 4x4 grid, using one tiny 2x3 rack over this west holding some red, pink, and blue marbles.
this lower area holds five lanes from regular cases , but one won't get far just via matching colors randomly.
this pass into solving sphere Sort 790 sits one very exact sequence for clearing out that central blockade.
If one just start dropping spheres, your Conveyor Belt will jam in seconds.
Level 790 Clustered Center
Let's break down this unique layout of Marble Sort Level 790 .
this main problem sits one piece from special cases parked between this Top Tray and the Conveyor Belt .
At this upper from this piece are two sets of Connected Boxes .
over this west, one pair from red Boxes each needing two marbles.
over this east, one dark azure case needing three spheres connected to an orange Box needing two.
one can't access any from this spheres or cases directly behind them until these are cleared.
Below them sits another line from obstacles: One pair from Connected cases styled like fidget poppers (orange and purple).
Several individual popper-style Boxes (red, green).
Two secret cases that conceal their shade until an adjacent Box is cleared.
this biggest snare over this board sits releasing spheres from the main grid too early.
If one spot one bunch from gold or light azure marbles and drop them, you're done.
here sit zero gold or light azure Boxes available at the start.
They sit buried deep in the bottom columns.
one should ignore those tempting shades and focus on what's immediately playable.
this first goal sits into empty one path via targeting this standard Boxes at the very bottom.
Level 790 Level Overview
Follow this order precisely into manage this Conveyor track and break through the central obstacles.
Do not deviate, or this board will lock up.
Level 790 Initial Moves: Creating Space
this first priority isn't this fancy stuff over this middle; it's creating breathing room over your Conveyor Belt .
this board starts using very little margin for error.
Target Dark azure First: Look at the bottom Boxes .
this far-west lane plus this far-east lane both have a Dark Blue Box ready.
here sit azure spheres accessible on this main upper rack and the small tray on the left.
Release three azure marbles to clear the first Box .
empty one Second case: Immediately pivot to another accessible color.
this Light emerald cases on this second and third columns are great targets.
here sit light emerald spheres on the top-right of the main grid.
Hold plus Stockpile: Now that one hold one little room over this Conveyor track , one can start thinking about the central block.
Use this extra room into stockpile this shades you need for the upcoming Connected Boxes .
Level 790 Attacking the Connected Box Blockade
using some room into work using, it's time to dismantle the central blockade.
This sits this most important phase from Marble Sort Level 790 .
empty this crimson Connected cases: this first major obstacle sits this pair from crimson Connected Boxes that each require two marbles.
Gather them from this left-side tray and the main grid.
Once one hold all four over this Conveyor track , send them in to clear the Box .
This shall send this obstacles below them down one level, making them reachable.
empty this azure/amber Connected Boxes: This is the trickiest part.
one want three dark azure spheres Plus two amber spheres over the Conveyor Belt at the same time.
This sits why creating room in the first steps was so critical.
Carefully collect those five spheres without clogging the belt with other colors.
Once ready, send them into clear the blue and orange Connected Boxes .
Unlocking this Popper cases: using this upper tier from Connected cases gone, this line from fidget-popper cases and Mystery Boxes is now active.
Level 790 Managing the Mid-Game Reveals
Now one're on the cleanup phase, but don't get complacent.
this Conveyor track may yet get jammed if you aren't careful.
empty this Popper Connected cases: this amber and purple popper-style Boxes are connected.
Release this required marbles to clear them both.
Solve this secret cases: Clearing this amber popper shall likely show this shade from the first Mystery Box next to it.
As soon as one spot its shade, find this matching spheres in the Top Tray and clear it.
Do this same with this second Mystery Box as it becomes available.
Finish this lower Rows: From here, this rest from sphere Sort 790 is a straightforward sorting puzzle.
this remaining popper cases plus all this standard cases at the bottom are now open.
Work systematically, clearing one shade at a time.
Prioritize shades that hold multiple cases available to clear the board faster.
Keep some eye over the Conveyor track room, plus you'll empty the level without any more jams.
Frequently asked questions
How do I beat Marble Sort Level 790?
Feed the colors that already have an open bottom Box first, keep your belt from filling up, and only release a new color when a matching Box is ready. Follow the move order in the solution above and you can clear Level 790 every time.
What is the main trap to avoid on Marble Sort Level 790?
The biggest mistake on Level 790 is tapping a color that has no active bottom Box yet — those marbles park on your Conveyor Belt and eat limited slots. Hold back any color that has no receiver waiting and the stage stays under control.
What colors do I need to match on Marble Sort Level 790?
Level 790 mainly revolves around Orange, Red, Dark Blue. Focus on feeding Orange first when its Box is open, then introduce Red as the lower lanes free up so you never choke the belt.
How should I open Marble Sort Level 790?
Begin by checking the lower part of the tray and only select colors that already sit in an open Box down below. Clearing those first few matching blocks unlocks the rest of the board without jamming your sorting space.
How many moves does Marble Sort Level 790 take to complete?
Level 790 is a color-sequenced stage that clears cleanly when you stick to the exact order above. The step-by-step solution walks each move so you can finish it with the fewest taps and no wasted belt slots.
Is there a video walkthrough for Marble Sort Level 790?
Yes. The embedded video on this page walks through Marble Sort Level 790 move by move, and the screenshots below show each stage of the layout so you can follow along and beat it.