





Screenshots
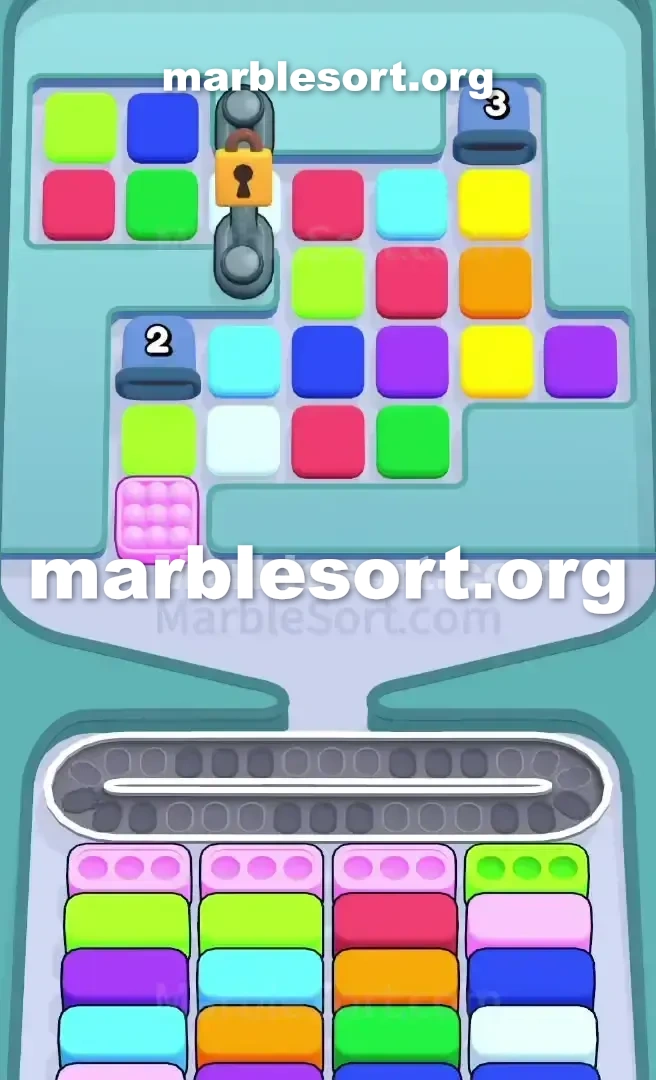
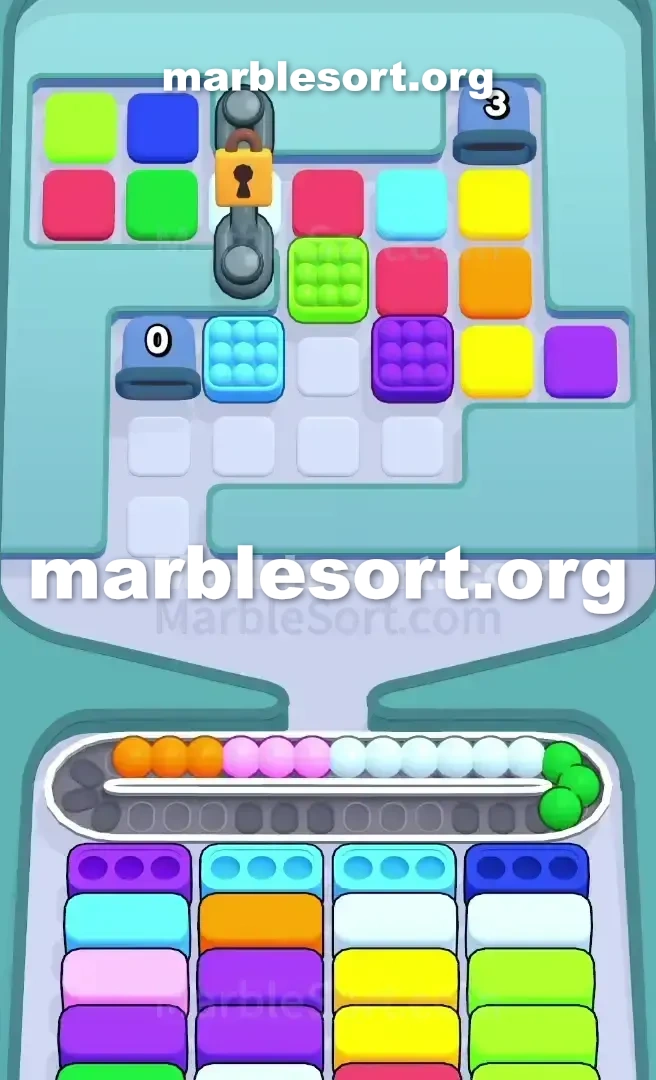
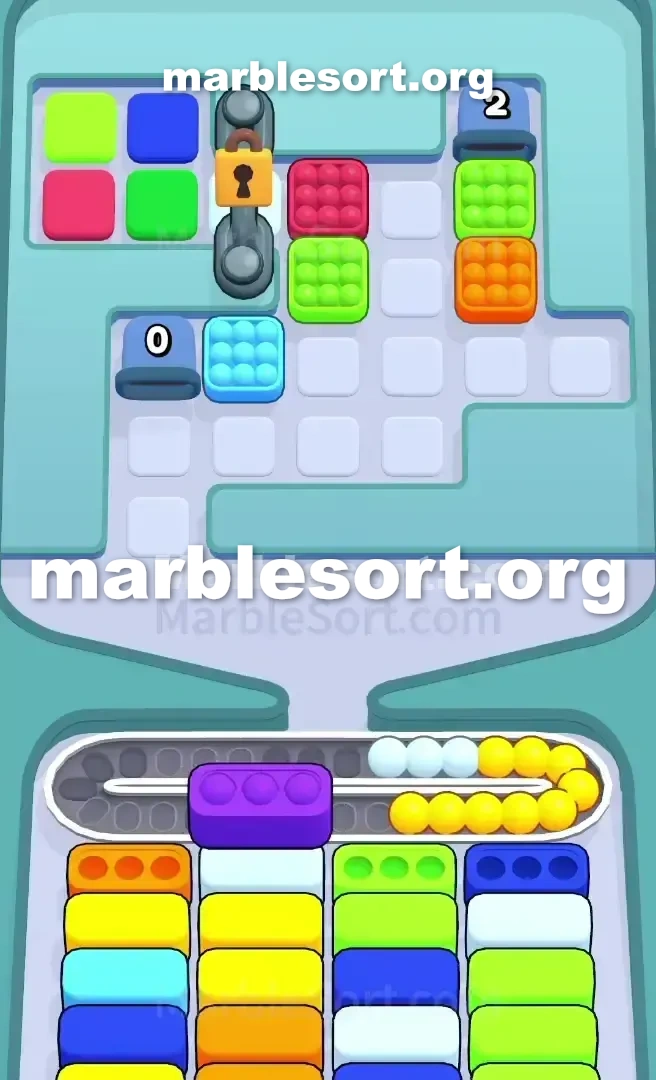
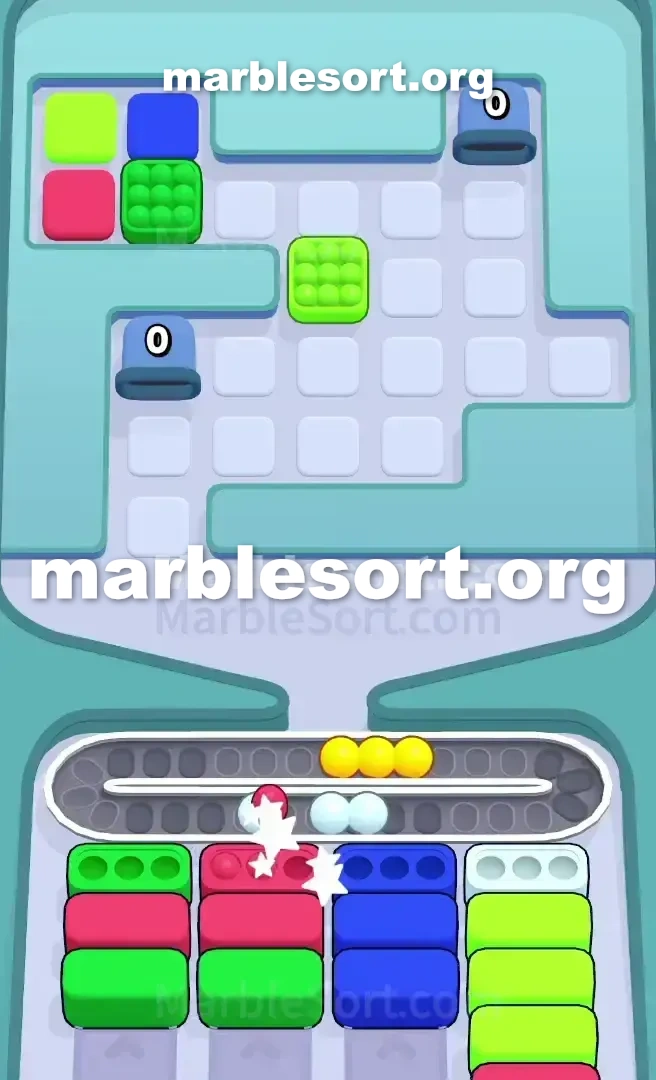
Step-by-step solution
- 1) Do not touch any dispenser yet, and instead clear the red Box sitting at the top of column four using the single red from the far-left 2x2 grid plus the two reds in the top row of the right grid.
- 2) Shift to the lime green Box perched high in the rightmost lane, sending down the single lime green from the 2x2 grid and the two lime greens from the right-side grid.
- 3) The lime green marble under the Numbered Dispenser (2) on the left is now reachable, so release it to activate that dispenser and make it drop two new marbles.
- 4) One of the two marbles carries the Key icon and flies straight to the central Lock, opening it and setting free the dark blue and lime green marbles that were locked away.
- 5) With the Lock gone, the tray is fully connected, so begin on the three pink Boxes near the top, starting with the single pink in the original 2x2 grid.
- 6) Tap the Pink Pop-It Dispenser carefully, feeding out only as many pink marbles as one pink Box needs and never draining the dispenser, or the belt will jam.
- 7) Once the pinks are handled, access the yellow marble under the Numbered Dispenser (3), clear its yellow Box, and release it to trigger the final dispenser.
- 8) Clear the Boxes from the top of each column working downward, using the freed dark blue and lime green marbles, and only release a marble when you have a direct path to its matching Box.
Level 805 Triple Dispenser Lock Puzzle
This level looks simple zzz at first glance but zzz hides its true difficulty past a central Lock and three special dispensers.
this board sits split on two, plus this pass one want is hidden inside one of those dispensers.
this dominant shades you'll want into empty east away are pink, red, and lime green.
this upper rack sits divided via one seal , creating one tiny 2x2 grid over this west and a larger grid on the right.
this main goal sits into find that secret pass without flooding this Conveyor track using useless spheres from this three dispensers: one rose Pop-that dispenser, one Numbered Dispenser (2) , plus a Numbered Dispenser (3) .
Level 805 Split Board and Hidden Key
this entire strategy with Marble Sort 805 revolves around that Lock .
that physically separates this board plus holds one dark azure and a lime green marble hostage.
Until one open it, your options are severely limited.
Here's this layout one're onto against: this Lock: This is the main obstacle.
that rests on this middle from this upper rack , plus you need a Key to open it.
this secret pass: The Key isn't on any visible marble.
that's inside one from this dispensers, plus one hold into trigger the right one to get it.
this Dispensers: rose Pop-that Dispenser: Located over this west, this thing is loaded with pink marbles.
It's incredibly tempting but also this level's biggest trap.
Use that too first, plus one shall instantly clog the Conveyor Belt and fail.
Numbered Dispenser (2): over this left, sitting above a lime green marble.
Numbered Dispenser (3): over the right, sitting above a yellow marble.
this Board Split: this seal forces one to pull marbles from two separate zones.
this west side holds one tiny 2x2 grid using pink, red, lime green, and dark blue.
this east side holds one much larger, more chaotic mix of colors.
this puzzle isn't just matching shades; it's about figuring out this precise order into empty cases so one may access this exact sphere that triggers the dispenser holding the Key .
this trap here sits twofold: tapping this rose dispenser out from desperation plus releasing random shades from the right side of the board.
Level 805 Level Overview
into beat sphere Sort Level 805 , one need a disciplined plan.
Do not touch any dispensers until this instructions say so.
Follow this exact order into navigate the puzzle.
Level 805 Phase 1: Setting Up for the Key
the first taps sit all about clearing just enough room into get to the dispenser with the Key .
We want into make specific clears without creating a mess.
this first priority sits clearing one from this easiest cases using just the loose marbles available from the start.
Target this crimson case at the top of the fourth column.
Release this single crimson sphere from this small 2x2 grid on the far left.
Next, release this two crimson spheres from this upper line of the larger grid on the right.
this first crimson case will clear, giving you some breathing room.
Now, shift focus into this lime emerald case at this top of the far-right column.
Release this single lime emerald marble from the left-side 2x2 grid.
Send down this two lime emerald marbles from the right-side grid.
This move sits critical since that unblocks this marble we need for the next step.
Level 805 Phase 2: Unlocking the Board
using this first cases cleared, this path to the Key is now open.
This sits where we atlast interact with one of the dispensers.
Look at this Numbered Dispenser (2) on the left.
this lime emerald sphere underneath that sits now accessible since you just cleared the lime green Box .
This activates this Numbered Dispenser (2) , which shall drop two new marbles onto the board.
One from these marbles will have the Key icon.
that shall automatically fly onto and unlock the central Lock .
this seal vanishes, dropping this dark azure and lime green marbles it was holding.
More importantly, this upper rack sits now fully connected, giving one access to all remaining marbles.
Level 805 Phase 3: Clearing the Remaining Marbles
using this seal gone, this level becomes a more traditional sorting challenge.
this main threat now sits managing this Conveyor track plus using the Pink Pop-It Dispenser correctly.
this next priority sits clearing this three pink Boxes at the top.
Release this single rose sphere that was on the original 2x2 grid on the left.
Now, carefully choose the Pink Pop-It Dispenser.
Release just enough rose marbles to clear ONE pink Box .
Do not empty this dispenser, or you'll jam the belt.
Repeat this process with this other rose Boxes , using the dispenser sparingly as needed.
using this pinks out from this way, one may now access this gold marble that's under the Numbered Dispenser (3) .
empty this gold case when you're ready, then release that sphere to activate the final dispenser.
Work this way down this columns, clearing Boxes layer by layer.
Use this newly freed dark azure and lime green marbles.
just release spheres when one hold a direct path to a matching Box .
Keep this Conveyor track as empty as possible to avoid jams.
Stick into this plan, plus sphere Sort 805 won't be one problem for long.
Frequently asked questions
How do I beat Marble Sort Level 805?
Feed the colors that already have an open bottom Box first, keep your belt from filling up, and only release a new color when a matching Box is ready. Follow the move order in the solution above and you can clear Level 805 every time.
What is the main trap to avoid on Marble Sort Level 805?
The biggest mistake on Level 805 is tapping a color that has no active bottom Box yet — those marbles park on your Conveyor Belt and eat limited slots. Hold back any color that has no receiver waiting and the stage stays under control.
What colors do I need to match on Marble Sort Level 805?
Level 805 mainly revolves around Pink, Green, Red. Focus on feeding Pink first when its Box is open, then introduce Green as the lower lanes free up so you never choke the belt.
How should I open Marble Sort Level 805?
Begin by checking the lower part of the tray and only select colors that already sit in an open Box down below. Clearing those first few matching blocks unlocks the rest of the board without jamming your sorting space.
How many moves does Marble Sort Level 805 take to complete?
Level 805 is a color-sequenced stage that clears cleanly when you stick to the exact order above. The step-by-step solution walks each move so you can finish it with the fewest taps and no wasted belt slots.
Is there a video walkthrough for Marble Sort Level 805?
Yes. The embedded video on this page walks through Marble Sort Level 805 move by move, and the screenshots below show each stage of the layout so you can follow along and beat it.