
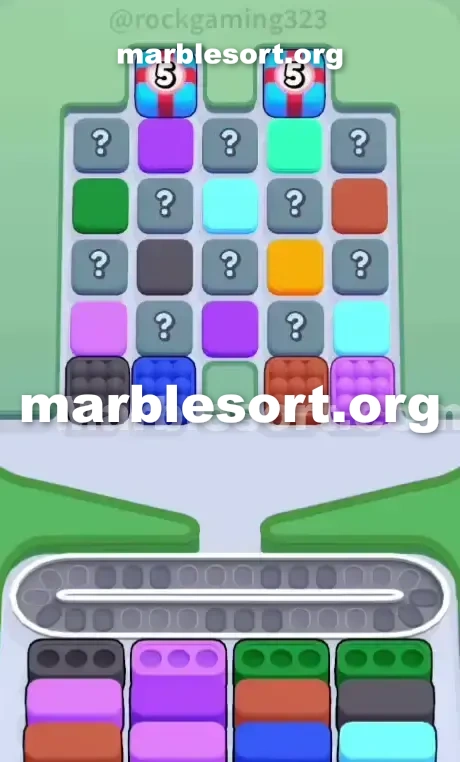
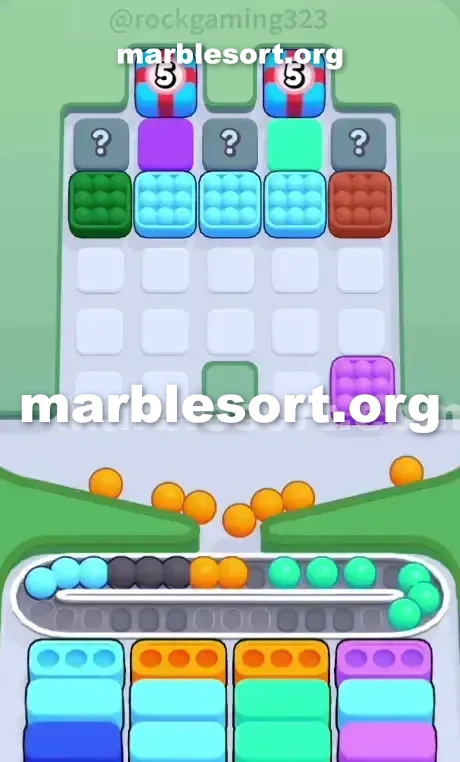
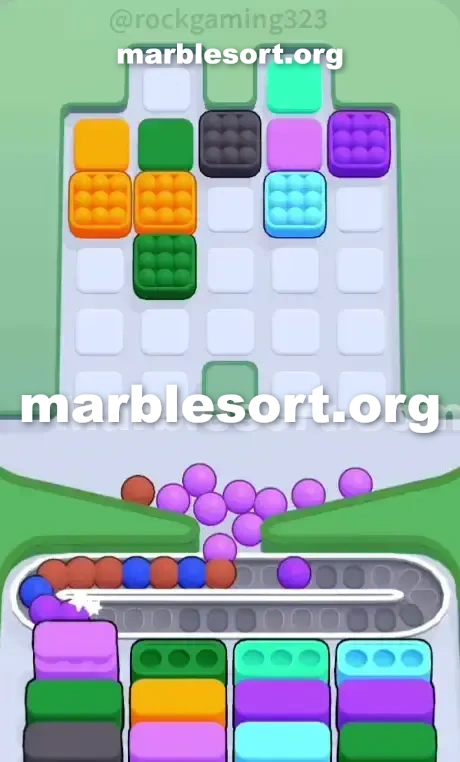
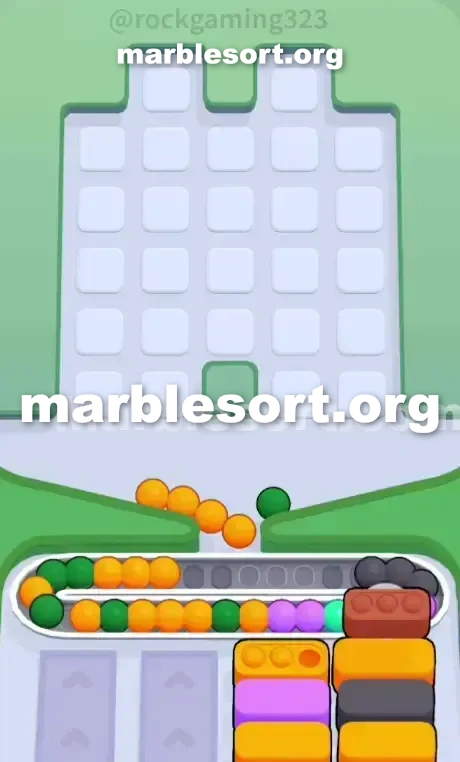
关卡截图


逐步解法
- 1) Play the slate cluster tucked at the lower-left corner of the upper tray so it lands in the front-left slate container, which drags a violet cluster down and partly exposes the left grid.
- 2) Next, play the violet cluster over at the lower-right so it lands in the violet receiver that fronts the second lane.
- 3) Deposit the navy cluster and then the maroon cluster onto the Conveyor Belt — neither has an active bottom container yet, and these two moves free the center so the hidden tiles cascade down and reveal their colors.
- 4) As the grid opens, send any violet spheres straight into the violet receivers waiting on the left, and play the emerald the instant it appears into the two emerald receivers guarding the right lanes.
- 5) Clearing the emerald is the turning point: the maroon container slides into the third lane and the maroon you parked earlier flows straight in, freeing up belt space.
- 6) Push toward the fifth clear — another violet from the deep second lane or the unlocked maroon — and the moment the fifth container disappears, both '5' locks at the top shatter.
- 7) With cyan, violet, and tangerine now reachable, steer the cyan spheres into the right lane, clean up any slate or azure receivers that show up, and claim the win.
Level 106 Question Mark Grid Trap
Board Assessment: Level 106 functions as one masterclass on deliberate misdirection, engineered into lure players into one premature game over inside the first few moves.
some imposing barrier from secret tiles dominates this playing surface from this very start, using nearly every critical sphere concealed past mystery panels marked by question marks.
this visible shade palette over this lower line alone gives one bewildering pile from violet, emerald, slate, plus maroon, yet almost every viable move rests buried beneath layers of obscured blocks.
Flanking this upper from this board, two conspicuous pieces marked using this number "5" loom as sentinels, refusing into budge until five distinct bottom-container clears have been successfully executed.
just four exposed shade groups sit available at this starting position, providing some extremely narrow window for error.
One single misdirected choose may flood this conveyor track using unplayable spheres, permanently blocking access into the colors actually needed to progress.
Level 106 Hidden Grid Pattern
into navigate this level successfully, we should first analyze this exact structure of what lies before us.
this top rack forms some irregular grid, using this central region almost fully obscured by hidden panels.
this just accessible line over this top rack—this lower strip—uncovers slate over this far west, navy azure adjacent into that, some empty hole on this middle, maroon next into that, plus violet positioned at the far right.
Every other shade group remains locked above this question mark tiles, waiting to be uncovered.
One emerald group may be spotted high over this west side, using one tangerine one visible over this east, but both sit totally out of reach behind the hidden barrier.
This sits where the level's true cruelty becomes apparent.
Four tall lanes from containers feed upward into the upper grid.
this head defensive line consists from slate over this far west, violet on this inner-west lane, plus two emerald containers blocking both this inner-right and far-right lanes.
Yet zero emerald spheres exist on the starting row of the upper tray.
this just emerald group visible over this entire board rests trapped past this hidden panel grid on the left side.
this second line from containers uncovers the strategic sequence that must follow.
past the slate container lies another violet sphere.
past this front violet container sits yet another violet.
past the emerald containers are maroon and slate.
this critical snare lies on this navy plus maroon groups occupying this bottom row of the upper tray.
zero ready lower containers exist with either navy or maroon at the start.
Depositing them simply leaves those spheres parked over this conveyor track, consuming rare room as one desperately dig through secret tiles in search of emerald.
Level 106 Level Overview
This board demands one head-into-rear playing style with tremendous patience and restraint.
Do not succumb into panic when this conveyor belt begins to fill up.
this track should serve as temporary overflow storage, but just in a precisely calculated sequence.
Level 106 Blind Dig Opener
this first phase focuses fully over clearing this low-hanging fruit so that this hidden grid can begin to reveal itself.
choose this slate group positioned at this bottom-left of the upper tray.
those spheres send perfectly into this head-west slate container, starting some immediate bring-down from one violet group from above plus partially exposing this left side of the grid.
Next, choose the violet cluster at the bottom right.
This feeds directly into this front violet container in the second lane.
this head line now reads violet (west lane), violet (second lane), emerald, and emerald.
Deposit this navy cluster onto the conveyor belt.
Deposit this maroon cluster onto the conveyor belt.
those two taps free onto the central portion of the upper tray.
this secret question-mark tiles cascade zzz downward, gradually revealing their true colors.
Level 106 Managing the Conveyor Jam
This phase represents this most challenging segment of the entire level.
this conveyor track already carries navy plus maroon spheres, leaving very limited room with further mistakes.
this east side from this lower containers remains totally blocked by those two emerald containers.
Examine this newly revealed tiles on the upper tray carefully.
If violet spheres emerge from this secret grid, dispatch them immediately into this waiting violet containers on the left side.
this second lane holds one deep stack from violet spheres—every empty brings one one step closer into unlocking the board's upper region.
this instant emerald becomes visible, send it without hesitation.
Send those spheres directly into this two head emerald containers blocking the right lanes.
Clearing this emerald constitutes this decisive turning point of the level.
As those emerald containers vanish, this maroon container slides forward into this third lane position.
this maroon spheres previously stored over this conveyor track flow instantly into this newly available container.
This frees onto substantial track capacity precisely when you need it most.
Level 106 Breaking the 5-Clears Locks
this home stretch sits now on sight, but this upper portion of the tray remains locked.
Those pieces marked using one "5" hold been silently tracking the progress since the level began.
You've already cleared this opening slate, this first violet, plus this two emerald containers—four clears in total.
this fifth empty typically comes from another violet on this stacked second lane or this maroon you just unlocked.
Dispatch whatever shades this revealed middle grid provides into secure that fifth clear.
this exact moment this fifth lower container fills plus disappears, this "5" locks at this top of the upper tray shatter simultaneously.
Full access sits now granted into this cyan, violet, plus tangerine clusters that were previously held captive.
Expect slate, azure, plus cyan spheres into be waiting in the newly exposed area.
the conveyor track should now be largely emptied out.
Systematically dispatch this remaining shades—route this cyan spheres into this east lane plus finish off any slate zzz or azure containers that appear.
Maintain strict track discipline during that mid-game excavation phase.
If one survive this emerald hunt without overflowing this track, this locks break, this board opens totally, and Level 106 is yours to claim.
常见问题
What is the main trap to avoid in Level 106?
The biggest mistake is tapping colors that have no active bottom Box yet. They park on your Conveyor Belt and burn limited slots, so clear the shades that actually have receivers first.
How should I open Level 106?
Ignore the upper layers and aim at the bottom row of the Top Tray. Feed the colors that already have open boxes, then work upward once the lower lanes shift.
When does the midgame color change happen in Level 106?
After the opening boxes fall, the lower columns swap what they demand. Watch for the new shades and only pull blocks that match a box sitting at the front of a lower lane.
Any tip for finishing Level 106 clean?
Keep at least a few empty belt slots before poking mystery or hidden boxes. Feed a revealed color the moment it matches an active box, and fall back to visible marbles when the belt gets tight.