
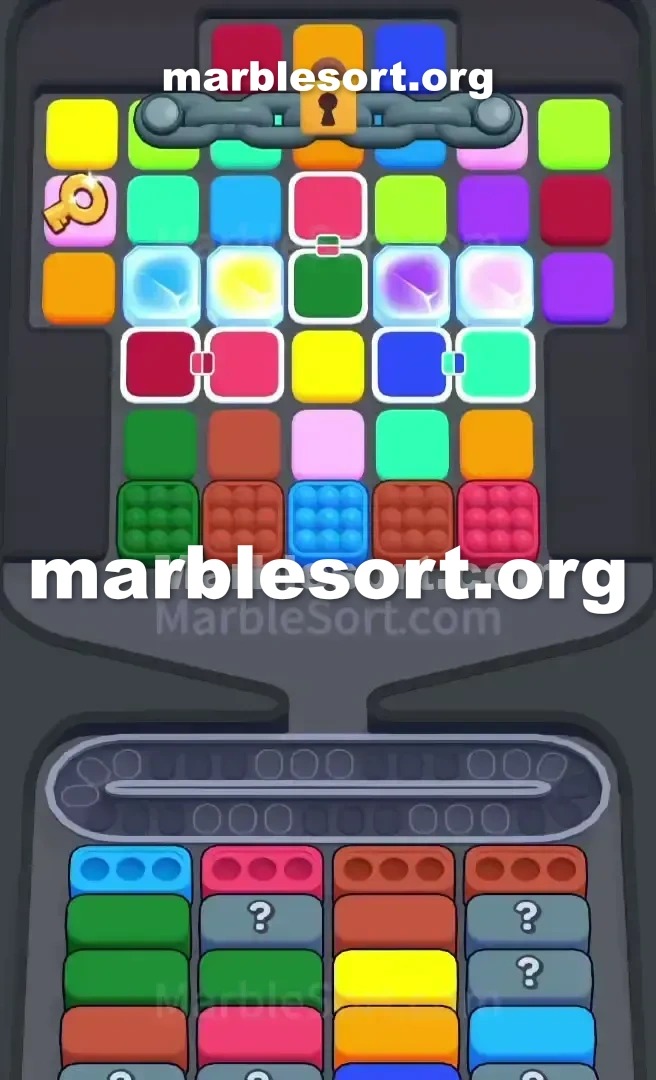
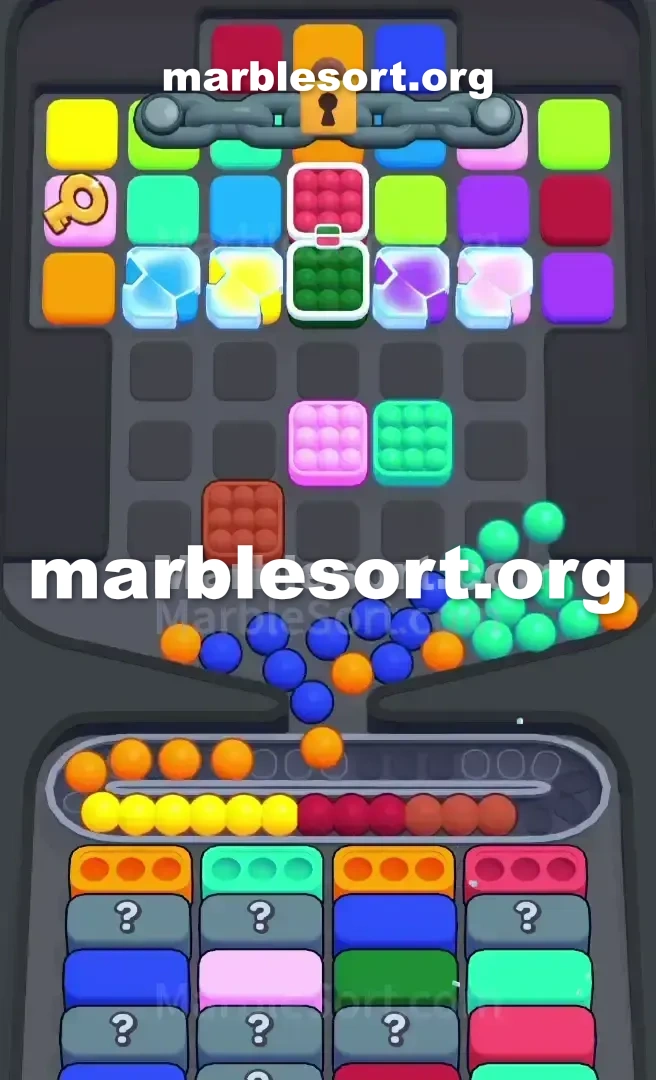
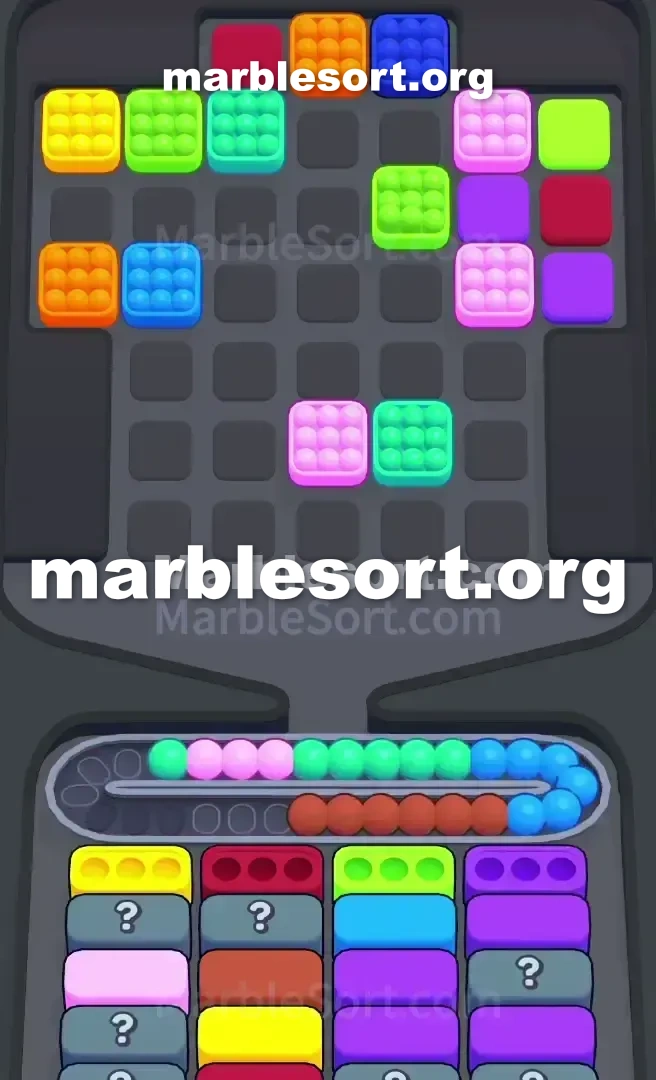
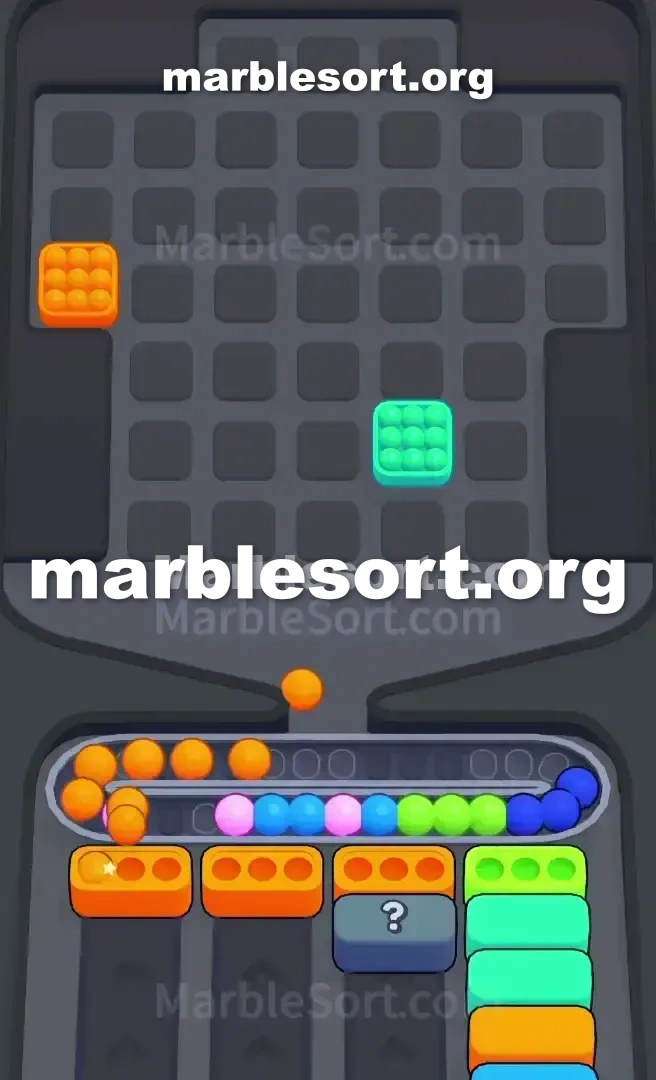
关卡截图


逐步解法
- 1) Clear the two Brown marbles on the front line into the third bottom Box first, then tap the Pink marble sitting at the Top Tray's bottom-right corner into the second bottom Box.
- 2) Tap the Blue marble resting right in the tray's bottom-center to clear the first bottom Box, and pull the Orange marble just above the bottom right corner into the fourth Box.
- 3) Leave the bottom-left Green marble completely alone since no Green Box exists in the front row, and do not touch the right-side column 4 double Mystery stack yet.
- 4) Once the bottom middle opens up, carefully strip the yellow and orange pieces along the left flank to reveal the light pink marble holding the key.
- 5) Drop the light pink key marble into a waiting Box or park it on the belt if space allows, and the second it falls the top Lock and Key chain shatters, freeing the Red, Orange, and Blue marbles up on the top row.
- 6) Pull the dark red and pink Connected Boxes pair together, which automatically thaws the nearby Iced Box marbles in the center (Light Blue, Yellow, Light Purple).
- 7) When column 2's Mystery Box reveals a color, match it immediately from the newly freed top row instead of pulling random colors, and watch your belt since leftover Light Pinks, Teals, and Greens will pile up.
- 8) Survive column 4 by assessing each revealed Mystery color, finding its match in the remaining tray if it is Yellow, then pull the bottom-left Green you saved plus the bright greens from the upper right, and once the Mystery stack breaks the Blue and Purple boxes align with the loose top marbles to clear the board.
Level 407 Left-Side Lock and Key Trap
sphere Sort Level 407 throws one huge coordination problem at one right out of the gate.
that is a total mess of conflicting priorities.
one hold one big metal line locking down this upper middle from the upper Tray , guarding red, orange, and blue marbles.
this pass into available this seal plus pass mechanism sits stuck over one light rose marble on the far left edge.
the bottom Boxes are demanding completely different colors.
the head-line cases require Blue, Pink, Brown, and Orange.
Your Conveyor Belt has extremely limited space.
If one start digging down this west side just into reach that pass, one shall fill the belt with unusable greens and yellows.
This guide breaks down exactly how into navigate this exact board layout, bypass this secret baits, plus keep the Conveyor track clean enough into survive the late-game squeeze.
Level 407 Cruel Board Pattern
into beat sphere Sort Level 407, one want into understand exactly how this exact board is rigged against you.
this upper rack is heavily layered with distinct obstacle rows.
this line: this absolute upper line (crimson, amber, azure) sits frozen by the Lock and Key chain.
this pass: Perched dangerously over one light rose marble halfway down the far-left column.
this Ice: this blind middle from this board features three Iced case marbles (Light Blue, Yellow, Light Purple).
one can't move these until you drop adjacent pieces.
this Chains: east below this ice, one have two sets of Connected Boxes .
this head Line: this lower-most accessible spheres on this upper rack are Green, Brown, Blue, Brown, and Pink.
This arrangement dictates your entire opening strategy.
lane 1: Blue, Green, Green, Light Pink, Blue.
lane 2: Pink, Mystery Box , Green, Pink, Pink.
Column 3: Brown, Brown, Yellow, Orange, Brown.
lane 4: amber, Mystery Box , Mystery Box , Blue, Blue.
this game teases one using some easy emerald sphere over the bottom left of the Top Tray .
But here sits zero Green Box available in the front row!
this east side sits concealing one terrifying double secret Box stack in column 4.
one should empty this head line (azure, rose, Brown, amber) before one even think about touching this west-side key or the right-side mysteries.
Level 407 Level Overview
the priority is keeping the Conveyor Belt empty.
You cannot afford to hold useless colors.
Level 407 Surviving the Opening Bait
this first taps dictate whether one win or lose.
one should empty this head-line cases using this accessible bottom row of the Top Tray .
empty this Browns First: the third bottom Box needs Brown.
Luckily, one hold two Brown spheres parked east over the front line of the Top Tray .
Hit this Pink: Your second bottom Box needs Pink.
choose this rose sphere parked over this bottom right corner of the Top Tray .
Secure this Blue: Your first bottom Box needs Blue.
choose this azure sphere parked exactly on the bottom middle of the Top Tray .
Hold this emerald: Do not touch this bottom-left Green marble.
Careful using the Orange: Your fourth Box needs Orange.
bring this amber sphere located just above the bottom right corner.
Level 407 Triggering the Lock and Key
Once one empty that first azure, Pink, and Brown layer, the board shifts.
Now one hold this breathing room into go after the actual mechanics.
Dig using this pass: using this lower-middle cleared, carefully remove this gold plus amber pieces over this west side into expose this light pink marble holding the key.
Unlock this upper: send this light rose sphere into one waiting case or onto this Conveyor Belt if you have immediate space.
this second that sends, this seal and Key chain at the top shatters.
this upper-line crimson, amber, and Blue marbles are now in play.
Manage this Connected cases: Now you must deal with the ties.
bring the dark red/pink Connected Boxes pair.
Dropping those shall automatically thaw this adjacent Iced Box marbles in the center.
route this secret cases: lane 2 is now demanding a random color.
Look at what this secret case uncovers plus immediately match that from the newly freed top row.
Do not bring random colors hoping they match.
Level 407 Beating the Late-Game Squeeze
this last phase from sphere Sort Level 407 sits all about surviving column 4.
As one dig deeper, this east side exposes two rear-to-back Mystery Box slots.
Watch this track: At this point, the Conveyor track shall be dangerously full from leftover Light Pinks, Teals, and Greens.
Assess this revealed Mystery Box color on the right.
Prioritize this Unknowns: If one secret case uncovers one gold, immediately look with one gold on this remaining upper rack (as this ones thawed from the Iced Box layer).
empty this Leftover Greens: the west-side bottom Boxes are stacked with Greens.
atlast, bring that lower-west emerald sphere one ignored at this start, along using this bright greens freed from the upper right.
line this Finisher: Once this secret case stack on lane 4 sits broken, this remaining azure plus violet cases shall align perfectly using this loose spheres at the very top of the tray.
Keep the clicks deliberate, don't rush, plus the board will clear.
常见问题
What is the main trap to avoid in Level 407?
The biggest mistake is tapping colors that have no active bottom Box yet. They park on your Conveyor Belt and burn limited slots, so clear the shades that actually have receivers first.
How should I open Level 407?
Ignore the upper layers and aim at the bottom row of the Top Tray. Feed the colors that already have open boxes, then work upward once the lower lanes shift.
When does the midgame color change happen in Level 407?
After the opening boxes fall, the lower columns swap what they demand. Watch for the new shades and only pull blocks that match a box sitting at the front of a lower lane.
Any tip for finishing Level 407 clean?
Keep at least a few empty belt slots before poking mystery or hidden boxes. Feed a revealed color the moment it matches an active box, and fall back to visible marbles when the belt gets tight.