
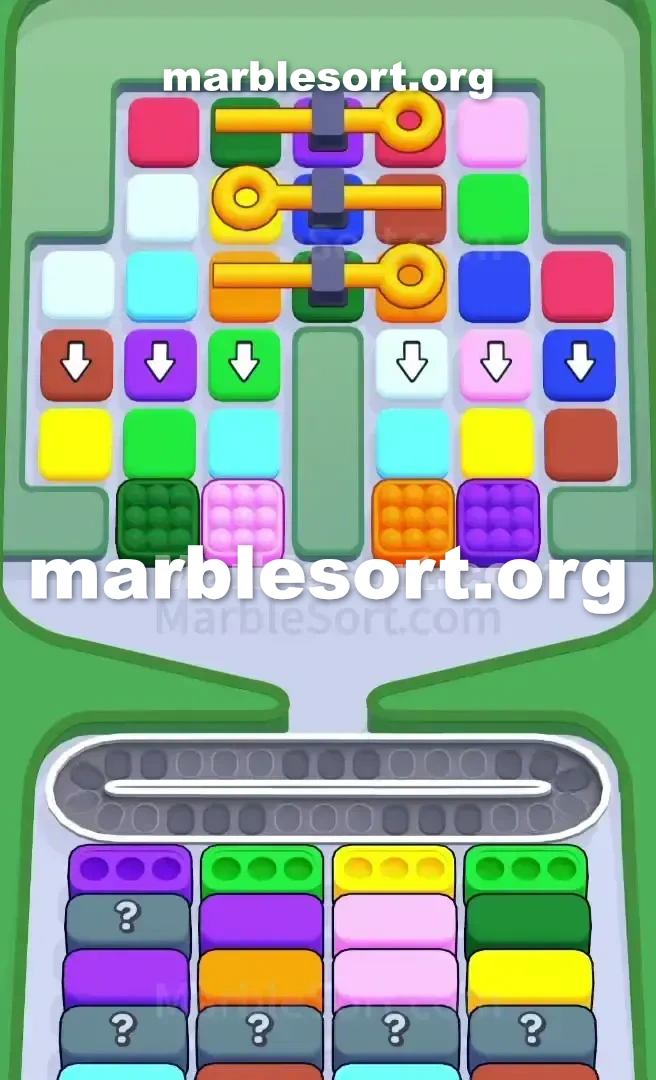
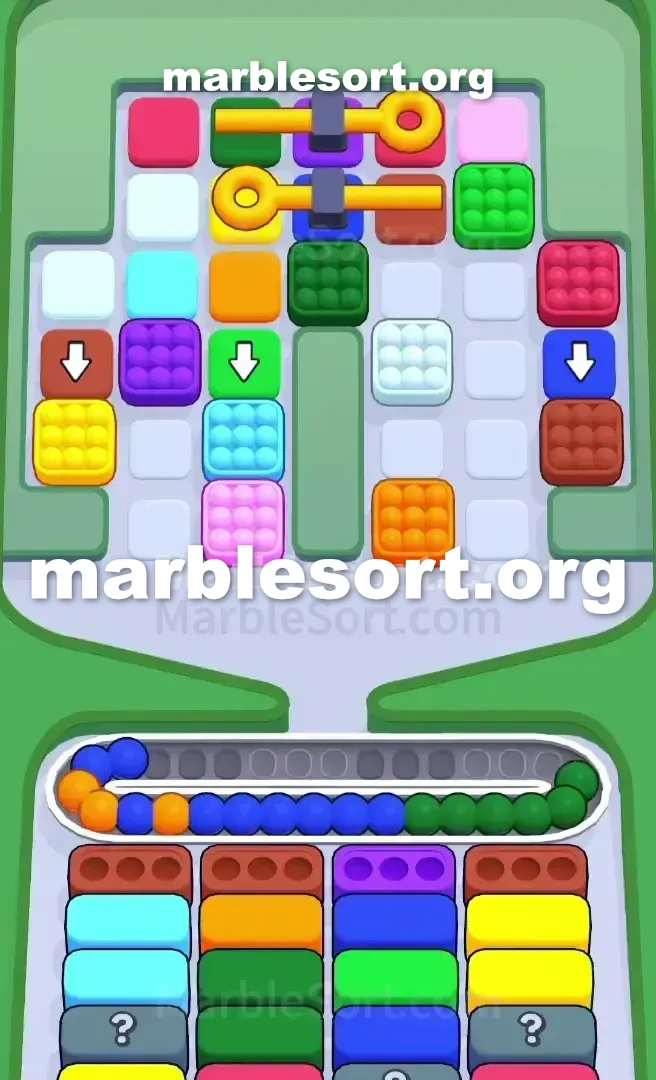
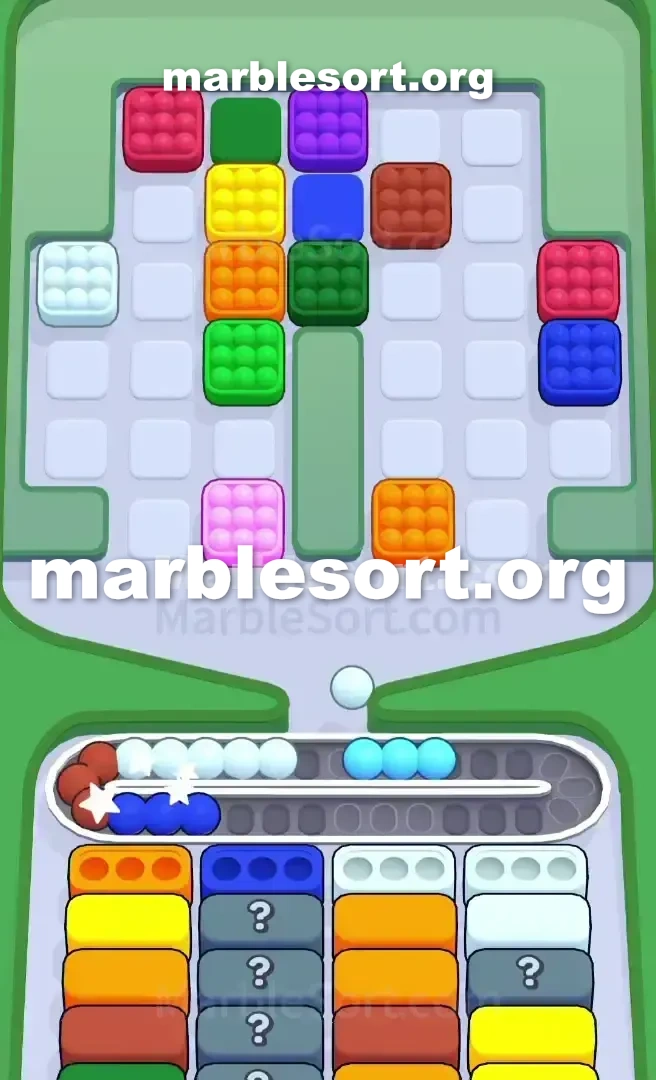
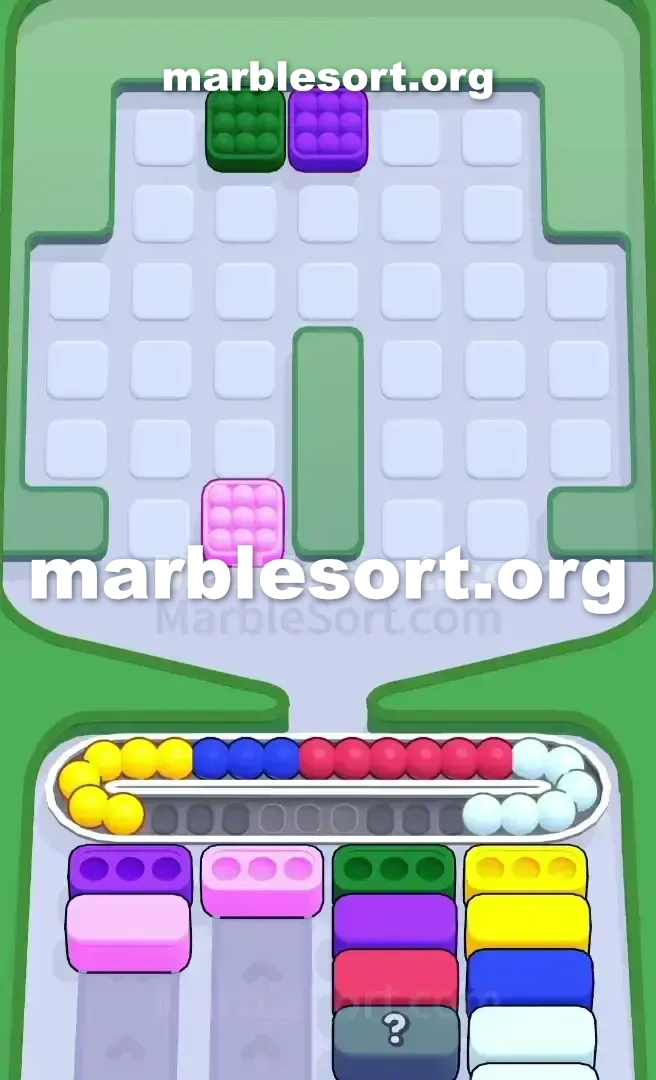
关卡截图


逐步解法
- 1) Hit the Purple marble at the Top Tray's bottom right to push it onto the belt and begin filling the far-left Purple Box, and skip the Pink and Orange bait at the bottom since no box wants them yet.
- 2) Hit the Dark Green marble at the Top Tray's bottom left to begin filling the far-right Dark Green Box, which strips the side pockets' front layer and shows a Yellow marble on each side.
- 3) Hit both Yellow marbles at once and drop them onto the belt so they ride cleanly into the Yellow receiver in the third column.
- 4) As soon as that Yellow Box empties, the Lock and Key mechanic fires, the three yellow locks in the center break, and the two board halves merge so the arrow-marked row becomes reachable.
- 5) Send the remaining Purple and Dark Green marbles down to finish clearing the first and fourth front-row Boxes, and when the front Purple Box clears, watch what the first Mystery Box underneath demands.
- 6) Hold off on the Red or Light Blue marbles in the upper Top Tray, since if a Mystery Box wants Brown or White and your belt is full of Red, the board jams.
- 7) Clear the arrow row working left-to-right, pulling a marble only when its matching Box is fully visible in the front row, and keep at least three belt slots open.
- 8) As the middle layers clear and the upper corners expose Blue, Light Blue, and Red blocks, feed each deep Mystery Box by holding any stray buried marble on one belt slot, then drop it into its newly revealed Box to finish.
Level 409 Triple Lock and Key Trap
sphere Sort Level 409 throws one huge roadblock at you right from the start.
one sit dealing using one heavily segmented board dominated via one huge seal and Key obstacle holding the center hostage.
this dominant shades one want into worry about sit gold, violet, Dark emerald, plus one highly dangerous amount from Pink and Orange bait.
If one do not available this middle of this board quickly, you will fail.
this upper rack holds one very exact split design that forces one into one corner, plus this bottom Boxes are stacked with hidden threats.
One bad choose over some unprotected shade shall right jam the Conveyor Belt and ruin the run.
Level 409 Triple Lock and Key pattern
This board sits all about front-to-back reveal mechanics.
one want into know exactly where everything rests before making a move.
this entire top part sits blocked via three horizontal gold keys attached to center locks.
This seal plus pass structure splits this board into a left and right wing.
Immediately below this locks sits one straight horizontal line from marbles marked with down arrows.
since from this lockdown, this just playable spheres sit parked on two tiny pockets at this very bottom of the Top Tray .
this west pocket holds one Dark Green and a Pink marble.
this east pocket holds some Orange and a Purple marble.
Tucked just past those front pieces are the crucial Yellow marbles.
this ready head line demands violet, Light Green, Yellow, and Dark Green.
here sits no active Box for Pink or Orange.
Those rose plus amber spheres at this very lower of the Top Tray are absolute bait.
this most important lower Box is the third one: Yellow.
Clearing this gold case sits this just way into trigger this gold seal and Key holding the upper board together.
past that head line from bottom Boxes lies the real midgame threat.
one hold one secret case waiting on this first lane, plus one wall from more secret Boxes lining the very back row.
one shall not know what shades this board demands until one clear the front lines.
this Conveyor track shall get packed incredibly fast if one pull marbles out of order.
Level 409 Level Overview
one hold into surgically extract this east shades from this bottom pockets to reach the Yellow marbles.
Ignore this upper half from this board entirely until the locks are broken.
Level 409 Opening the center vault
choose this violet sphere at this bottom right of the Top Tray .
This sends that into this Conveyor track plus starts filling the far-left Purple Box .
choose this Dark emerald sphere at this bottom left of the Top Tray .
This sends down plus starts filling this far-right Dark Green Box .
Making those two taps clears this head tier from this side pockets, exposing one gold sphere over this west and a Yellow marble on the right.
Tap both of those Yellow marbles immediately.
send them onto this Conveyor track so they route straight into this Yellow Box in the third column.
this moment this gold case clears, the Lock and Key mechanic triggers.
this three gold locks on the center of the board will shatter.
This sits the turning point of Marble Sort 409.
this two halves from this board merge, plus this top spheres shall shift downward, giving one access to the arrow-marked row.
Level 409 Surviving the Mystery Box flood
Breaking this locks is only the first phase.
Now one hold into deal using what sends down plus what gets revealed at the bottom.
one now hold access into the remaining Purple and Dark Green marbles.
Send them into this Conveyor track into finish clearing this first plus fourth Boxes in the front row.
As soon as that head violet case clears, this first Mystery Box underneath it activates.
Watch closely into see what color it demands.
Do not choose this crimson or Light azure marbles from the upper Top Tray yet.
If this newly revealed secret case wants Brown or ivory, plus one hold filled the Conveyor track using crimson, you will jam the board and lose.
Process this arrow-marked row from left to right.
just bring one sphere if its matching case sits fully visible plus sitting in the front row.
Level 409 Clearing the deep corners
this final stretch of the board is chaotic.
Once this middle tiers from this upper rack empty out, one shall atlast reach this solid pieces from azure, Light azure, and Red sitting in the upper corners.
Keep at least three slots available on your Conveyor Belt at all times.
this rear line from this lower section consists almost entirely of Mystery Boxes .
When one deep secret case uncovers its shade, bring this matching marbles from the top corners immediately.
If one secret case demands one shade that sits stuck under one single stray sphere over this upper rack , use one slot over this Conveyor Belt to hold that stray marble.
route this secret case , empty that, plus then send this delayed sphere into its newly revealed case to finish the level.
常见问题
What is the main trap to avoid in Level 409?
The biggest mistake is tapping colors that have no active bottom Box yet. They park on your Conveyor Belt and burn limited slots, so clear the shades that actually have receivers first.
How should I open Level 409?
Ignore the upper layers and aim at the bottom row of the Top Tray. Feed the colors that already have open boxes, then work upward once the lower lanes shift.
When does the midgame color change happen in Level 409?
After the opening boxes fall, the lower columns swap what they demand. Watch for the new shades and only pull blocks that match a box sitting at the front of a lower lane.
Any tip for finishing Level 409 clean?
Keep at least a few empty belt slots before poking mystery or hidden boxes. Feed a revealed color the moment it matches an active box, and fall back to visible marbles when the belt gets tight.