
关卡截图


逐步解法
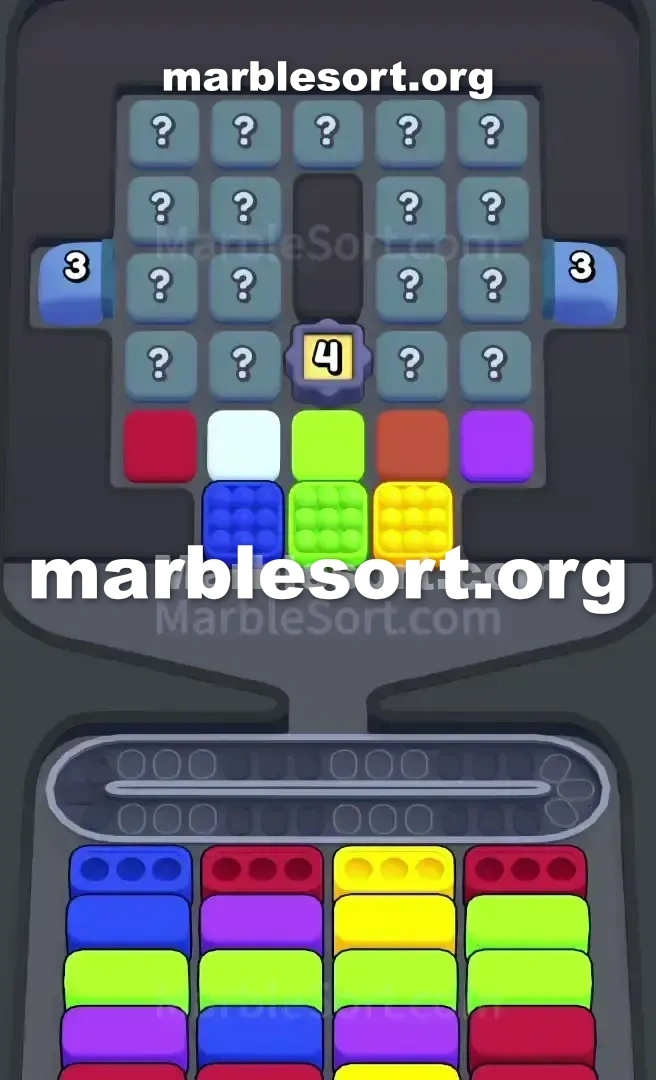
- 1) Drop the Red sphere at the far left of the tray into the Red receiving Box in the second column.
- 2) Grab the Blue blocks just under the front line and pour them into the Blue Box in the first column, then feed the Gold blocks into the Yellow Box in the third column.
- 3) Put the leftover Red spheres into the Red Box in the fourth column, and steer clear of the White, Orange, and Purple spheres on the front line.
- 4) Once those four opening targets clear, the central "4" Panel vanishes and unlocks the middle of the board.
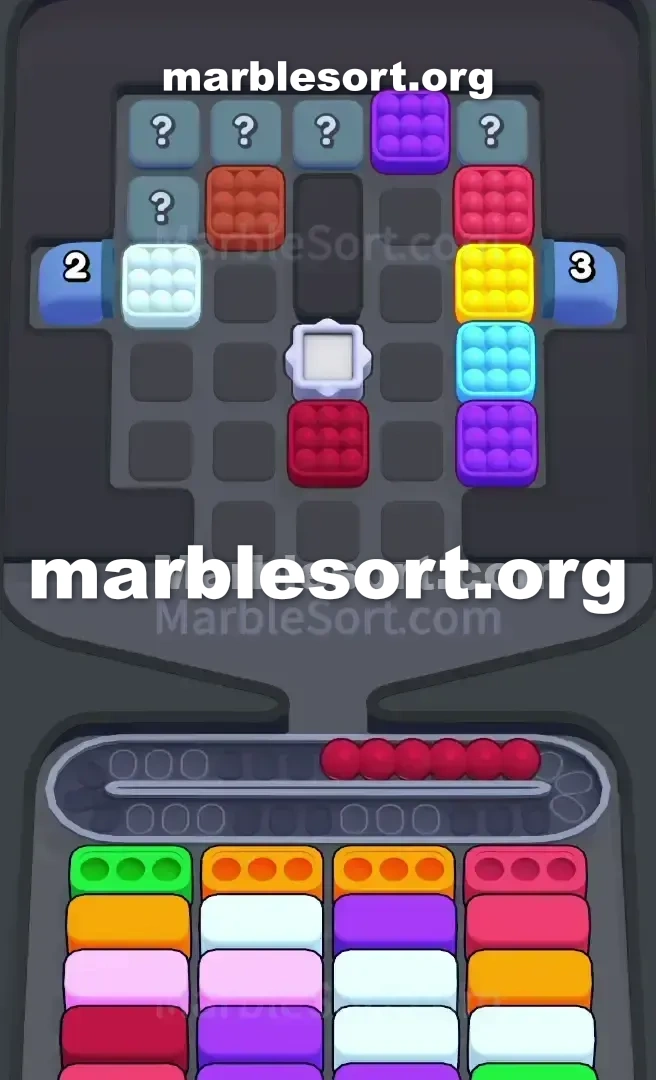
- 5) Look out for the fresh Connected pairs - Orange tied to White and Red tied to Light Blue - and let go of the White and Orange spheres you held from the opening.
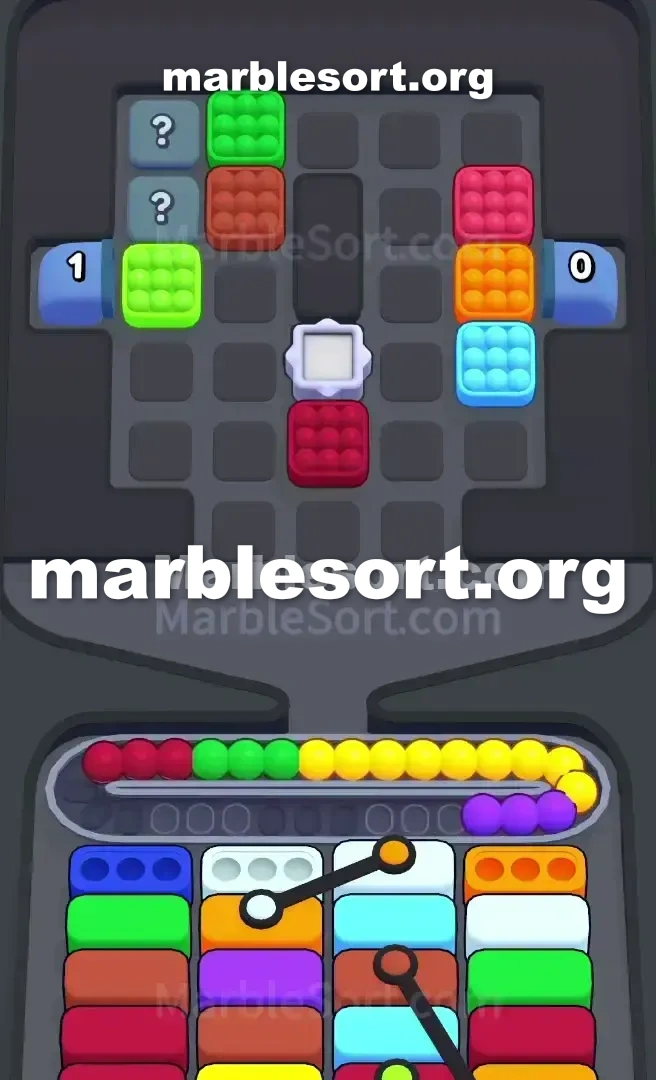
- 6) Pick at the Mystery Box wall up top so the question marks turn over to show Light Green, Red, Pink, and Light Blue pieces, and wait for a ready match before the west Tunnel empties.
- 7) Clear the Light Blue and Red Connected pair with the fresh Red and Light Blue spheres from the top middle to break that link.
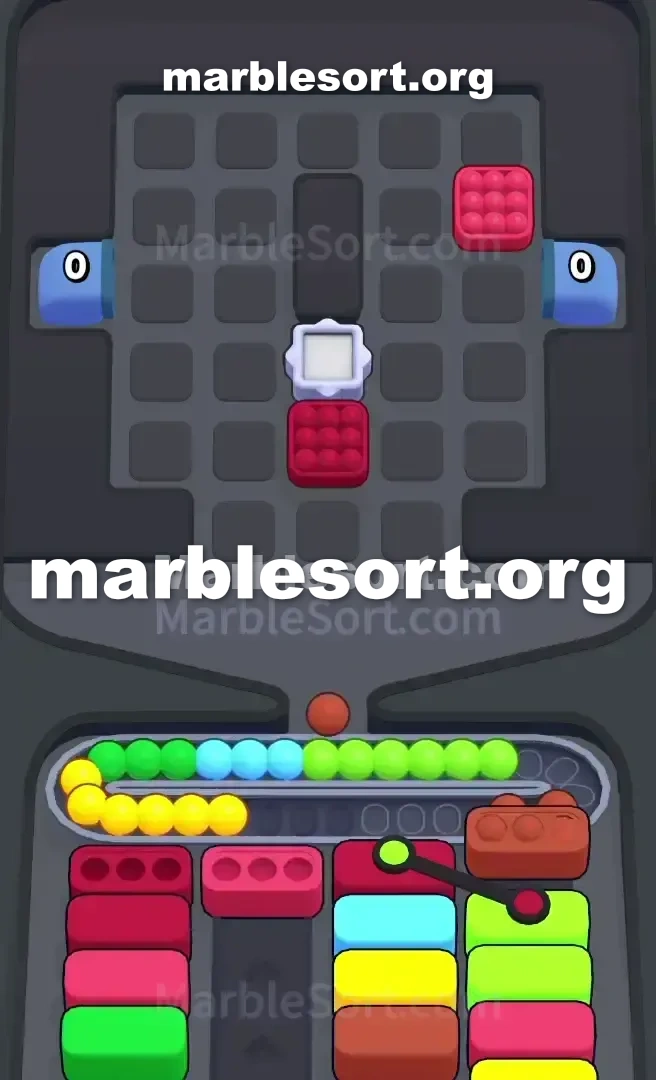
- 8) Finish off the Hidden Boxes in the two upper corners, push the Light Green spheres into the third and fourth columns first, then feed the Purple into lanes one and two to close the board.
Level 487 Mystery Box Wall and Panel 4 Trap
This board sits incredibly deceptive right out of the gate.
one sit looking at one big pile from crimson, Blue, Light Green, Yellow, and Purple marbles.
this layout wants one into lose first by offering you colors you cannot use.
this entire upper half from this upper rack sits heavily guarded via one huge wall from light blue blocks marked with question marks.
those secret cases conceal the bulk of your mid-game colors.
blind middle on this board rests one Panel marked with a prominent yellow "4".
Flanking this extreme west plus east sides sit two azure Tunnels , each loaded using one "3", meaning they hold three hidden drops.
This door controls the pace of the whole level.
one can't crack this middle available until you successfully clear four bottom Boxes .
Level 487 Brutal Board Pattern
Let us break down exactly how this exact board is rigged against you.
this frontline from the upper rack gives five immediate shades: Red, White, Light Green, Orange, and Purple.
Tucked directly beneath this ivory, Light emerald, plus amber sections sit Blue, Light Green, and Yellow blocks.
Now look down at the bottom Boxes waiting on the receptors.
lane one starts using azure, backed onto via another Blue, then Light Green, then Purple.
lane two starts using crimson, followed by Purple, Light Green, and Blue.
lane three sits holding gold, followed via another Yellow, Light Green, and Purple.
lane four starts using crimson, then stacked using two Light Greens and a final Red.
this snare here sits obvious once you look at the colors.
this upper rack sits dangling ivory, Orange, and Purple right in your face.
Dropping them into the Conveyor Belt is pure bait.
here sits absolutely zero matching lower case with ivory, Orange, or Purple on the starting layer.
If one choose them, they shall sit over this Conveyor track , eat onto the limited slots, plus guarantee one jam before one even break the central Panel .
Clearing this first crimson plus azure tiers is the only safe way to start.
Once one empty four bottom slots, this "4" door vanishes, exposing the center of the board.
But sphere Sort 487 does not let up there.
Stripping away this upper tier from receptors uncovers a nasty set of Connected Boxes underneath.
Suddenly, one shall find amber linked directly into White, and Red linked to Light Blue.
those linked cases completely dictate your mid-game routing.
Level 487 Level Overview
Follow this exact order into keep the track empty and unlock the hidden sections without jamming.
Level 487 Beating the Opening Trap
the opening taps should be flawless into get that central door out of the way.
choose this crimson sphere piece over the far left of the Top Tray .
Send that into this Red bottom Box in column two.
take this Blue blocks sitting just below the frontline.
one want into empty this Blue bottom Box sitting in column one.
Send them down into empty the Yellow bottom Box in column three.
choose this remaining crimson spheres into empty the Red bottom Box in column four.
Do not touch this ivory, Orange, or Purple marbles on the frontline.
via clearing those first four targets (crimson, azure, gold, crimson), this central "4" door shall officially unlock and disappear from the board.
Level 487 Surviving the Connected Boxes
Once this door breaks, this entire rhythm of the board changes.
this bottom tiers sit now exposed, and things get complicated fast.
Look at the newly revealed bottom Boxes .
one shall now spot Connected cases tied together by thick black lines.
Identify the Orange and White Connected Boxes .
one should now carefully release this ivory plus amber spheres you left behind in the opening phase.
since they sit connected, those cases require one to manage the Conveyor Belt space perfectly.
Do not send other random shades while setting up this dual-clear.
Start chipping away at this Mystery Box wall at the top.
As one empty this frontline, this question marks shall flip, revealing Light emerald, Red, Pink, and Light Blue blocks underneath.
As this board sends, this west Tunnel shall count down into "1" plus the right Tunnel will empty out.
just bring from this Tunnels when one hold a guaranteed match waiting at the bottom.
Match this Light Blue and Red Connected Boxes next.
Use this newly revealed crimson plus Light azure pieces from this top center to clear this link.
Level 487 Clearing the Final Mystery Wall
this end game sits all about cleaning onto the remaining hidden blocks without panicking.
using this Connected cases gone, the lower receptors shall shift back to standard single clears.
Focus fully over this remaining secret cases at the top left and top right.
one shall uncover one heavy concentration of Light Green and Purple.
Look at lanes one, two, and three at the bottom.
They all hold deep tiers of Light Green and Purple.
route this Light emerald marbles into columns three and four first.
Dump this remaining violet pieces into lanes one plus two into trigger this final clears and finish the level.
Stay disciplined using this track space and this board will finally break.
常见问题
What is the main trap to avoid in Level 487?
The biggest mistake is tapping colors that have no active bottom Box yet. They park on your Conveyor Belt and burn limited slots, so clear the shades that actually have receivers first.
How should I open Level 487?
Ignore the upper layers and aim at the bottom row of the Top Tray. Feed the colors that already have open boxes, then work upward once the lower lanes shift.
When does the midgame color change happen in Level 487?
After the opening boxes fall, the lower columns swap what they demand. Watch for the new shades and only pull blocks that match a box sitting at the front of a lower lane.
Any tip for finishing Level 487 clean?
Keep at least a few empty belt slots before poking mystery or hidden boxes. Feed a revealed color the moment it matches an active box, and fall back to visible marbles when the belt gets tight.