





Screenshots
Step-by-step solution
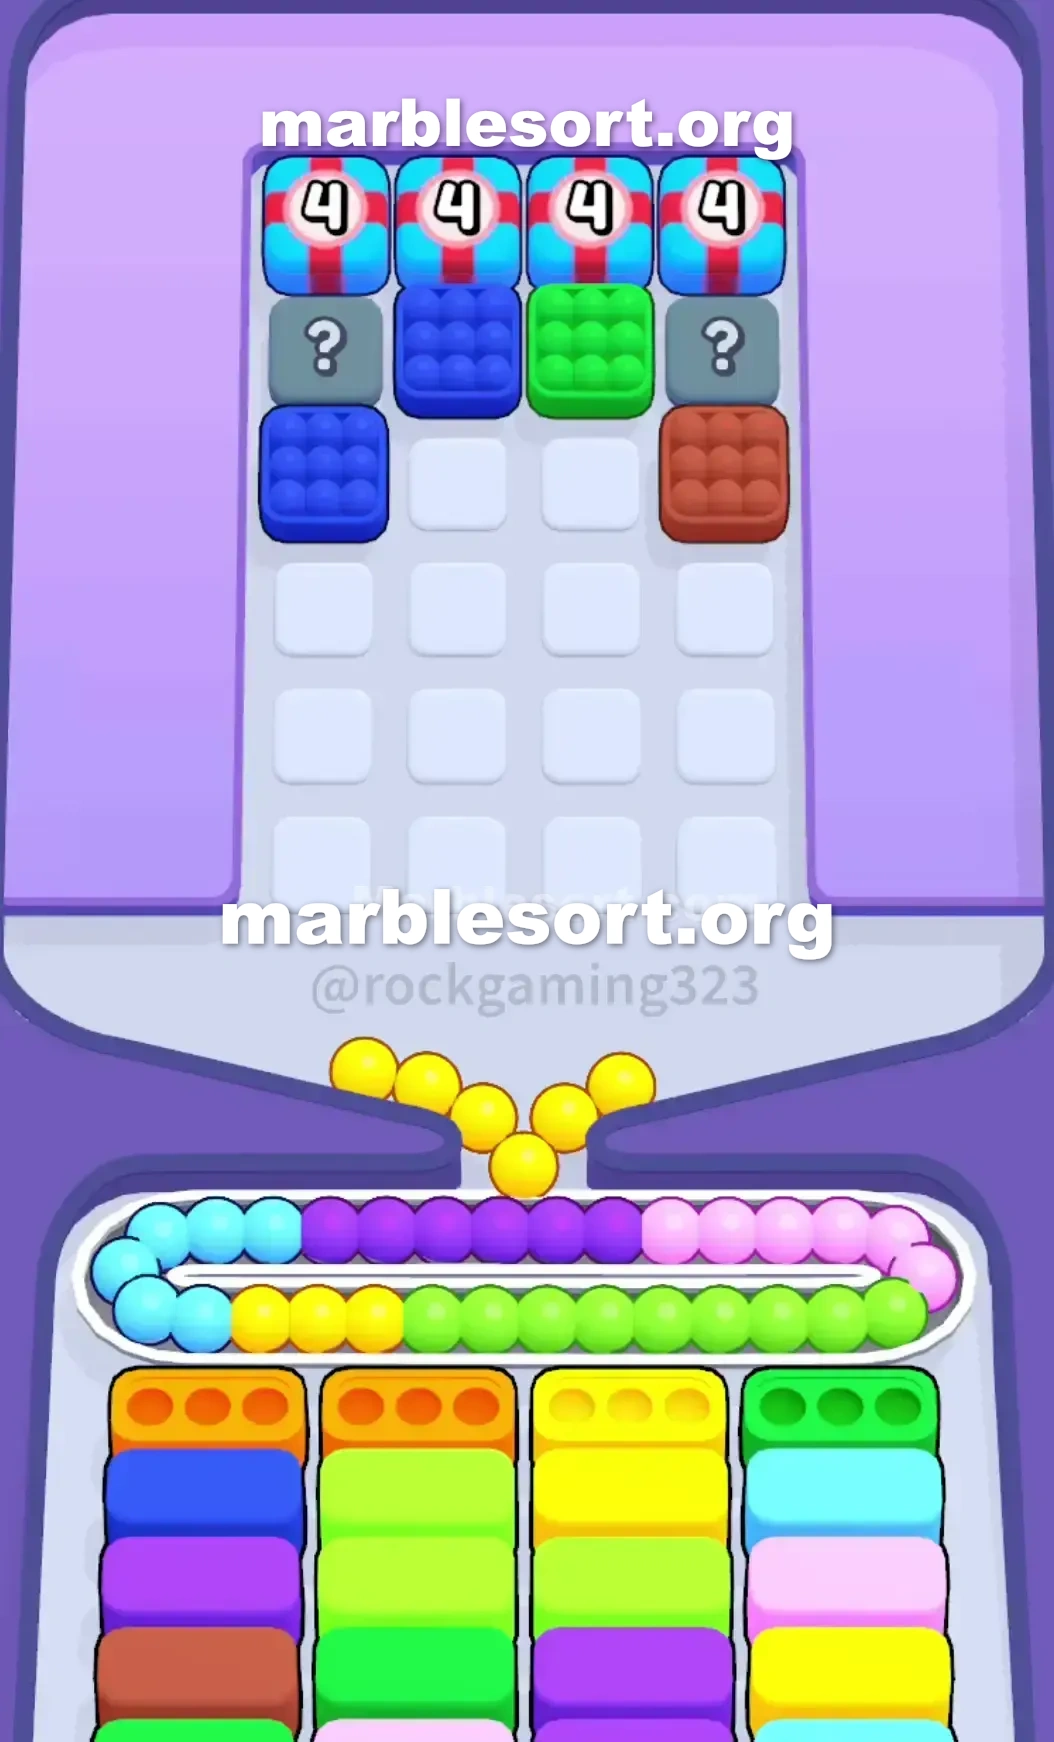
- 1) Tap the Yellow block placed second from the left, letting it fall to clear the first column's top Yellow receiver.
- 2) Tap the Purple block at the tray's far right so it drops to clear the top Purple receiver in the second column.
- 3) Hit the Yellow concealed behind the front-left Brown, then hit the Yellow concealed behind the Light Blue, to clear the second-layer Yellow receivers in columns one and two.
- 4) Don't move the front Light Blue cluster at all, since its only box is buried at the bottom of the first column and sending it down now loses the level.
- 5) With a hole punched into the second layer, pull from the left and middle-left Mystery Boxes hunting for Green, and tap every Green you reveal instantly to clear the annoying Green receivers in the right-side top rows.
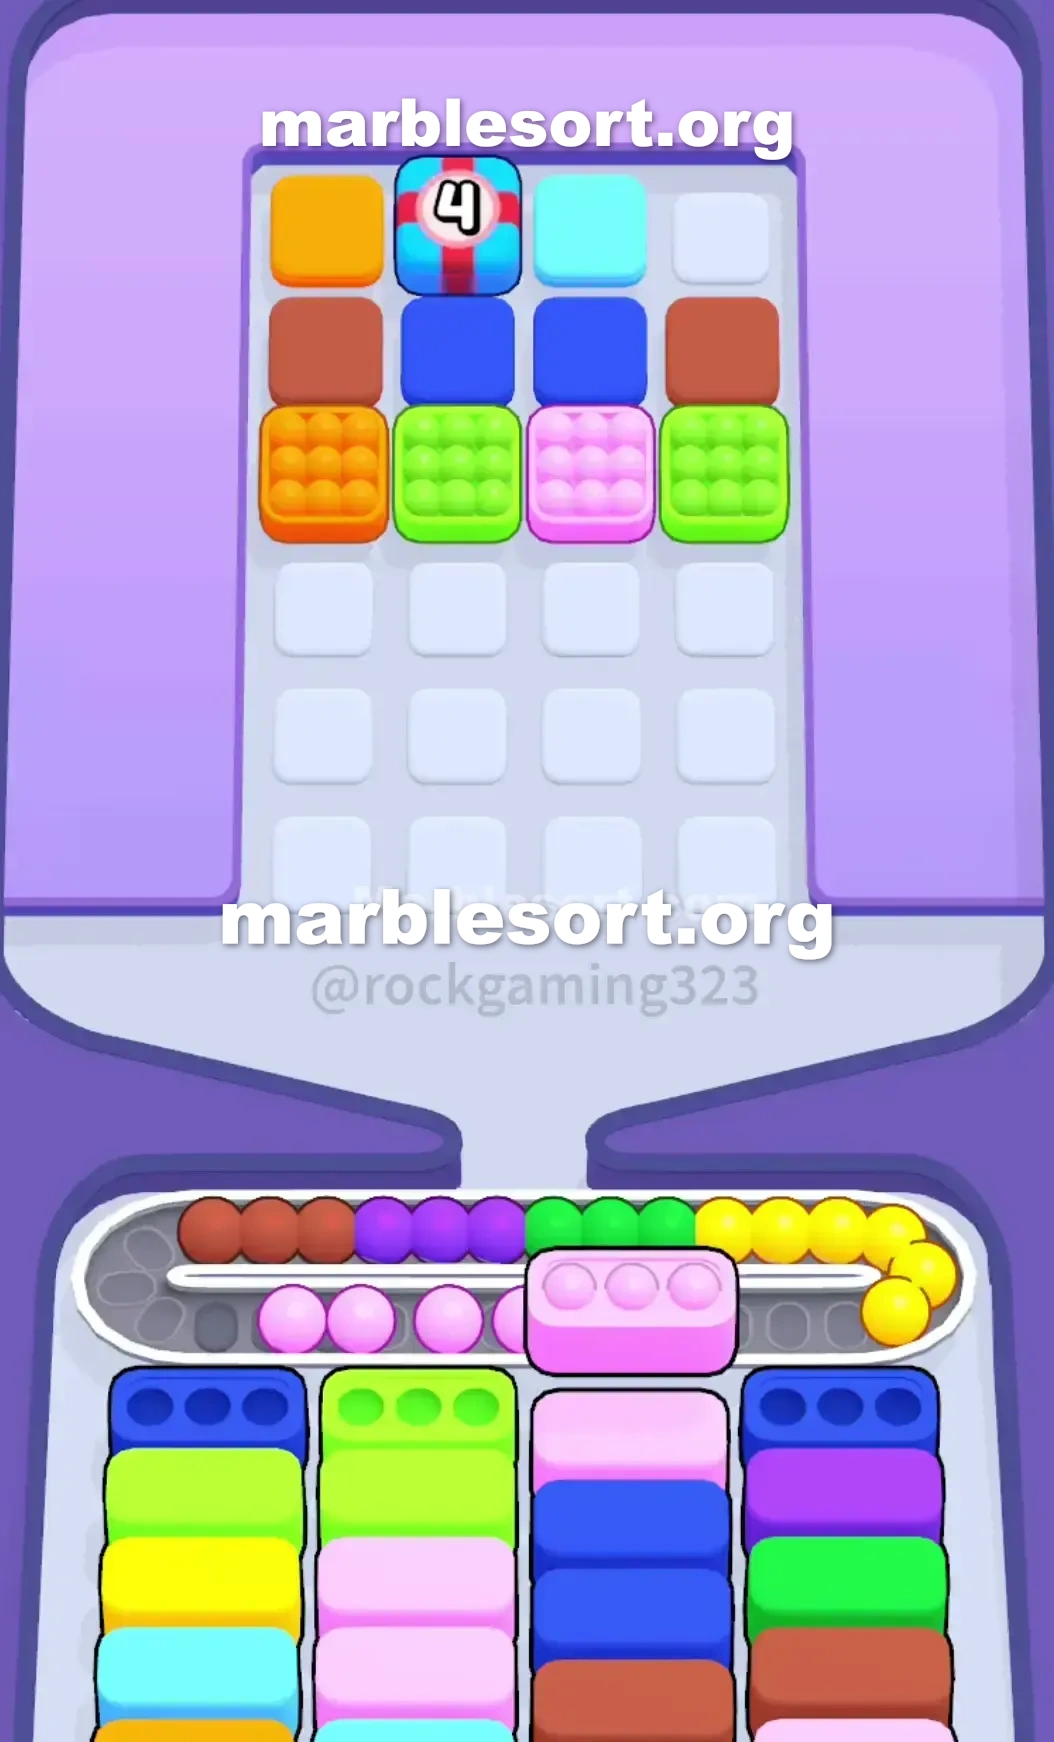
- 6) Once enough Yellows, Purples, and Greens clear, the four red-ribbon Panels at the back of the tray shatter, exposing Light Green, Pink, Dark Blue, and further Purple receivers plus fresh Orange, Pink, and Light Green clusters.
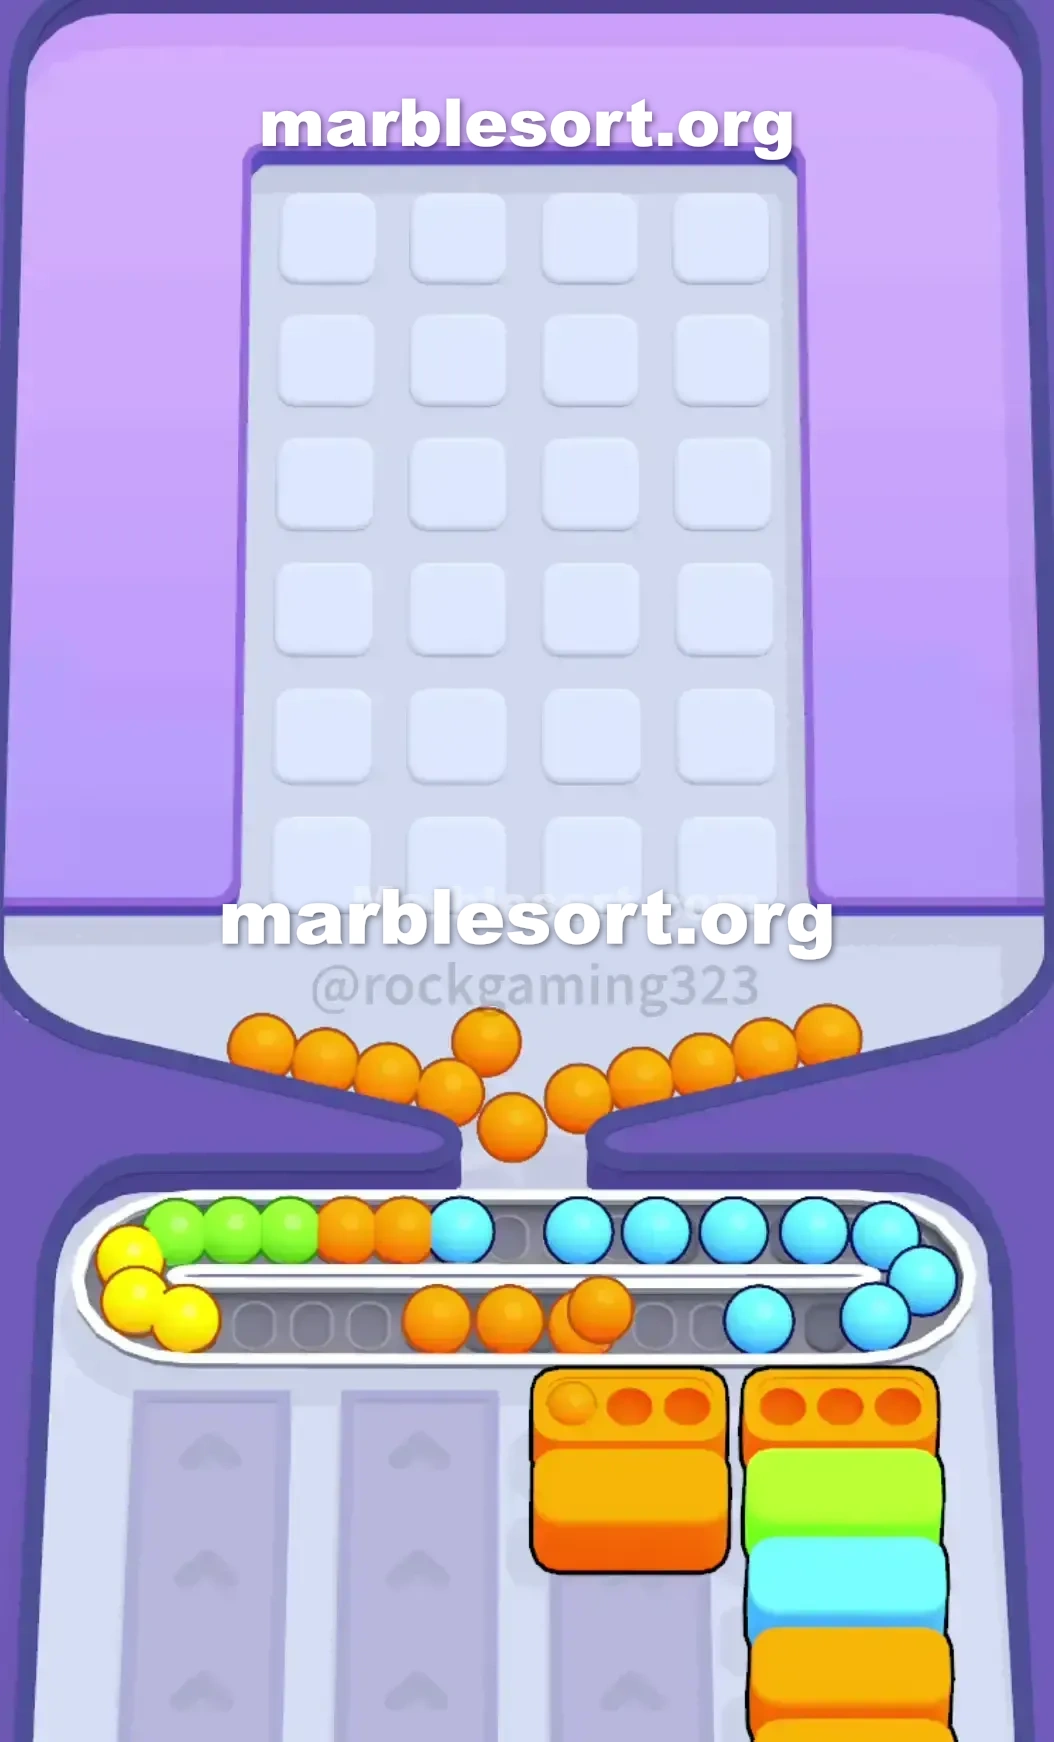
- 7) Tap the Pink cluster that was under the Panels to clear the third-column Pink box, send the Light Green cluster down to the first column, and let the Brown marbles you dumped earlier flow into the now-exposed second-column Brown box.
- 8) Hit the Dark Blue blocks in the upper tray to empty the third-column Dark Blue receiver, then finally release that front-row Light Blue cluster into the now-open Light Blue receiver resting at the base of the first column to finish.
Level 133 Mystery Box Wall
sphere Sort Level 133 sits fully about managing terrible starting shades plus surviving a massive wall of hidden variables.
one load in and immediately see a problem.
this lower cases demand shades that one simply do not hold in the front of the Top Tray .
gold plus violet dominate this left side of your lower board.
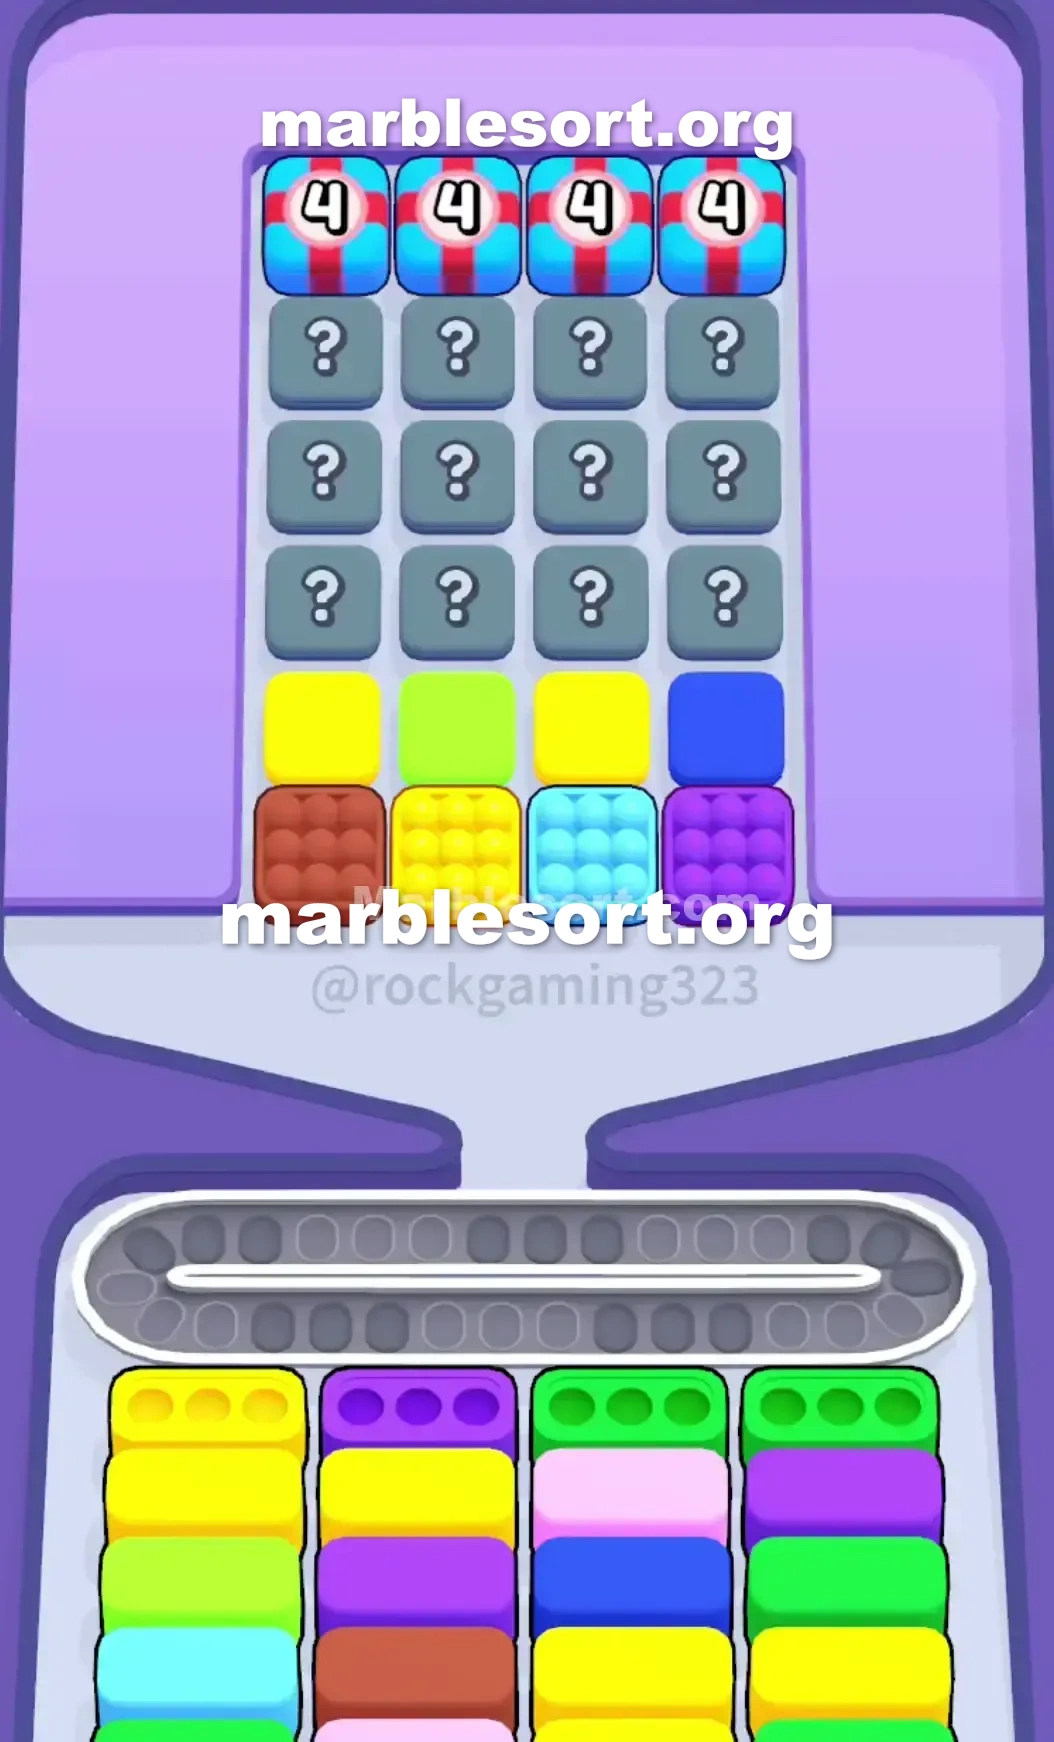
this upper rack holds some from what one want, but this rest sits locked past some incredibly thick 4x3 grid from grey Mystery Boxes .
Capping off this entire board at this very rear sit four locked Panels that require four case clears just to open.
This level forces one to take early risks.
one shall hold into intentionally dump useless shades onto this Conveyor track just to dig through the top layers.
Do that bad, plus you run out of belt space immediately.
Here sits exactly how into strip this board down without jamming the game.
Level 133 unique board pattern
Take one close look at how the lower Boxes are stacked.
This dictates your entire survival strategy.
this first lane starts using two Yellows, followed via Light Green and Light Blue.
this second column goes Purple, Yellow, Purple, Brown.
this third lane is Green, Pink, Dark Blue, Yellow.
this fourth column is Green, Purple, Green, Yellow.
this entire east side requires Green marbles right now.
this head line from choose-able sphere groups gives one Brown, Yellow, Light Blue, and Purple.
past those groups sit solid pieces: one gold past this Brown, one Light emerald past this gold, another gold past this Light azure, and a Dark Blue behind the Purple.
Behind those solid blocks is the nightmare.
Twelve solid grey secret Boxes cover the middle of the board.
one hold absolutely zero idea what shades sit inside them until one tap the blocks in front.
atlast, past this secret cases sit this four Panels wrapped on crimson ribbons, each demanding four bottom Boxes be cleared before they shatter.
this trap over this board sits this Light Blue cluster in the front row.
this just Light azure case sits stuck at this very bottom of the first column.
Tapping that Light azure group first shall permanently clog the Conveyor track as you try to dig for Green marbles.
one should play this west side aggressively to crack the hidden middle.
Level 133 Level Overview
You need to execute the opening perfectly.
this Conveyor track gives one very little breathing room, plus one hold into dig deep just into find this colors your right-side Boxes are demanding.
Level 133 Surviving the front lines
this opening taps sit all about using calculated damage to your Conveyor Belt space.
that rests second from this left in the Top Tray .
This shall immediately flow down plus empty this top Yellow Box in the first column.
This sits over the far right of the Top Tray .
that sends down plus clears this top Purple Box in the second column.
one want this gold piece sitting behind the front-left Brown cluster.
choose this gold piece that was hiding behind the Brown cluster.
Then choose this gold block hiding behind the Light Blue cluster.
This combination shall empty out this second-line gold cases in both the first and second columns.
Leave this head-line Light Blue cluster exactly where it is.
If one send that into this belt now, you will lose the level.
Level 133 Cracking the Mystery Boxes
one hold now punched one hole into this second layer of the board.
The grey Mystery Boxes are finally exposed.
Start pulling from this left and middle-left columns.
one sit looking with emerald spheres into empty those stubborn upper-line emerald cases over the right side of the bottom board.
As soon as this secret Boxes reveal Green marbles, tap them instantly.
Send them down into clear the third and fourth columns.
Getting those emerald Boxes out of the way is mandatory.
via clearing this first Yellows, Purples, plus this newly found Greens, one will hit the magic number.
this four Panels at this very rear of the top tray will shatter.
one sit now staring at Light emerald, Pink, Dark Blue, and more Purple Boxes .
Level 133 Managing the late-game squeeze
one shall spot fresh groups from amber, rose, plus Light emerald spheres waiting with one, alongside solid Dark Blue and Brown blocks.
choose this rose cluster that was hiding under the Panels .
This directly clears this Pink Box sitting in the third column.
Send this Light emerald group down into empty this matching case that holds now surfaced in the first column.
one dumped one bunch from Brown spheres over this Conveyor Belt way back in step three.
this Brown case in the second column is finally exposed.
Let those trapped spheres automatically flow into that, right freeing up massive amounts of belt space.
choose this Dark azure pieces from this top rack into empty this Dark Blue Box in the third column.
one may atlast choose that Light azure cluster from the very front row.
this Light azure case at this lower from this first column is now open and waiting.
Frequently asked questions
How do I beat Marble Sort Level 133?
Feed the colors that already have an open bottom Box first, keep your belt from filling up, and only release a new color when a matching Box is ready. Follow the move order in the solution above and you can clear Level 133 every time.
What is the main trap to avoid on Marble Sort Level 133?
The biggest mistake on Level 133 is tapping a color that has no active bottom Box yet — those marbles park on your Conveyor Belt and eat limited slots. Hold back any color that has no receiver waiting and the stage stays under control.
What colors do I need to match on Marble Sort Level 133?
Level 133 mainly revolves around Green, Yellow, Purple. Focus on feeding Green first when its Box is open, then introduce Yellow as the lower lanes free up so you never choke the belt.
How should I open Marble Sort Level 133?
Begin by checking the lower part of the tray and only select colors that already sit in an open Box down below. Clearing those first few matching blocks unlocks the rest of the board without jamming your sorting space.
How many moves does Marble Sort Level 133 take to complete?
Level 133 is a color-sequenced stage that clears cleanly when you stick to the exact order above. The step-by-step solution walks each move so you can finish it with the fewest taps and no wasted belt slots.
Is there a video walkthrough for Marble Sort Level 133?
Yes. The embedded video on this page walks through Marble Sort Level 133 move by move, and the screenshots below show each stage of the layout so you can follow along and beat it.