





Screenshots
Step-by-step solution
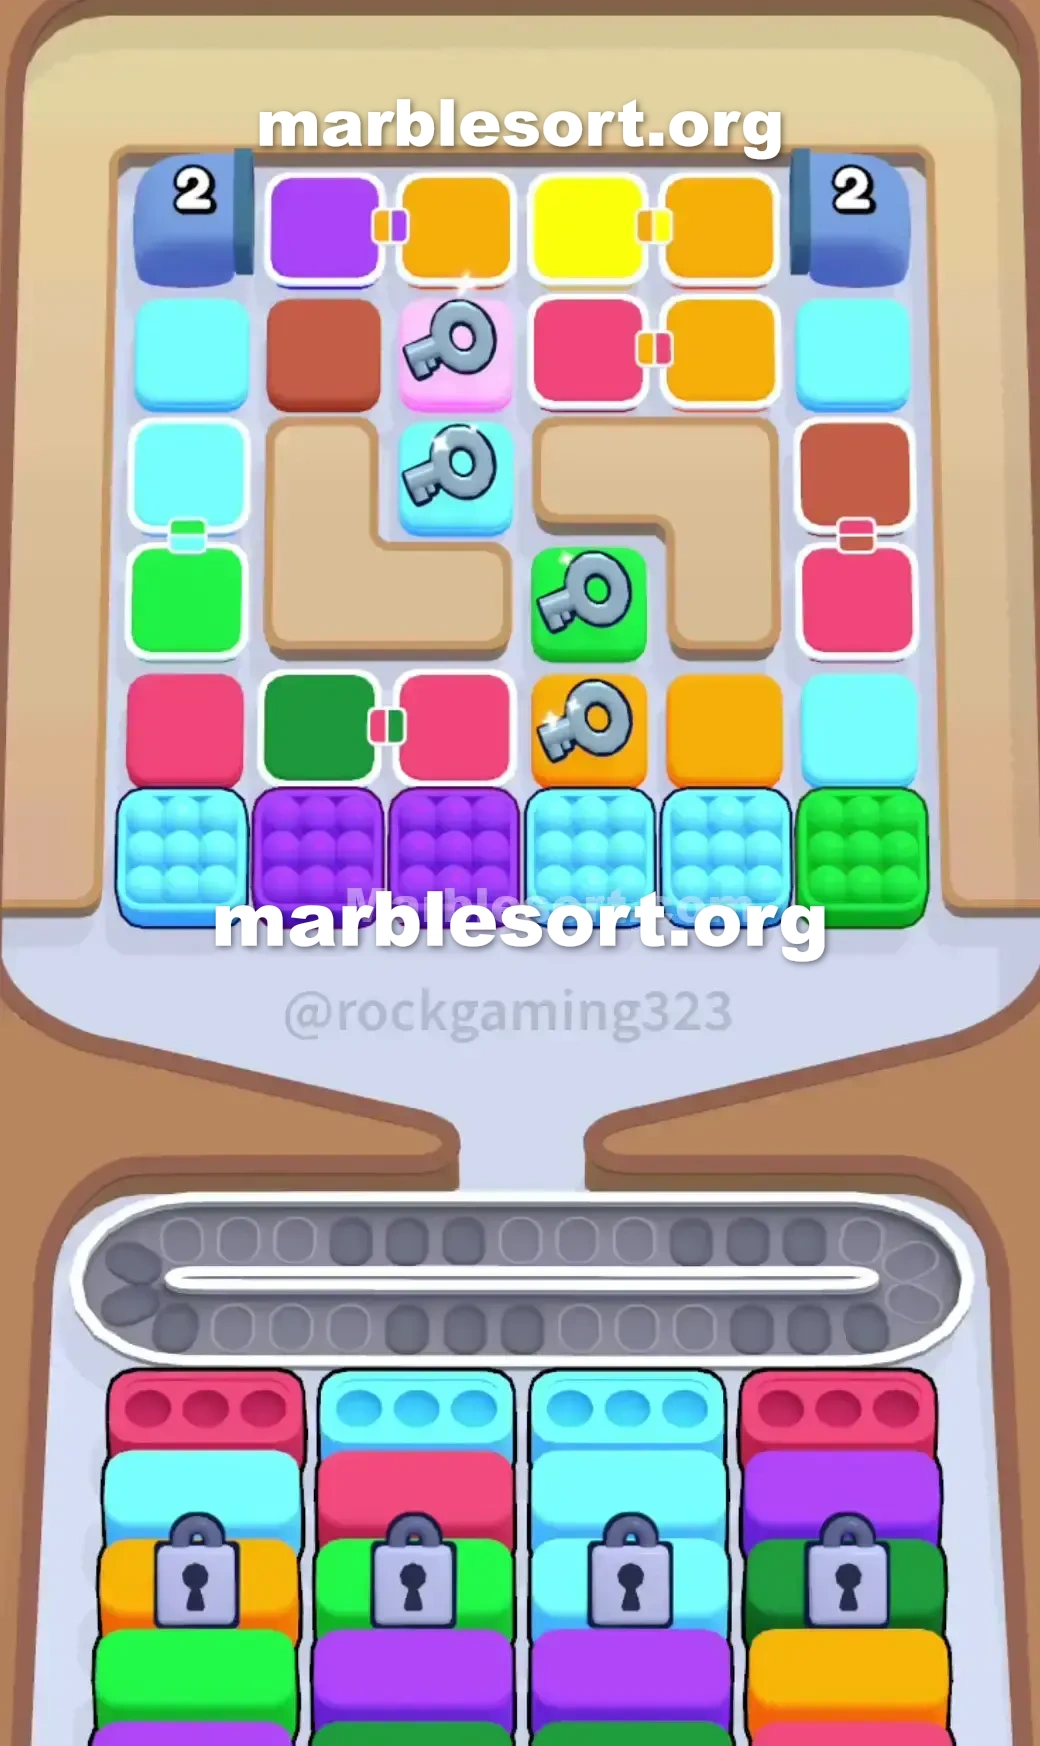
- 1) Shove the three Light Blue stacks sitting on the lowest Top Tray row into the two center boxes that call for Light Blue.
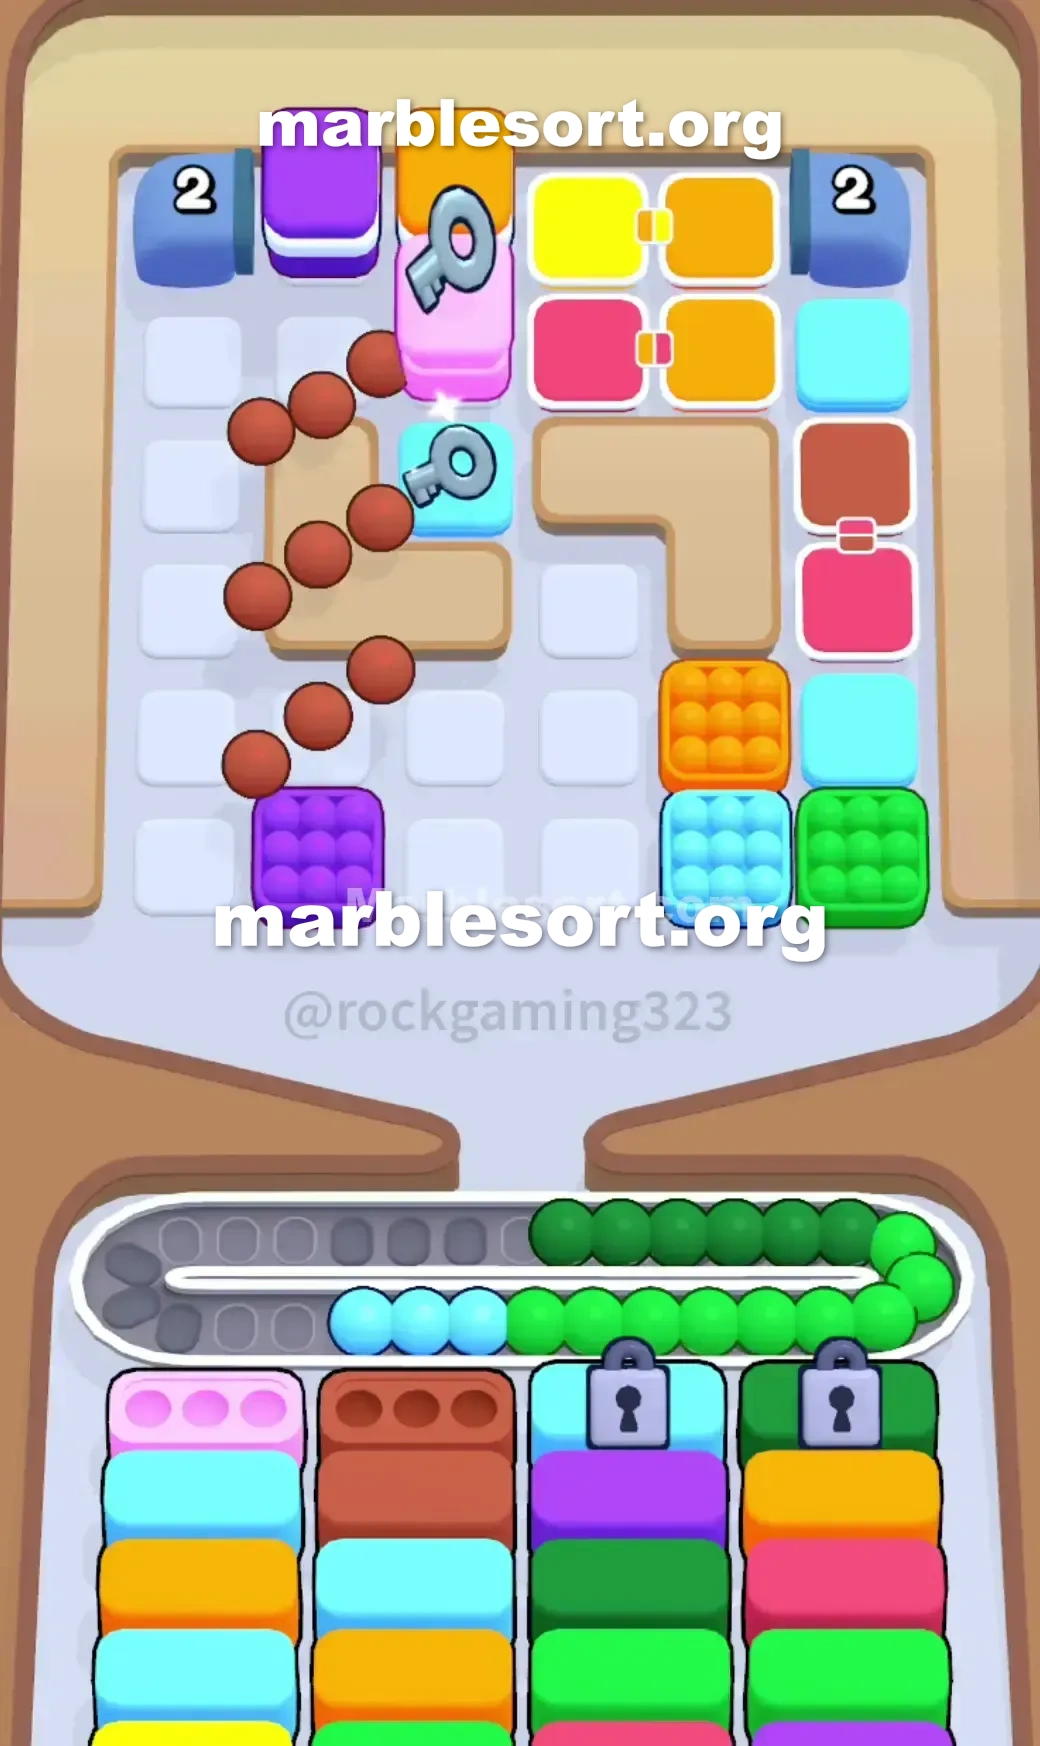
- 2) Let the blocking Purple and Green sets park on your Conveyor Belt to clear a route to the buried Red marbles.
- 3) Send the freed Red sets down to fill and clear the two outer Red bottom boxes.
- 4) Pop the four center keys one by one (Pink, then Light Blue, then Green, then Orange) to shatter every padlock at once.
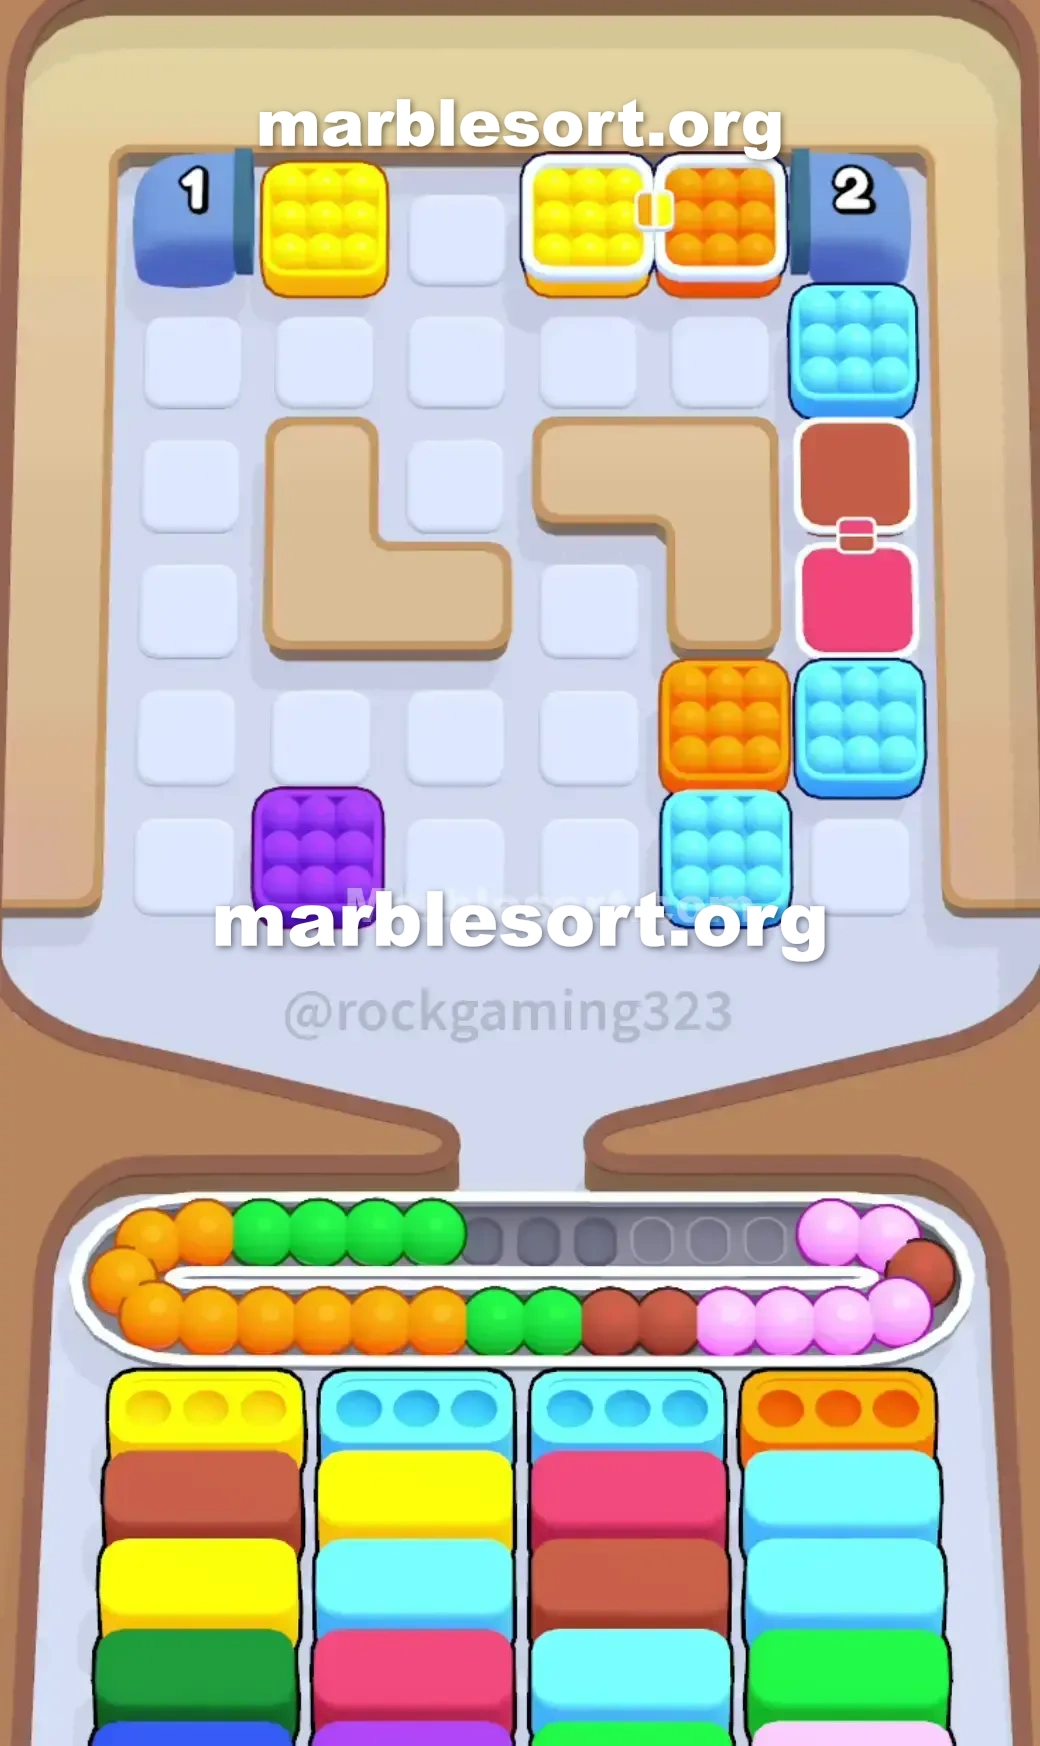
- 5) Instantly use the Purple and Green sets already sitting on the belt to clear their matching boxes and relieve the pressure.
- 6) Pull the connected Yellow and Orange boxes from the top right, but only after leaving at least two empty belt slots.
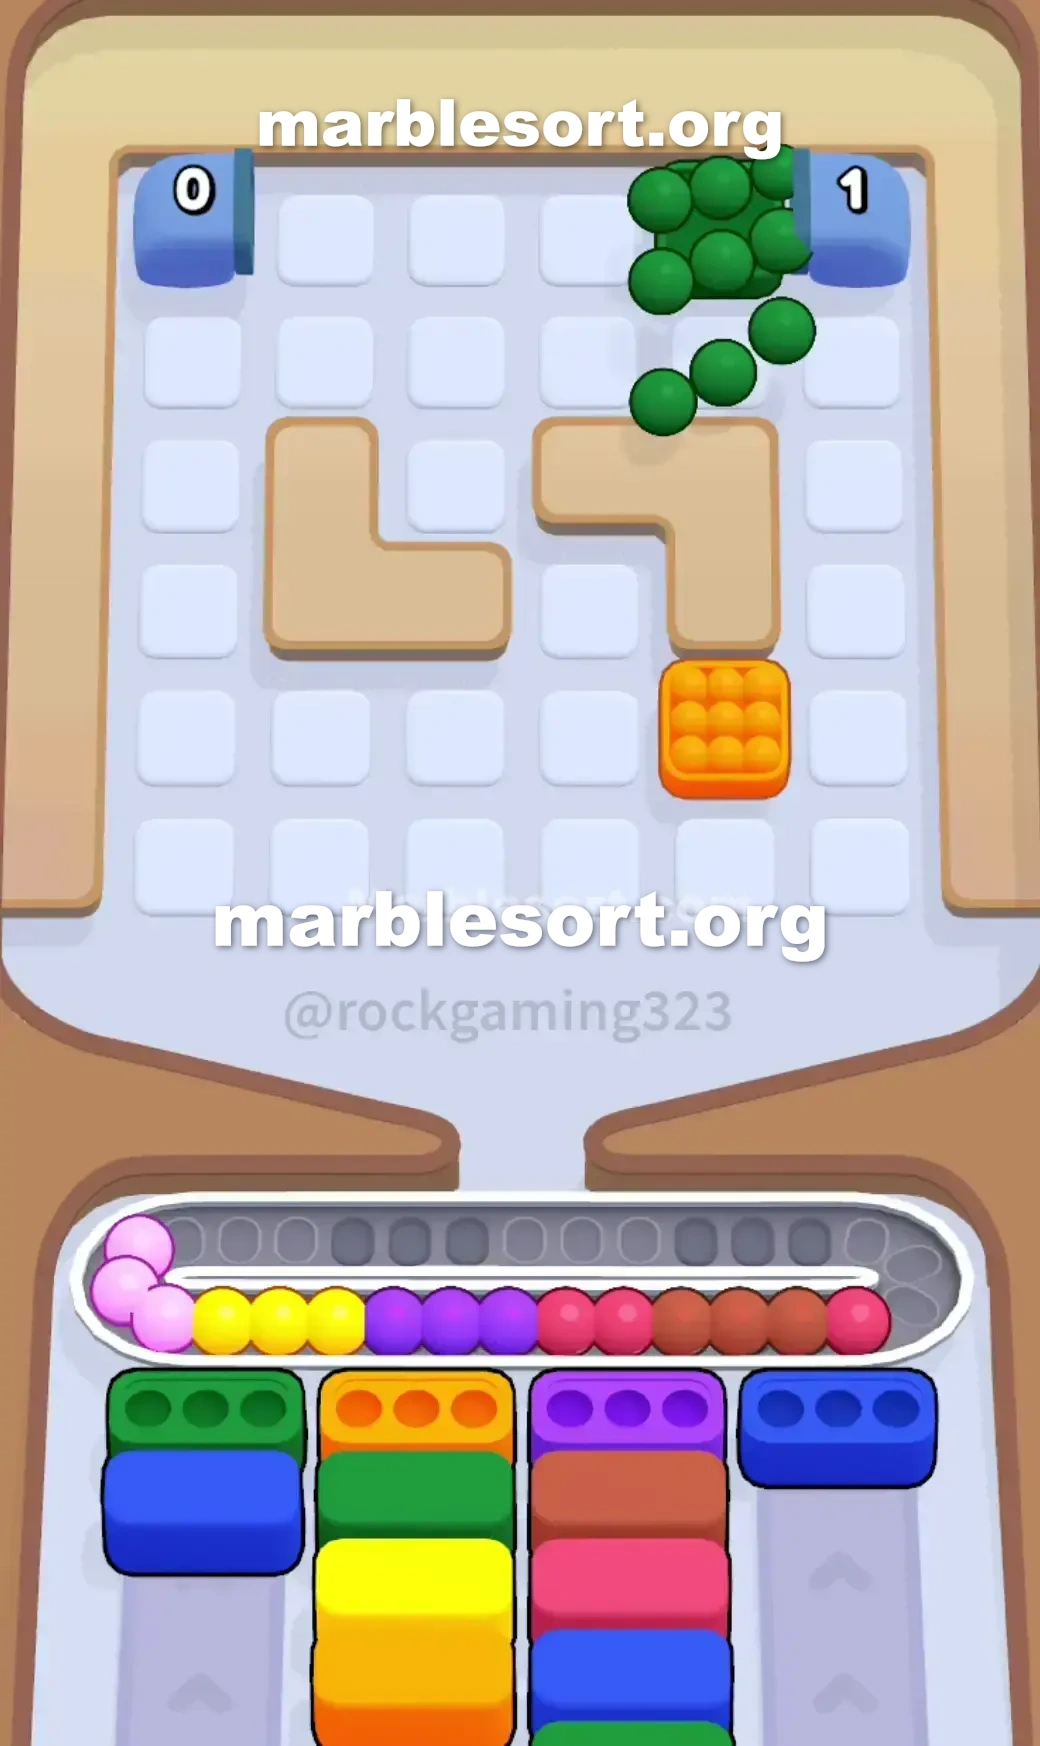
- 7) Clear the marbles blocking the left Tunnel and match them in, then repeat on the right Tunnel one wave at a time.
- 8) Keep the belt tidy while matching the last stray marbles to finish the board.
Level 208 Four-Lock Trap
one load into this board plus immediately hit a wall.
Four giant padlocks stare one down from the bottom area.
This sits this defining headache of Marble Sort Level 208 .
one can't ignore the Lock and Key mechanic here.
this dominant shades on this starting upper rack sit Light azure, violet, plus emerald, but this game cruelly demands crimson to clear the outer lanes.
Two huge L-shaped wooden path pieces restrict the center of the board.
Tucked inside plus across those wooden barriers sit four single spheres carrying the keys you desperately need.
Two azure Tunnels sit on this upper edges, marked using one '2', waiting into drop late-game garbage on you.
the entire focus first on is surviving the color mismatch.
this upper tier from bottom Boxes requires Red and Light Blue.
this upper rack refuses into give you easy access to Red.
one hold into clog the own board just into make the first few clears.
Level 208 Lock and Key pattern
This board layout sits heavily front-loaded with bait.
Look at this bottom row of the Top Tray .
one hold full sets from Light azure, Purple, and Green ready to drop.
this ready, unlocked line asks with crimson over this outside lanes and Light Blue on the inside columns.
this second line from bottom Boxes is entirely disabled by padlocks.
one can't access them until you find the keys.
Those keys sit attached into four single spheres on this middle from this upper rack : one rose, one Light azure, a Green, and an Orange marble.
They sit wedged between the brown L-shaped blocks.
one can't reach them until one empty the bulky marble sets sitting below them.
This creates one brutal bottleneck on your Conveyor Belt .
one hold into empty this two middle Light Blue bottom Boxes first.
one want crimson into empty this outermost lower cases , but this crimson spheres on this upper rack are buried under Purple and Green sets.
If one just wildly choose those violet plus emerald sets down into this Conveyor track , you will run out of space.
one hold into perfectly manage this track capacity into dig out this crimson sets, empty this outermost boxes, and finally reach the key marbles.
Level 208 Level Overview
Follow this exact order to break the opening trap.
Do not deviate, or the track shall overflow before one even unlock the second row.
Level 208 Surviving the opening bait
this goal sits into available this middle lanes plus carefully dig with Red without causing a fatal jam.
choose this three Light azure sphere sets at this bottom of the Top Tray .
Send them directly into this two middle Light Blue bottom Boxes .
Stop plus look at the outer Red bottom Boxes .
Locate this Red marble sets in the Top Tray .
They sit blocked via the bottom-row Purple and Green sets.
send this blocking violet and Green sets onto your Conveyor Belt .
They shall sit here plus take onto vital room, but this is a required sacrifice.
using this path empty, send this crimson spheres from this upper rack into fill plus clear the outer Red bottom Boxes .
one now hold access to the center of the board.
choose this single rose, Light azure, emerald, plus amber spheres that have the keys floating over them.
As soon as those pass spheres hit this Conveyor track , this four padlocks over the lower Boxes will shatter.
Level 208 Clearing the mid-board chaos
Unlocking the board completely changes your priorities.
this bottom cases shall push onto, revealing fresh color demands like Yellow, Orange, and Brown.
the Conveyor track sits currently holding those violet and Green sets you sacrificed earlier.
You must relieve this pressure instantly.
Prioritize clearing this emerald or violet cases using this sets currently clogging your Conveyor Belt .
Getting those off this belt is your only lifeline.
Once one hold breathing room, look at this top right of the Top Tray .
one shall expose Connected cases holding Yellow and Orange marbles.
since they sit tied together, tapping them sends both colors at once.
Ensure one hold at least two empty slots over your Conveyor Belt before pulling them down.
Match those gold plus amber sets into the newly revealed bottom Boxes .
Keep pulling single spheres from this middle from this upper rack into dismantle this structure around the L-shaped wooden blocks.
Focus over one side from this board into force one clear path to the top corners.
Level 208 Managing the Tunnels
this board sits mostly empty, but this top corners are still holding secrets.
this azure Tunnels on this upper west plus east edges shall activate once this marbles beneath them are cleared.
since they sit marked using one '2', they shall spit out two waves of hidden marbles.
Do not bring from both Tunnels at the same time.
empty the marbles blocking the left Tunnel first.
Match those shades into the remaining bottom Boxes .
Once the Conveyor track sits mostly empty again, bring the marbles blocking the right Tunnel .
Keep this track clean, match this last few stragglers, and finish the level.
Frequently asked questions
How do I beat Marble Sort Level 208?
Feed the colors that already have an open bottom Box first, keep your belt from filling up, and only release a new color when a matching Box is ready. Follow the move order in the solution above and you can clear Level 208 every time.
What is the main trap to avoid on Marble Sort Level 208?
The biggest mistake on Level 208 is tapping a color that has no active bottom Box yet — those marbles park on your Conveyor Belt and eat limited slots. Hold back any color that has no receiver waiting and the stage stays under control.
What colors do I need to match on Marble Sort Level 208?
Level 208 mainly revolves around Green, Red, Light Blue. Focus on feeding Green first when its Box is open, then introduce Red as the lower lanes free up so you never choke the belt.
How should I open Marble Sort Level 208?
Begin by checking the lower part of the tray and only select colors that already sit in an open Box down below. Clearing those first few matching blocks unlocks the rest of the board without jamming your sorting space.
How many moves does Marble Sort Level 208 take to complete?
Level 208 is a color-sequenced stage that clears cleanly when you stick to the exact order above. The step-by-step solution walks each move so you can finish it with the fewest taps and no wasted belt slots.
Is there a video walkthrough for Marble Sort Level 208?
Yes. The embedded video on this page walks through Marble Sort Level 208 move by move, and the screenshots below show each stage of the layout so you can follow along and beat it.