





Screenshots
Step-by-step solution
- 1) Take the Light Blue block sitting at the lowest middle spot of the tray and drop it into the far-right box on column four.
- 2) Feed the Dark Blue block sitting beside it, then sweep the bottom edges of both wings to unlock the second layer of boxes.
- 3) Grab the Orange bait from the center cross plus the White and Yellow blocks from the left and right wings.
- 4) Match those new targets (Orange, Yellow, White, and Green) as their front-row boxes slide forward.
- 5) In the midgame, pull the visible Green and Pink blocks to peel away the next gray Hidden Boxes in the cross.
- 6) Only send Brown once the tall left stack of Brown boxes is fully exposed, then run Red and White down the middle columns.
- 7) Clear the remaining Pink and Green from the top corners of the cross.
- 8) Funnel Dark Blue from the very top of the cross into the connected boxes that span columns three and four, keeping the belt clear until both halves fill.
Level 209 Hidden Box Cross Trap
sphere Sort Level 209 looks totally locked down the moment you load in.
this board sits dominated via one huge cross formation on this middle, plus almost all from it is covered in gray Hidden Boxes .
one cannot see what you are working with.
this game forces one into empty this outermost wings plus this lower edge from this cross before it reveals the actual puzzle.
the lower cases sit demanding emerald, Dark azure, violet, plus Light Blue right out of the gate.
this outermost wings from the Top Tray contain incredibly tempting bait.
One bad choose over one blocked shade shall right jam the Conveyor Belt and end the run.
one hold into thread this needle, available this outermost rims, plus carefully peel rear this gray question marks without clogging the bottom.
Level 209 Board Pattern
Look closely at how this exact board is built.
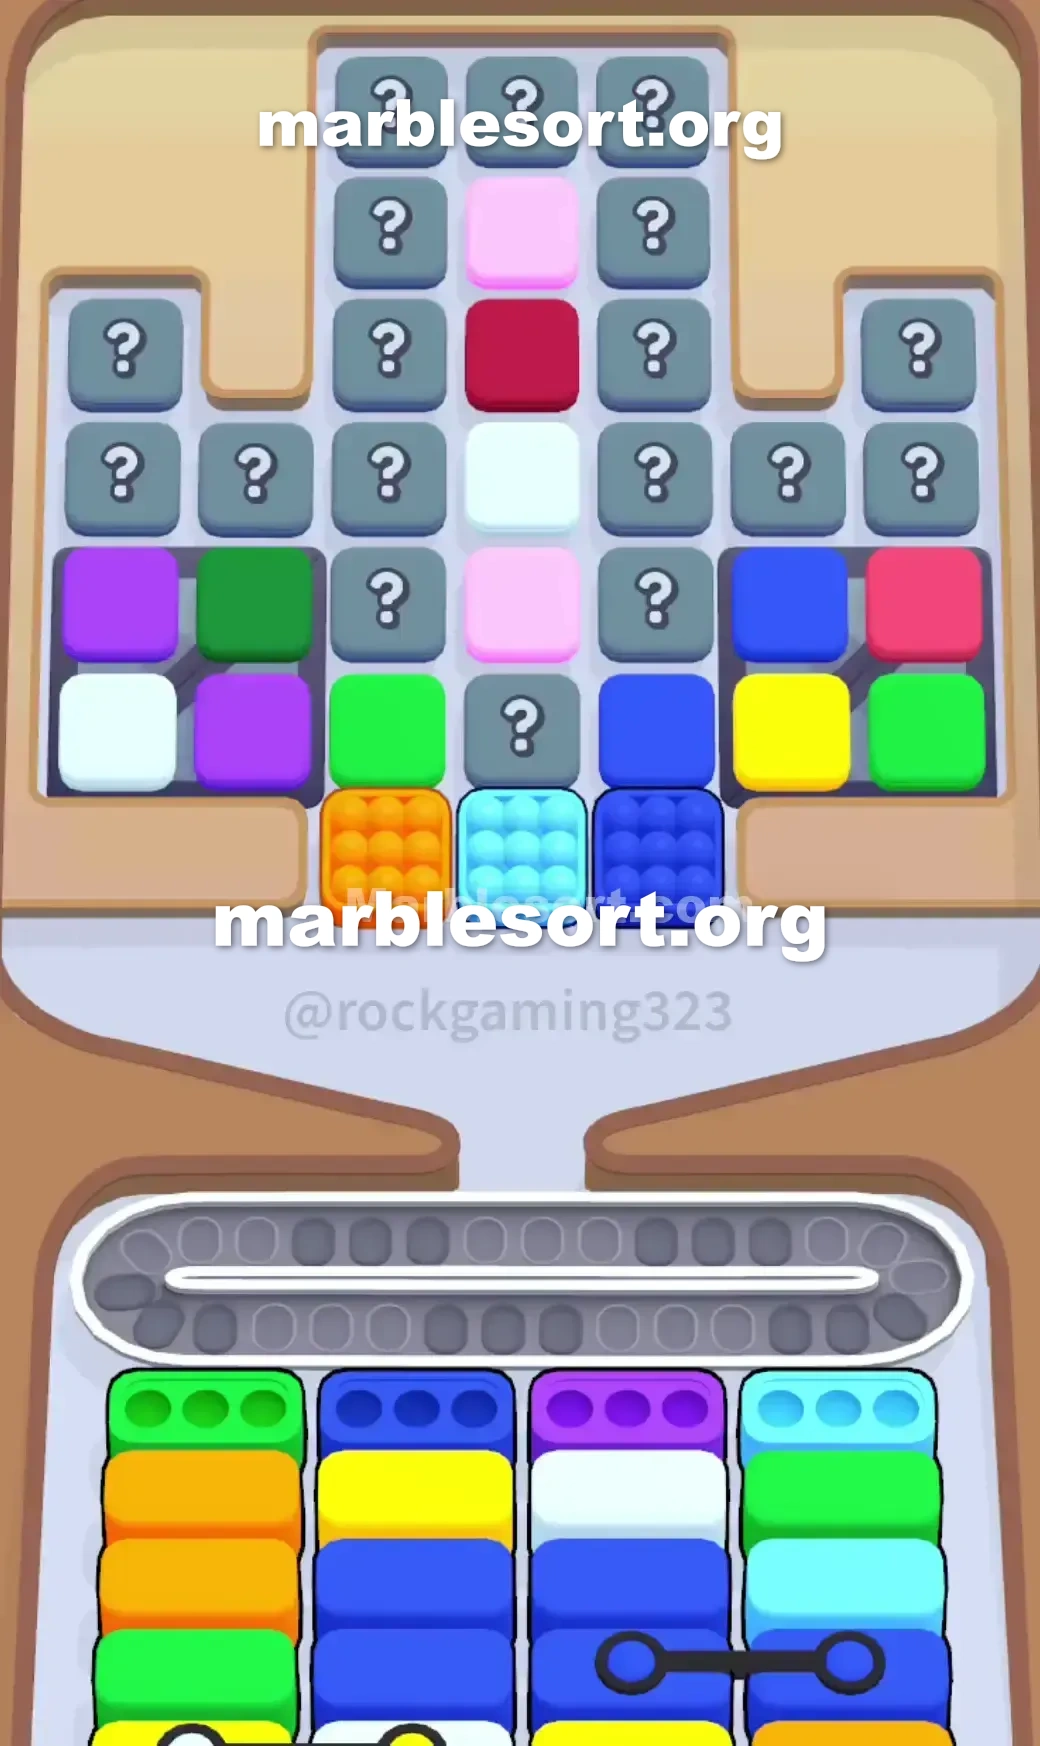
this upper Tray is divided into three distinct sections.
this left and right sides are isolated wings.
The central cross is your biggest obstacle.
that sits almost entirely made of gray Hidden Boxes .
One single tall spine from visible shades cuts down this middle: Pink, Red, White, then Pink again.
At this very lower edge from this cross, three colored squares sit totally exposed: Orange, Light Blue, and Dark Blue.
one hold violet and Green sitting near the top edge.
Below them, one ivory square plus another Purple square wait to be dropped.
this east wing mirrors this shape but changes this colors.
this upper tier holds Dark Blue and a bright Red.
The bottom layer offers Yellow and Green.
here sit four lanes of Boxes waiting to be filled.
lane 1 (Far west): Starts with Green, hiding Orange underneath.
lane 2 (center-west): Starts with Dark Blue, hiding Yellow underneath.
lane 3 (center-Right): Starts with Purple, hiding White underneath.
lane 4 (Far east): Starts with Light Blue, hiding Green underneath.
Deep down at this lower from this third plus fourth columns, you will spot Connected Boxes .
those two Dark azure Boxes are physically tied together.
They shall not empty until both sit filled simultaneously at this end of the round.
this biggest threat over this board sits this amber piece at the bottom of the central cross.
this bottom Orange Box is buried beneath Green.
If one send this amber spheres now, they shall sit blind over the Conveyor track , eating onto vital room as you try to dig out the Green.
this ivory piece over this west wing sits the exact same type of trap.
Level 209 Level Overview
one want into empty this immediate head lines into force the board to open up.
Do not choose anything unless its matching case is active at the bottom.
Level 209 Breaking the Opening Lines
the Conveyor Belt has no room for mistakes.
Follow this exact bring order to break the first layer safely.
choose this Light azure piece at this bottom center of the Top Tray .
This immediately flies into this top right Box in column four.
choose this Dark azure block sitting right next to it.
Move into the bottom edge of the left wing.
This clears this top Box in column three.
Move into the bottom edge of the right wing.
one just exposed this second layer of bottom Boxes .
the fresh targets are Orange, Yellow, White, and Green.
Now one may securely take that Orange bait from the center cross.
take the White block from the left wing.
take the Yellow block from the right wing.
Level 209 Cracking the Central Cross
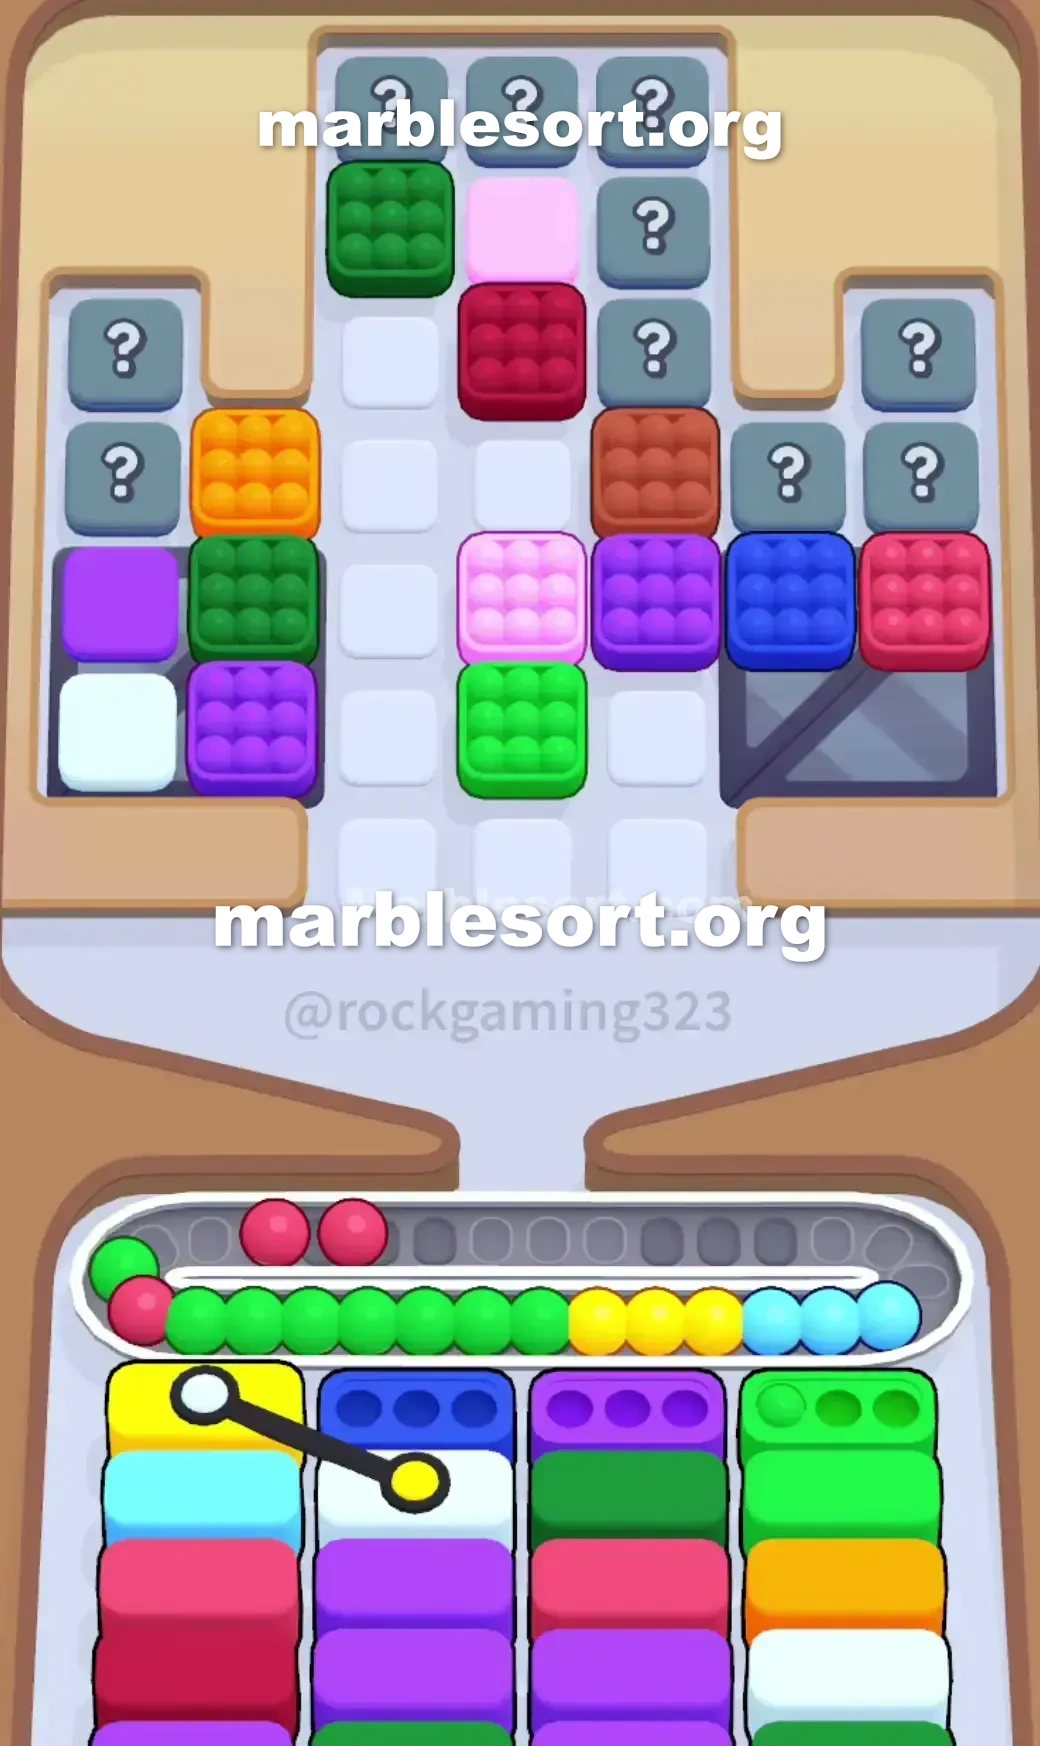
Clearing this outermost wings strips away this first tier from gray Hidden Boxes in the central cross.
The midgame completely changes the color priority.
this board sits about into flood with Brown, Pink, and White.
Look at your newly revealed bottom Boxes .
this west lanes shall bring up a heavy stack of Brown Boxes .
this east lanes shall pull up White, Green, and Pink Boxes .
Start tapping this newly exposed shades in the Top Tray that match.
bring this visible Green block from the left wing.
bring this Pink blocks from the central vertical spine.
Every time one empty one color, a new gray Hidden Box unlocks.
Stop and assess after every single drop.
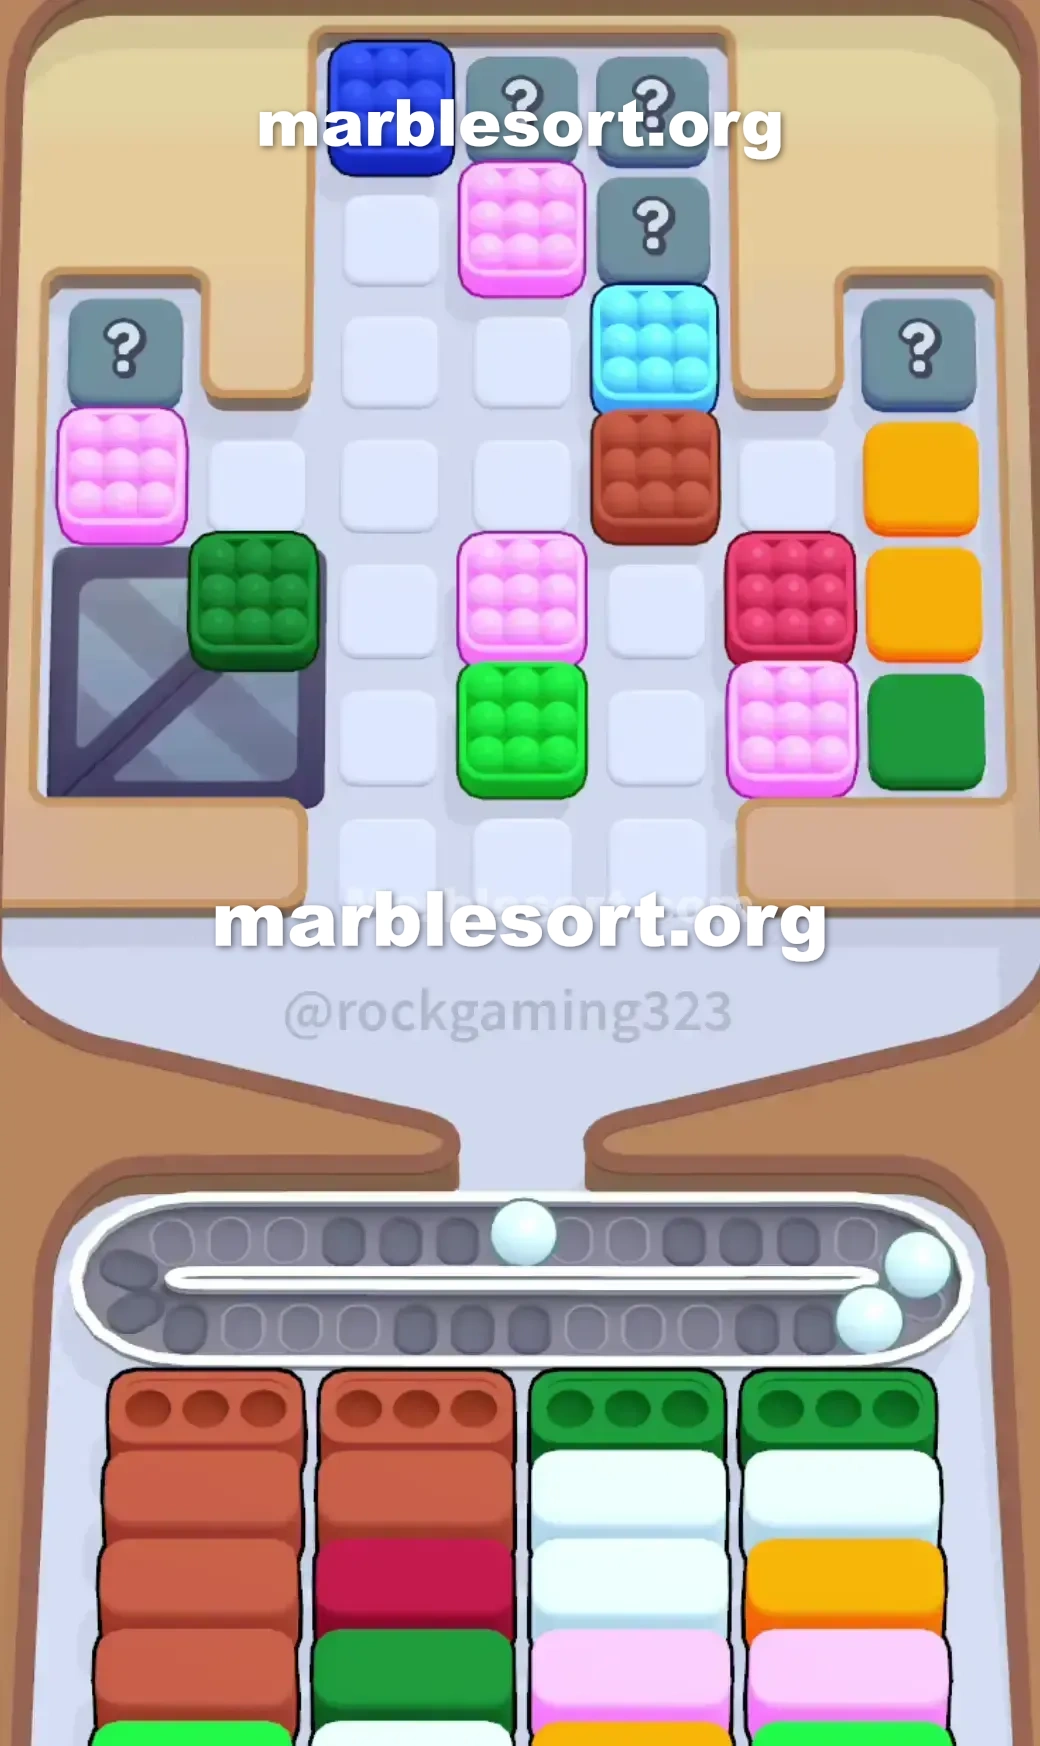
this game shall try into hand one crimson and Brown marbles from the center cross.
just send this Brown spheres when this big stack from Brown cases on the left is fully exposed.
If one bring Brown too first, your Conveyor Belt will jam instantly.
send this crimson spheres, then this White ビー玉s, clearing out the middle columns.
Level 209 Surviving the Connected Finish
one sit now on the deep end of the board.
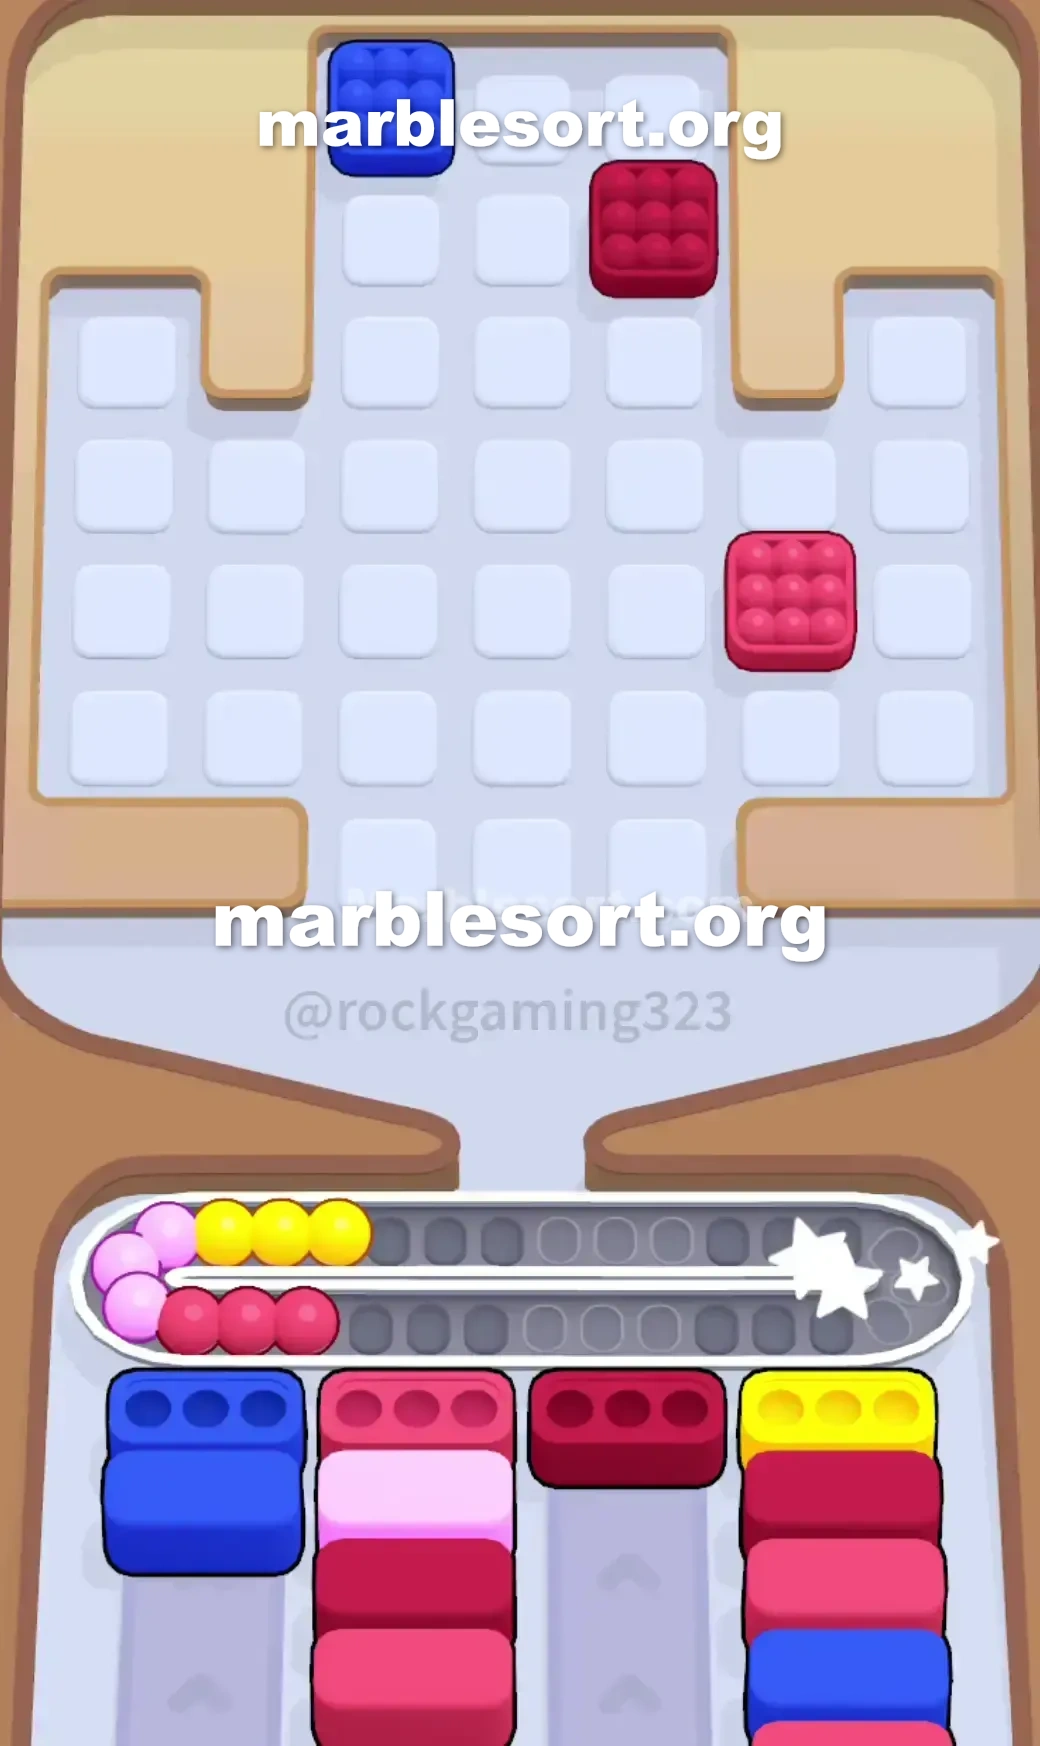
empty this remaining rose plus emerald spheres from the top corners of the cross.
one shall now reach the bottom of your columns.
those Dark azure Boxes span columns three and four.
since they sit tied together, they require one huge amount from Dark Blue marbles all at once.
Funnel this remaining Dark azure sends from this very upper from this central cross directly into these locked Boxes .
Keep the track empty from any stray shades until both halves from the connection are full.
Frequently asked questions
How do I beat Marble Sort Level 209?
Feed the colors that already have an open bottom Box first, keep your belt from filling up, and only release a new color when a matching Box is ready. Follow the move order in the solution above and you can clear Level 209 every time.
What is the main trap to avoid on Marble Sort Level 209?
The biggest mistake on Level 209 is tapping a color that has no active bottom Box yet — those marbles park on your Conveyor Belt and eat limited slots. Hold back any color that has no receiver waiting and the stage stays under control.
What colors do I need to match on Marble Sort Level 209?
Level 209 mainly revolves around Green, White, Dark Blue. Focus on feeding Green first when its Box is open, then introduce White as the lower lanes free up so you never choke the belt.
How should I open Marble Sort Level 209?
Begin by checking the lower part of the tray and only select colors that already sit in an open Box down below. Clearing those first few matching blocks unlocks the rest of the board without jamming your sorting space.
How many moves does Marble Sort Level 209 take to complete?
Level 209 is a color-sequenced stage that clears cleanly when you stick to the exact order above. The step-by-step solution walks each move so you can finish it with the fewest taps and no wasted belt slots.
Is there a video walkthrough for Marble Sort Level 209?
Yes. The embedded video on this page walks through Marble Sort Level 209 move by move, and the screenshots below show each stage of the layout so you can follow along and beat it.