





Screenshots
Step-by-step solution
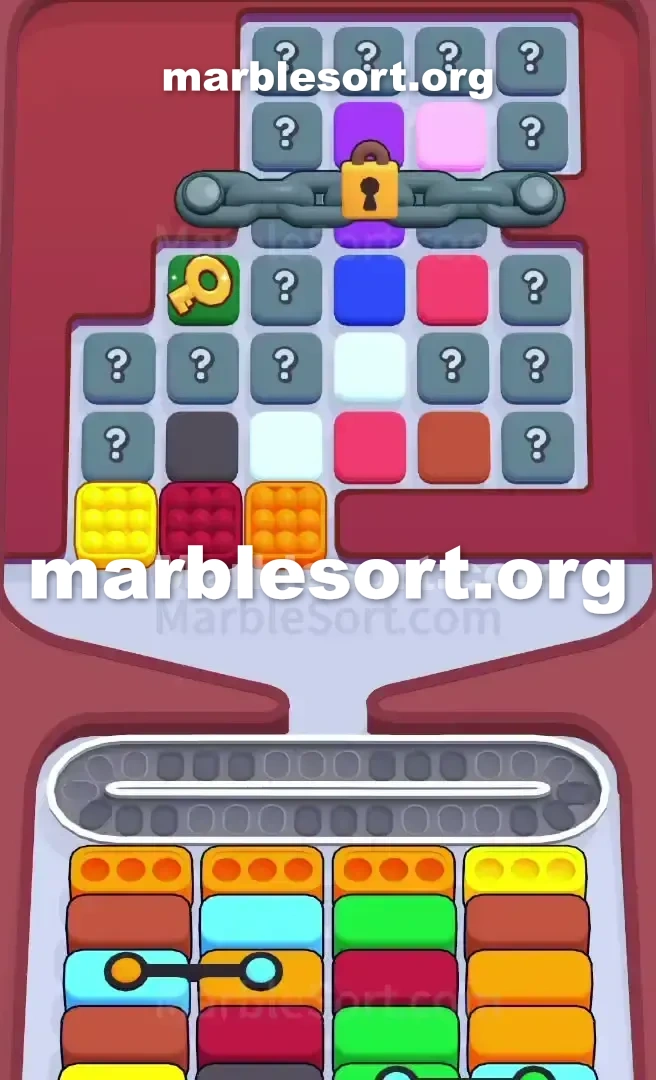
- 1) Open on the front Brown pair in the Top Tray so they fall straight into the two Brown Boxes on bottom columns one and two.
- 2) That same tap tops off the Orange Box sitting in the third column, leaving only the far-right Pink receiver still open.
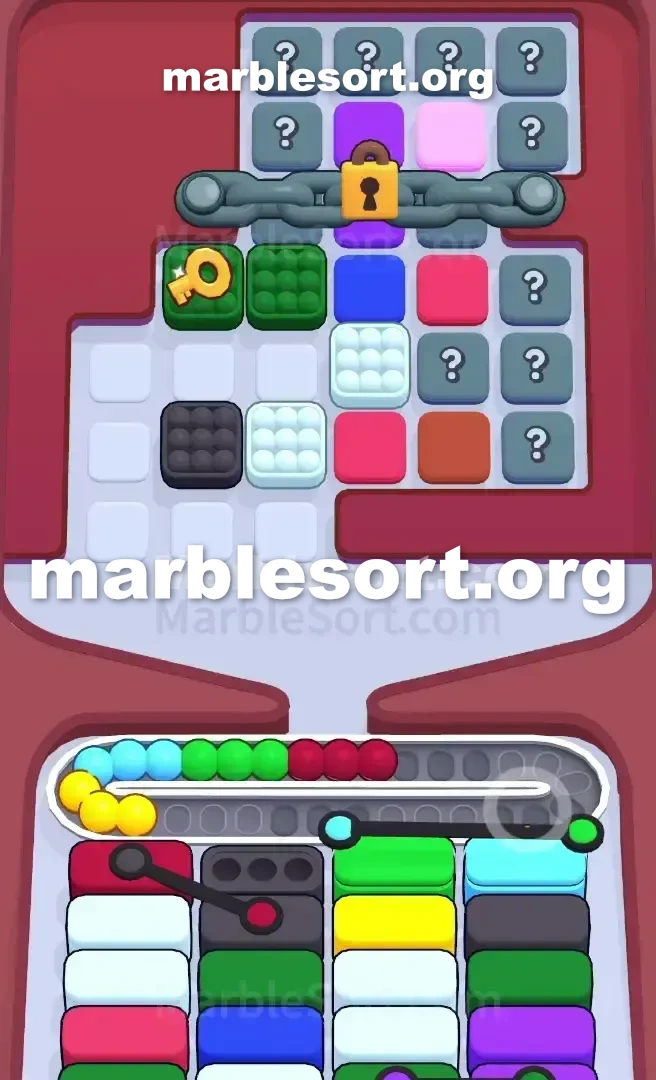
- 3) The Pink cluster sits trapped behind the front Light Green block on the left of the Top Tray, so spend one belt slot clearing that Green to unlock the path.
- 4) Tap the exposed Pink cluster to fill the top-right receiver and wipe out the front line, leaving the front Light Blue bait completely alone.
- 5) Once those four boxes clear, the lower section lifts to reveal Hidden Boxes plus fresh Light Green and Dark Green receivers, and the Light Green you parked on the belt snaps into its box automatically.
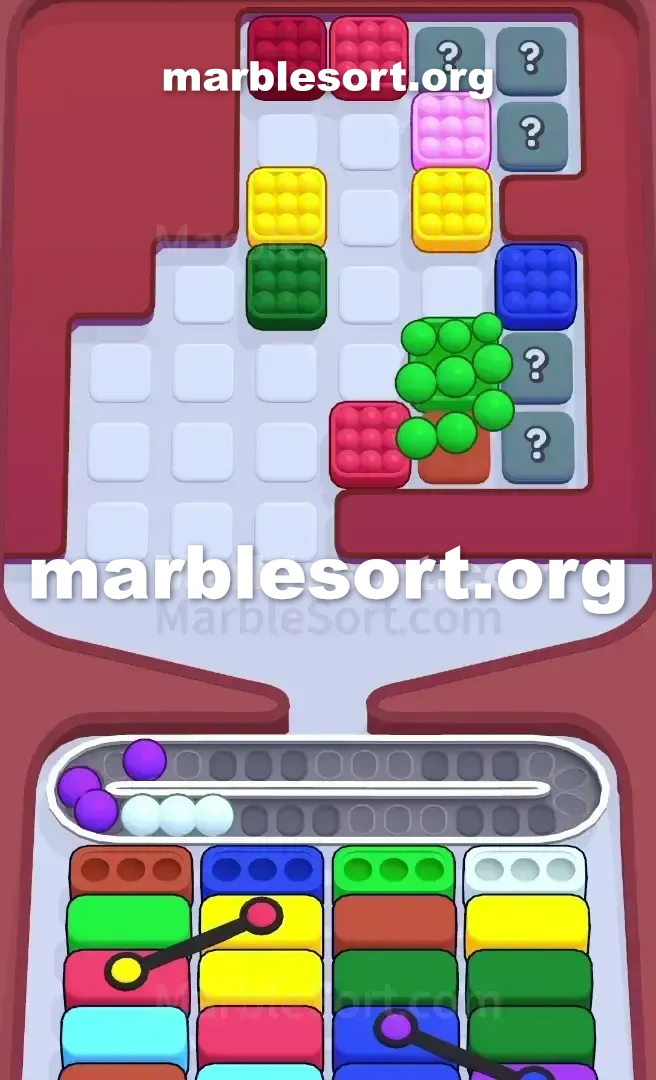
- 6) Poke the Dark Green cluster over near the right edge of the Top Tray to feed the right-side receiver, then clear the blockers guarding the two middle Tunnels.
- 7) Match each Tunnel output against the middle columns and flip the Mystery Boxes in the top corners, only dropping a color whose box is already waiting at the bottom.
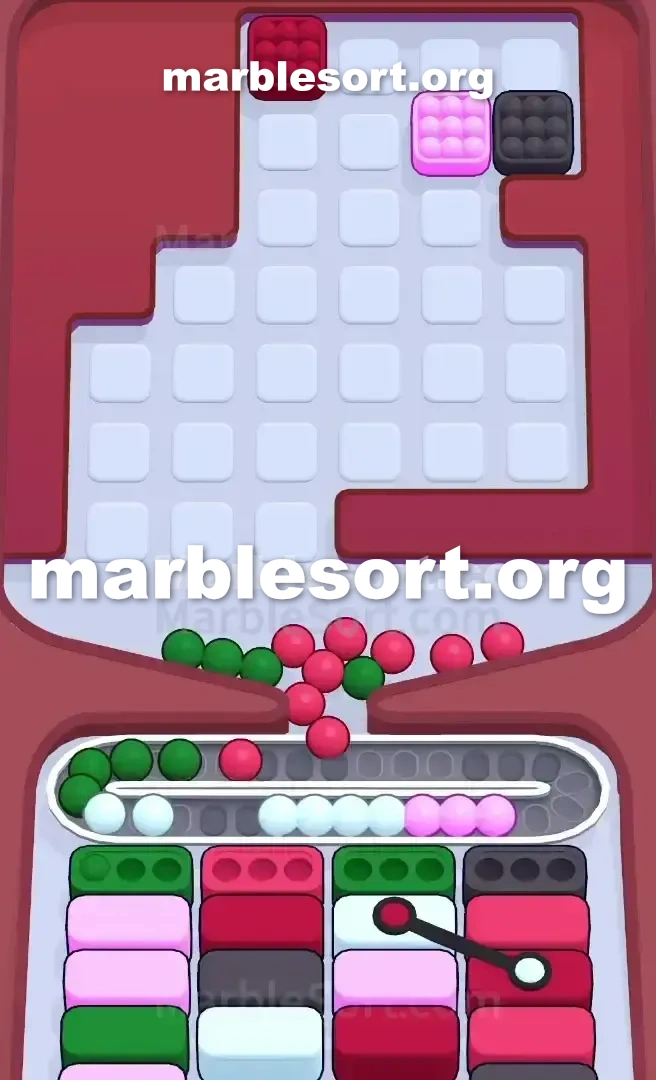
- 8) Preserve belt room through the final sequences and clear one color at a time so the corner Tunnels finish themselves.
Level 229 Four-Tunnel Hidden Box Trap
one load on, look at this lower area, plus spot one very exact set of receiver Boxes waiting for marbles.
Then one look at this upper rack and see a completely mismatched front line.
If one just start tapping shades since they sit on this front, you will lose within five moves.
this dominant shades one hold into juggle first are Light Green, Brown, Orange, and Pink.
But this real menace here is the board architecture.
one sit dealing using four distinct Tunnels marked using one '4', one huge horizontal crimson wall blocking this middle from this upper rack , plus two middle lanes on this lower section completely choked with Hidden Boxes .
Let's tear this level apart so one can beat it.
Level 229 Bottleneck Layout
Look at exactly how this board sits arranged.
This isn't one level where one can just flow from top to bottom.
one hold into surgically extract exact colors while leaving others completely anchored.
on this lower receiving area, you have four distinct columns.
this leftmost lane sits fully visible: Brown, Pink, Light Blue, Brown.
this rightmost lane sits also fully visible: rose, Dark Green, Dark Grey, Pink.
They start using one Brown plus some amber case over upper, but immediately beneath them sit three deep rows from Hidden Boxes marked with question marks.
one can't plan the end game until you expose those question marks.
this head protruding line gives one four sphere groups: Light Green, Brown, Light Blue, and Orange.
past them rests one line containing rose, Brown, Light Green, and Dark Green.
east below that solid crimson horizontal wall sit two Tunnels waiting into dispense four times.
Way onto on this upper west plus upper east edges sit two more Tunnels , totally barricaded by a field of Mystery Boxes .
this biggest snare on sphere Sort Level 229 sits that front Light Blue cluster.
the lower cases currently need Brown, Brown, Orange, and Pink.
Light azure is nowhere on that priority list.
If one send Light azure onto this Conveyor track just into access this shades past that, one sit throwing away crucial track space right as the game begins.
Level 229 Level Overview
one need a strict order of operations here.
this goal sits into empty this upper tier from bottom Boxes without clogging the Conveyor Belt .
Once those empty, this board shifts, plus the Tunnels will start coming into play.
Level 229 Surviving the First Drops
this absolute first priority sits clearing this front row of the bottom section.
one want Brown, Brown, Orange, and Pink to drop.
choose this front Brown cluster in the Top Tray .
This sends perfectly into this two Brown cases parked on columns one and two at the bottom.
This immediately fills this Orange Box in the third column.
one now want Pink to clear the far-right Box .
this rose spheres sit trapped past this head Light emerald group over the left side of the Top Tray .
that shall send onto your Conveyor Belt and sit there.
one hold into spend one track slot to open the route.
using the path clear, tap the Pink cluster.
that sends, fills this upper-right receiver, and clears the front line.
Leave this front Light Blue cluster completely alone.
Level 229 Triggering the Midgame Tunnels
Once one empty those first four cases , sphere Sort Level 229 completely changes its identity.
this bottom part shifts onto, revealing this first tier of Hidden Boxes in the middle columns.
More importantly, your receiver needs change entirely.
one shall now spot Light emerald and Dark Green Boxes demanding marbles.
That Light emerald group you left sitting on your Conveyor Belt ?
that shall right fly into this newly revealed Light emerald case , freeing onto the track space exactly when you need it most.
Release this Dark emerald group from this east side from this upper rack to clear the next right-side receiver.
one now hold one direct path to the two middle Tunnels .
choose this remaining blockers on head from them as their matching Boxes appear below.
Once this middle Tunnels sit exposed, they shall start dispensing new colored clusters.
send one group, let that fill one lower case , plus check this newly revealed Hidden Box beneath it.
Match this Tunnel outputs carefully with the middle columns.
this goal here sits into chew through this secret cases so one know what shades one really need for the rest of the match.
Level 229 Beating the Top Corners
via this time this middle from this board sits hollowed out, one shall be staring at this top left and top right corners.
this crimson wall forces you to climb the sides.
Focus fully over this outermost columns of the bottom receiving area now.
Clearing this visible rose, Light azure, plus Dark Grey cases allows one into access this upper sides of the Top Tray .
one shall start flipping this Mystery Boxes located around the top Tunnels .
just send one newly revealed shade if its corresponding case is waiting at the bottom.
If one secret case uncovers one shade one don't need, leave it in the tray.
If one dump that over this Conveyor track , you risk a late-game jam.
Once one empty this pieces on head from this upper corner Tunnels , they shall dump their final sequences.
Since one preserved the Conveyor track room, one shall hold plenty from room into catch whatever they throw at one plus route it to the remaining bottom Boxes .
Maintain discipline, empty one shade at one time, and the level will solve itself.
Frequently asked questions
How do I beat Marble Sort Level 229?
Feed the colors that already have an open bottom Box first, keep your belt from filling up, and only release a new color when a matching Box is ready. Follow the move order in the solution above and you can clear Level 229 every time.
What is the main trap to avoid on Marble Sort Level 229?
The biggest mistake on Level 229 is tapping a color that has no active bottom Box yet — those marbles park on your Conveyor Belt and eat limited slots. Hold back any color that has no receiver waiting and the stage stays under control.
What colors do I need to match on Marble Sort Level 229?
Level 229 mainly revolves around Brown, Green, Pink. Focus on feeding Brown first when its Box is open, then introduce Green as the lower lanes free up so you never choke the belt.
How should I open Marble Sort Level 229?
Begin by checking the lower part of the tray and only select colors that already sit in an open Box down below. Clearing those first few matching blocks unlocks the rest of the board without jamming your sorting space.
How many moves does Marble Sort Level 229 take to complete?
Level 229 is a color-sequenced stage that clears cleanly when you stick to the exact order above. The step-by-step solution walks each move so you can finish it with the fewest taps and no wasted belt slots.
Is there a video walkthrough for Marble Sort Level 229?
Yes. The embedded video on this page walks through Marble Sort Level 229 move by move, and the screenshots below show each stage of the layout so you can follow along and beat it.