
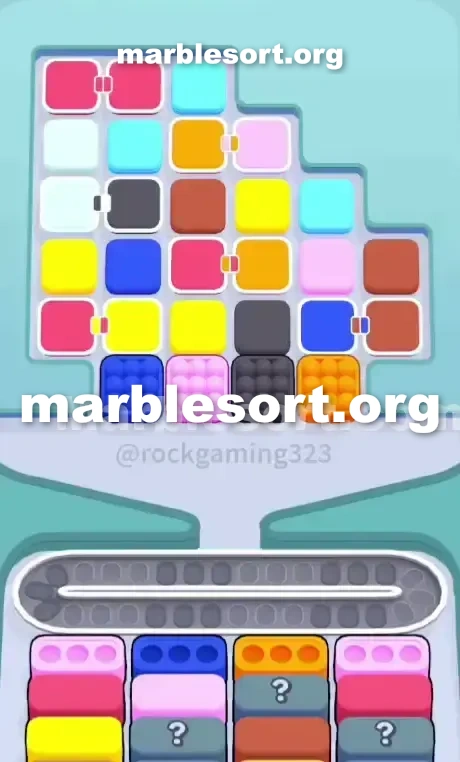
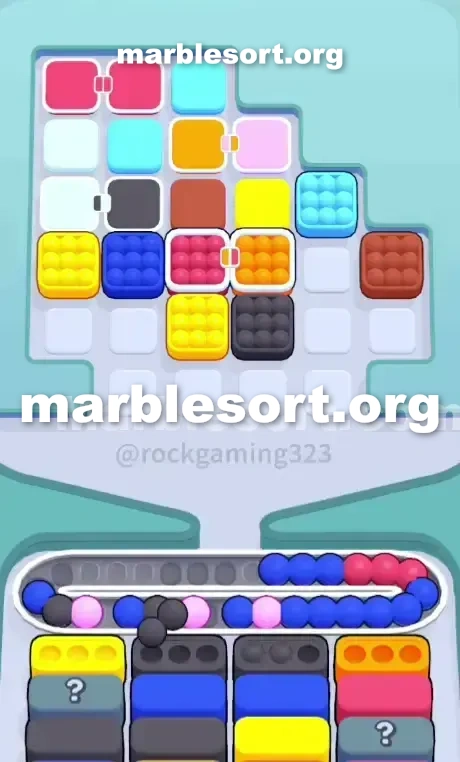
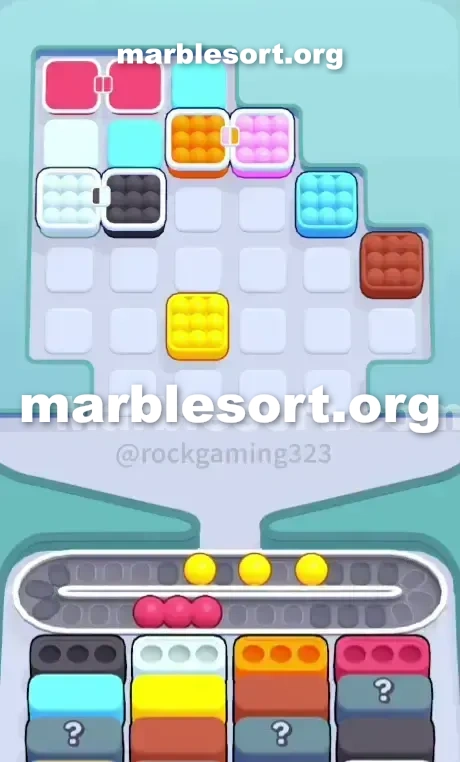
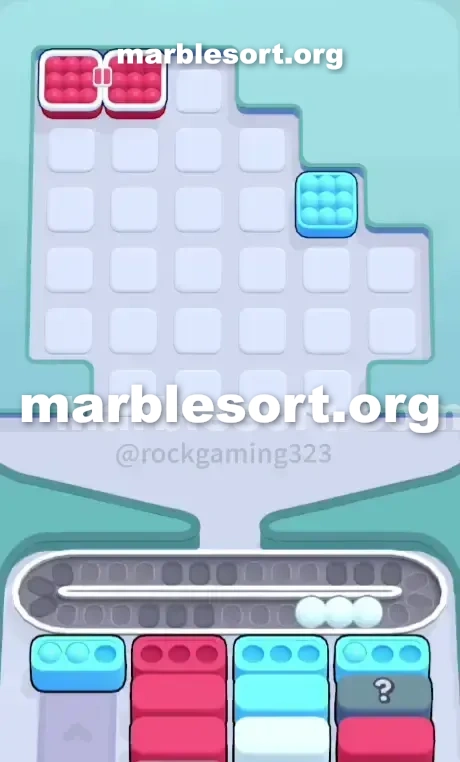
关卡截图


逐步解法
- 1) Open on the Top Tray's bottom row by dropping the single Blue and single Peach spheres straight into the front containers that are already open.
- 2) Poke the lone Orange on the bottom starboard into the third-column Orange container, but leave the dead-center Dark Blue sphere alone, since it has no receiver and would just park on the belt.
- 3) Pull the extra Peach and Blue you need from the second layer, then clear the two outer Peach containers so a Pink box shows up on the port side alongside a brand-new Peach box in column two.
- 4) Once the front Blue and Orange containers vanish, the first Mystery box surfaces; read its demand, and now that the Dark Blue container shows up on the lower port, safely drop that bait Dark Blue sphere from the middle.
- 5) Break the upper linked pairs: shove the port-side Ivory/Dark Blue tether home, then feed the Orange/Peach pair in the upper middle to complete the second Peach box in the lower rows.
- 6) Ignore the Yellow cluster in the middle-port until the Yellow container rotates to the front of the lower port side, then send those spheres home.
- 7) When the middle empties, the final Mystery boxes appear at the bottom, so fill them instantly with the loose center spheres and clear the top-port Pink/Pink pair to satisfy the back-starboard Pink container.
- 8) To close out, drop the Cyan and Tan off the starboard staircase once their hidden receivers clear, and finish the remaining containers to beat the level.
Level 118 Linked Container Web plus the Twin Peach Dilemma
sphere Sort Level 118 presents one chaotic tangle from tethered spheres and deeply concealed objectives.
this board layout you face is sharply staggered.
One jagged staircase pattern defines the starboard side.
Alternating shades fill a solid block in the center.
Critically, linked containers totally seal off the middle rows.
Rose, gold, azure, plus peach hues flash prominently at first glance.
Before dispatching any sphere, scrutinize this lower containers closely.
Yet this top platform gives zero straightforward path into fill those outermost peach containers without triggering a chain reaction.
this true obstacle governing this board sits this sheer volume from linked containers compelling one into dispatch colors you do not yet need.
Threading this needle sits essential to survive the opening phase.
Level 118 Vast Linked Container Network
Examine this bottom row of the upper platform.
one gain immediate access into azure, peach, obsidian, and tangerine spheres.
At first glance this seems perfectly manageable.
Now shift the gaze into the front row of the lower containers.
From port into starboard, this required shades sit peach, azure, tangerine, and peach once more.
That obsidian sphere parked blind-middle over this upper platform's bottom row is pure bait.
zero obsidian container stands ready to receive it.
If one dispatch that obsidian sphere just into empty that out, it lands on your delivery chute.
This spells critical failure on Marble Sort Level 118.
Every inch from chute room sits needed to untangle the tethered pairs above.
some ivory sphere plus some obsidian sphere sit chained together on the far port side.
One tangerine sphere plus one peach sphere sit hooked together in the upper middle area.
One rose/gold tether plus some azure/tan tether sit adjacent into one another in the lower middle.
Dispatching one half from those linked containers drags this other half down with it.
If one send this azure/tan pair into fill this head azure container, that tan sphere lands as blind weight on your delivery chute.
Worse yet, three secret containers lie stuck just beneath the bottom surface.
one can't plan the end routing without knowing what shades those containers shall demand once the front lines clear.
This head-into-rear reveal logic forces a defensive playing style.
Level 118 Level Overview
Surviving this demands strict delivery chute discipline.
Do not dump spheres merely into expose the next layer.
Play strictly into the containers that are open right now.
Level 118 Surviving the Twin Peach Opening
The opening dispatches determine victory or defeat.
this head line must be cleared without clogging the chute.
Begin via dispatching this single azure plus single peach spheres from this upper platform's bottom row.
They slot directly into this open front containers.
Dispatch this single tangerine sphere on the bottom starboard.
that sends into this tangerine container in the third column.
One peach container remains over the far starboard.
More azure plus tangerine spheres sit needed to finish the middle containers.
Look into the second row of the upper platform.
bring this necessary peach plus azure spheres from the second layer.
Should one want into bring this azure/tan linked container pair into obtain this azure, accept that this tan sphere shall occupy a spot on the delivery chute.
Clear the two outer peach containers first.
This uncovers one standard rose container over this port side plus one fresh peach container in the second column.
Level 118 Unlocking the Mystery Containers
totally clearing this initial front lines shifts the board entirely.
stress migrates from this outer edges toward the center.
Once this head azure plus tangerine containers vanish, this first mystery container reveals itself.
Adjust the strategy based on whatever color it demands.
some obsidian container atlast appears on the lower area's port side.
Now dispatch that trap obsidian sphere from the upper platform's middle.
Begin breaking the upper linked containers.
this ivory/obsidian pair over this port side becomes safe into bring now that the obsidian container is exposed.
Next target this tangerine/peach linked pair on the upper middle.
Dropping this pair shall likely complete this second peach container parked in the lower rows.
Keep watch over this gold spheres clustered on the middle-port of the platform.
Do not dispatch them until this gold container rotates into this front position on the lower port side.
Level 118 Clearing the Final Starboard Staircase
via this time this middle hollows out, just isolated blocks remain on the edges.
this top platform's starboard staircase holds one cyan sphere and a tan sphere.
Leave them untouched until their respective containers empty the hidden layers below.
this last mystery containers will uncover at the bottom.
Fill them immediately using this loose center spheres.
empty the top-port rose/rose linked pair.
This typically satisfies this last rose container parked in the lower area's back starboard.
Flush this isolated cyan plus tan spheres from this starboard staircase down into this delivery chute into finish this remaining containers and beat the level.
Keep this chute moving plus never bring one linked pair unless at least one half holds an open container waiting.
常见问题
What is the main trap to avoid in Level 118?
The biggest mistake is tapping colors that have no active bottom Box yet. They park on your Conveyor Belt and burn limited slots, so clear the shades that actually have receivers first.
How should I open Level 118?
Ignore the upper layers and aim at the bottom row of the Top Tray. Feed the colors that already have open boxes, then work upward once the lower lanes shift.
When does the midgame color change happen in Level 118?
After the opening boxes fall, the lower columns swap what they demand. Watch for the new shades and only pull blocks that match a box sitting at the front of a lower lane.
Any tip for finishing Level 118 clean?
Keep at least a few empty belt slots before poking mystery or hidden boxes. Feed a revealed color the moment it matches an active box, and fall back to visible marbles when the belt gets tight.